


Models
>
JVM1870SKC02
JVM1870SKC02 General Electric Microwave - Overview
Sections of the JVM1870SKC02
[Viewing 1 of 1]
Keep searches simple, eg. "belt" or "pump".

Halogen Light Bulb - 120V 20W
PartSelect #: PS2351821
Manufacturer #: WB25X10019
This light bulb is located on the inside of your microwave. The bulb is behind the top grill. It will need to be replaced when it has burnt out and no longer works. Unplug the unit before beginning th...
$22.15
In Stock

Drive Motor
PartSelect #: PS237772
Manufacturer #: WB26X10038
This is a microwave turntable drive motor. This is a genuine OEM replacement part. It accepts a D-shaped drive shaft. The drive motor is located under the glass microwave turntable, and allows the tur...
$72.87
In Stock

Glass Light Lens
PartSelect #: PS247275
Manufacturer #: WB36X10071
The microwave glass light lens protects the light bulb inside the appliance. It is clear in color and measures approximately 6-1/2 inches long, and 2-1/2 inches wide. You may notice that this part is ...
$17.46
In Stock

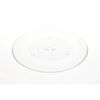
Glass Cooking Tray
PartSelect #: PS250009
Manufacturer #: WB49X10063
This tray rotates in your microwave ensuring more even temperatures and is approx.14-1/2 inches in diameter.
$95.90
In Stock

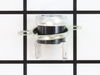
Primary Door Interlock Switch
PartSelect #: PS237015
Manufacturer #: WB24X10047
This interlock switch is located in the door latch.
$33.44
In Stock

Grease Filter
PartSelect #: PS952418
Manufacturer #: WB06X10596
This metallic vent hood filter collects grease particles in the air from cooking. Sold individually.
$63.98
In Stock

Flat Cab Mounting Bolt
PartSelect #: PS651196
Manufacturer #: WB01X10180
This part is the replacement flat cab mounting bolt for your microwave. The bolt is approximately 4 inches long. It is designed to hold the microwave in place in your cabinet. The main reason to repla...
$14.29
In Stock


Stirrer Motor
PartSelect #: PS237771
Manufacturer #: WB26X10037
This motor has a square-shaped shaft. This part operates the stirrer fan in the microwave.
$98.74
In Stock
Questions And Answers for JVM1870SKC02
We're sorry, but our Q&A experts are temporarily unavailable.
Please check back later if you still haven't found the answer you need.
Sort by:
- < Prev
- 1
- Next >
Search filter:
Clear Filter
Your search term must have 3 or more characters.
Keep searches simple. Use keywords, e.g. "leaking", "pump", "broken" or "fit".
Sorry, we couldn't find any existing answers that matched.Try using some different or simpler keywords, or submit your new question by using the "Ask a Question" button above!
Safet
October 20, 2023
No power
For model number JVM1870SKC02
Hi Safet, thank you for getting in touch. Based on our understanding of the issue, we would suggest checking the fuse, part number PS240270, as it has most likely blown and may need to be replaced. We hope this solves your problem!
Was this helpful?
Thank you for voting!
Related Parts:
Ceramic Fuse - 15 Amp

$11.36
In Stock
- < Prev
- 1
- Next >
Common Symptoms of the JVM1870SKC02
[Viewing 6 of 6]Tray won’t turn
Fixed by
these parts
these parts


Show All
Won’t turn on
Fixed by
these parts
these parts
Show All
Noisy
Fixed by
these parts
these parts

Show All
No heat
Fixed by
these parts
these parts
Show All
Doesn’t shut off
Fixed by
these parts
these parts
Show All
Door not closing properly
Fixed by
these parts
these parts

Show All

Keep searches simple. Use keywords, e.g. "leaking", "pump", "broken" or "fit".
Lens cracked and bulbs burned out
First I removed the single screw holding the lens assembly in place. Then I lowered the assembly and tilted it until it came out. To remove the existing cracked glass lens there were four tabs bent down on it. By hand I lifted each tab just enough to remove the broken lens. I then replaced the broken lens with the new one and re-bent
... Read more
the tabs down by hand to secure them to the new lens.
The lens assembly, now removed, revealed the cavity that contained the two halogen bulbs. Since they were both burned out for days, they weren't hot so I could pull each one out by hand. The bulbs are secured by two straight heavy gauge wire leads and provided a little resistance but come out fairly easily. Make a mental note of the angle they came out so it will be easier to replace them with new ones.
You're not supposed to touch halogen bulbs with your bare hands, so I used the bubble wrap they came in as a means to hold the bulb while installing it.
Be sure to insert the bulbs at the same angle they came out so the pins do not get bent.
Once both bulbs are in place, replace the lens cover assembly by putting the end opposite where the screw hole goes in first on the right, then swing it up until flush and screw it down.
Read less
Parts Used:
-
Mark from GRAND BLANC, MI
-
Difficulty Level:Really Easy
-
Total Repair Time:Less than 15 mins
222 of 305 people
found this instruction helpful.
Was this instruction helpful to you?
Thank you for voting!
The turntable motor went out and was making a horrible sound when I started the microwave
First I unplugged the microwave. :) Then, I removed the 6 screws found underneath the microwave, which allowed the bottom piece to hang down so I could see the turntable motor. I took the two screws out holding the motor in place and pulled the electric connectors off the motor terminals. Then I got the new part from PartSelect.com, repla
... Read more
ced the electrical commectors, fit the motor back into the slot it came from (cause the pin has to be seated up in the hole) and replaced the 2 screws holding in the motor. Then I put the bottom metal piece back up and put the 6 screws back in. It was really easy - and I'm a chick! ;)
Read less
Parts Used:
-
Kim from Centerville, GA
-
Difficulty Level:Really Easy
-
Total Repair Time:Less than 15 mins
-
Tools:Screw drivers
158 of 224 people
found this instruction helpful.
Was this instruction helpful to you?
Thank you for voting!
Grinding sound when tray turned
Unscrewed bottom plate of microwave and two screws that secured motor. Disconnect wires. Reversed process when installing new motor. Couldn't have been easier.
Parts Used:
-
Charles from Wall, NJ
-
Difficulty Level:Really Easy
-
Total Repair Time:Less than 15 mins
-
Tools:Screw drivers
85 of 89 people
found this instruction helpful.
Was this instruction helpful to you?
Thank you for voting!