


Models
>
JP370B9K3
JP370B9K3 General Electric Cooktop - Overview
Sections of the JP370B9K3
[Viewing 3 of 3]


Keep searches simple, eg. "belt" or "pump".

Drip Bowl - 6 Inch
PartSelect #: PS244677
Manufacturer #: WB32X10012
This six inch chrome drip bowl is intended for use with tilt lock style surface mount burner element units.
$11.33
In Stock

Trim Ring - 6 Inch
PartSelect #: PS244475
Manufacturer #: WB31X5013
This 6 inch high rise burner trim ring is intended for use with detached style low rise tilt lock surface mount burners on ranges.
$8.44
In Stock

Trim Ring - 8 Inch
PartSelect #: PS244479
Manufacturer #: WB31X5014
This 8 inch high rise burner trim ring is intended for use with detached style low rise tilt lock surface mount burners on ranges.
$11.96
In Stock

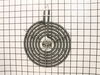
Surface Element - 8 Inch - 2350W
PartSelect #: PS243868
Manufacturer #: WB30M2
The surface element, also known as the coil surface element, transfers heat to the area on top of range. The element is 8 inches in diameter. If your surface element does not heat, over heats, or heat...
$61.79
In Stock

Drip Bowl - 8 Inch
PartSelect #: PS244680
Manufacturer #: WB32X10013
This eight inch chrome drip bowl is intended for use with with tilt lock style surface mount burner element units.
$17.90
In Stock

Surface Element - 6 Inch - 240V
PartSelect #: PS243867
Manufacturer #: WB30M1
If you notice that your surface element will not heat properly, you may need to replace it. This surface element is 6 inches in diameter and 240V. It is a Y-frame surface burner element with five turn...
$57.41
In Stock

Terminal Block
PartSelect #: PS232646
Manufacturer #: WB17X5113
This kit includes one ceramic block with 6" wire leads, 2 wire nuts and 2 heat shrink with mounting bracket.
$38.38
In Stock


Center Piece - 8 Inch Burner
PartSelect #: PS244823
Manufacturer #: WB32X51
This part it is used to cover the center of the coil burner. Sold
individually.
No Longer Available

Questions And Answers for JP370B9K3
We're sorry, but our Q&A experts are temporarily unavailable.
Please check back later if you still haven't found the answer you need.
Common Symptoms of the JP370B9K3
[Viewing 2 of 2]Element will not heat
Fixed by
these parts
these parts


Show All
Little to no heat when broiling
Fixed by
these parts
these parts
Show All


Keep searches simple. Use keywords, e.g. "leaking", "pump", "broken" or "fit".
Needed to replace Drip Pans and Trim Rings for old stove
Repair was simple (just lift off the old and put on the new). What was pleasantly surprising was how quickly I received the parts (amazing)!
Lastly, I've been looking for the correct parts/sizes in stores for years (yes, I should have tried this sooner). I was delighted to finally find a place that actually had the correct ... Read more parts.
Lastly, I've been looking for the correct parts/sizes in stores for years (yes, I should have tried this sooner). I was delighted to finally find a place that actually had the correct ... Read more parts.
Read less
Parts Used:
-
Cynthia from Tampa, FL
-
Difficulty Level:Really Easy
-
Total Repair Time:Less than 15 mins
39 of 46 people
found this instruction helpful.
Was this instruction helpful to you?
Thank you for voting!
Replacement of Coils
Removed by slightly wiggling out of the coupling. No tools needed, seriously, (and I'm a contractor). Basically, pull out and snap back in.
Parts Used:
-
Joseph from South Plainfield, NJ
-
Difficulty Level:Really Easy
-
Total Repair Time:Less than 15 mins
35 of 42 people
found this instruction helpful.
Was this instruction helpful to you?
Thank you for voting!
Heating element required continuous adjustments to work.
I removed old 8" surface element and terminal block. Some of old wiring had to be cut off because of harding/cracking of old wiring. Stove was 23 years old and this burner was the most frequently used one. I soldered the new and remaining old wires together. I used the shirnk wrap that came with the terminal block to cover the solder join
... Read more
t. I screwed the new terminal block (one screw holds it in place - used same screw from old terminal block that was removed). I finished by inserting the new surface element. Everything works fine. In the next week or two after we use it a while, I will check wiring again to make sure there are no changes. You need to be very careful as it gets very hot under the burner.
Read less
Parts Used:
-
Richard from Apex, NC
-
Difficulty Level:Really Easy
-
Total Repair Time:30 - 60 mins
-
Tools:Pliers, Screw drivers
29 of 32 people
found this instruction helpful.
Was this instruction helpful to you?
Thank you for voting!