This is the replacement charcoal filter for your microwave. It is silver and black in color and measures approximately 10 inches by 2 ½ inches. The charcoal filter removes cooking odors from the air ...
$22.91
In Stock
Order within the next 3 hrs and your part ships today!
This is a genuine replacement 40 watt bulb for a microwave. The bulb is meant to light up the underside of the microwave or inside of your microwave when the door is open or during use. If your bulb i...
$37.74
In Stock
Order within the next 3 hrs and your part ships today!
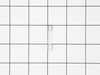
This part is a replacement handle support for your microwave door. The handle support is the part that connects the handle to the microwave door. Occasionally the handle supports can become loose and ...
$54.59
In Stock
Order within the next 3 hrs and your part ships today!
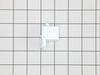
This light socket is for your microwave and is designed to hold the light bulb. If the light bulb is not working, and the bulb has not burned out, it may be a problem with the light socket. This part ...
$36.16
In Stock
Order within the next 3 hrs and your part ships today!
This turntable tray is for microwaves.
Turntable tray rotates in the center of the microwave to help ensure the food cooks evenly.
Follow the instructions in the owner's manual when installing this part.
$149.53
In Stock
Order within the next 3 hrs and your part ships today!
Open the front cover by pushing it at the top (where it says “Push”), lifting up and pushing back on top edge of the old filter. Pull it out. Installing the new one is basically just the reverse of those steps! That simple.
Old filter did seem to be a little thicker (filter material), but the new one was the exact same dimen
... Read moresions, so it went in properly. Wish the filter material was white, so you knew just how dirty it was actually getting. But... :-D
1. Unplug unit 2. Open door, remove two screws above the top trim piece, slide and remove trim. 3. Remove screw behind control board and top left corner, then release from position. 3b. Unplug all wire terminations and set control panel aside. 4. Remove two screws securing latch board, lift and rotate board
... Read moreout of position, remove three micro switches, xfer monitor switch actuator from lower pin in old board and insert in new. Install new door switches and reverse procedure to complete repair.
Note 1. Take care to located new latch board so holding tabs line up, pass through frame, and openings for door tangs line up with openings in frame before securing with screws.