Models > JDS9860AAP > Symptoms > Will not start

Parts That Fix Jenn-Air Range JDS9860AAP Will not start

Will not start is a commonly reported symptom for the JDS9860AAP Jenn-Air Range, and we have put together a full guide on how to fix this. This advice is based on feedback from people who own this exact appliance. We have listed the most common parts for your JDS9860AAP Jenn-Air Range that will fix Will not start. We have included repair instructions, and helpful step-by-step video tutorials. If you are experiencing this issue, not to worry, DIYers just like you have fixed this, and shared their experience to help you!

Fixes Symptom 39% of time
★★★★★
★★★★★
20 Reviews

Rated by 19 customers 


Really Easy 

30 - 60 mins 

Ratings submitted by customers like you who bought this part.   

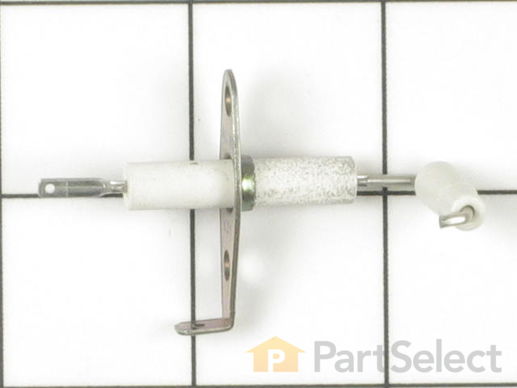
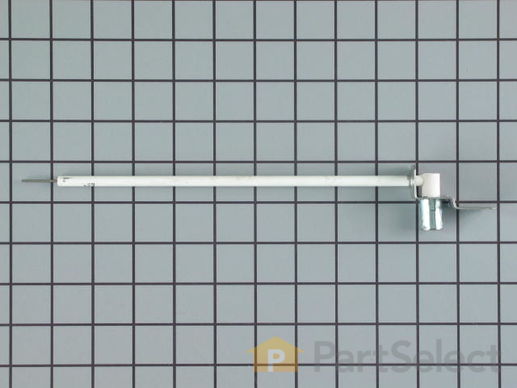
This is a surface burner igniter, also known as a top burner ignitor and stove top spark electrode. It is used to generate the spark that lights the surface burner. If your stove will not start, element does not heat, or gas igniter glows but does not light, replacing the igniter can solve these issues. For this installation, you will need a Phillips screwdriver and needle nose pliers. First place the grate on top of the burner, then lift the burner and disconnect the wires. Next remove the two Phillips screws from the bottom of burner, pull igniter out of the burner and wiggle in the new one. Refer to the installation instructions provided by the manufacturer for more instructions.

$ 41.20
  In Stock
PartSelect Number PS2082000
Manufacturer Part Number 74004053

Replacing your Maytag Range Top Burner Igniter

Replacing your Top Burner Igniter

Customer Repair Stories

burner would not light; ignitor did not produce spark

Take a few screws off the back of the slide in burner module. Take off the back. Unscrew the ignitor screw, remove ignitor carefully, replace with the new ignitor, put the screw back in, put the back back on, try it out! Ours worked after a couple of tries - don't know if the ignitor had to "rev up" by several sparks or we just didn't have it properly installed at first. Anyway, very easy. Did it in my pajamas on a Saturday morning.
  • Candace L. from Woodinville, WA
  • Difficulty Level:
    Really Easy
  • Total Repair Time:
    15 - 30 mins
  • Tools:
    Screw drivers
16 of 20 people found this instruction helpful.
Was this instruction helpful to you?
Thank you for voting!

gas burner ignitor failure

Lift out sealed burner assembly rear of stove first while careully sliding to rear to disengage ignitor probes.Remove philips head screws from bottom sheet metal housing to expose bottom of burners Remove gas tube assembly screws and move tube away carefully.Unplug wires from ignitor.Remove screws for ignitor .Remove ignitor, I noticed that rust and dirt had built up around burner to pan connection.I used my oil filter wrench to turn slightly the burner to remove it from the pan to clean.Reassembled in reverse order.
  • roy from East Providence, RI
  • Difficulty Level:
    Easy
  • Total Repair Time:
    15 - 30 mins
  • Tools:
    Screw drivers
139 of 157 people found this instruction helpful.
Was this instruction helpful to you?
Thank you for voting!
Fixes Symptom 22% of time
★★★★★
★★★★★
33 Reviews

Rated by 53 customers 


Easy 

30 - 60 mins 

Ratings submitted by customers like you who bought this part.   

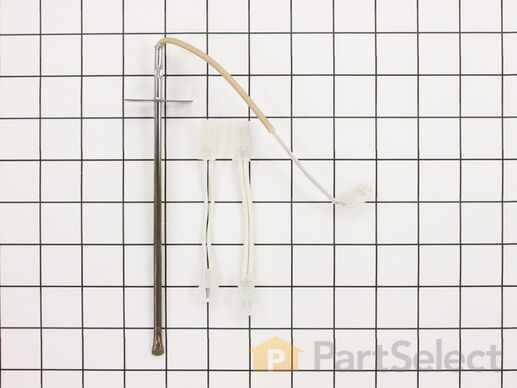
This long oven sensor is also commonly known as a temperature sensor. It is designed for use with ovens and ranges. It is similar to a thermostat; it measures and regulates the internal temperature of your oven cavity. There is an adapter at one end, a probe at the other, and they are connected by an insulated wire. The probe is approximately 7 inches long. You can test the sensor with a multi-meter for functionality. You need to check the model-specific manual to determine what the proper resistance is for your specific appliance. This oven sensor comes with two wire harness adapters and a set of instructions.

$ 34.75
  In Stock
PartSelect Number PS1570174
Manufacturer Part Number 12001656

Replacing your Maytag Range Long Oven Sensor

Replacing your Long Oven Sensor

Customer Repair Stories

F1-1 code

First I removed the two screws that hold the element in place. I then pulled the sensor out about 3 inches and disconnected the two wires. Next, I connected new sensor and screwed the new sensor back in place. One area for caution. Make sure that the electrical connection is pushed in past the insulation on the back side of the oven. Failure to do so will cause the plastic plug connector to melt from oven heat.
  • charles from marstons mills, MA
  • Difficulty Level:
    Really Easy
  • Total Repair Time:
    Less than 15 mins
  • Tools:
    Screw drivers
74 of 99 people found this instruction helpful.
Was this instruction helpful to you?
Thank you for voting!

Oven not holding 350 F, when cooling the coils did not reheat

Removed the oven door by opening slightly, then pic door up to remove. Remove 2 screws holding oven sensor in place, gently pull on sensor to remove, had to remove about 8 inches to get at plastic connector. Unplug connector, had to use an adapter cable supplied with the PartSelect kit to install new sensor, push cable back into opening, reinstall 2 screws. The oven works fine! Note that due to thermal lag the temperature overshoots to 370 degrees and undershoots to 340 degrees, this appears to be normal oven operation. Putting door back in place was easy.
  • David from Westford, MA
  • Difficulty Level:
    Really Easy
  • Total Repair Time:
    15 - 30 mins
  • Tools:
    Screw drivers
156 of 196 people found this instruction helpful.
Was this instruction helpful to you?
Thank you for voting!
Fixes Symptom 11% of time
★★★★★
★★★★★
5 Reviews

Rated by 4 customers 


Really Easy 

15 - 30 mins 

Ratings submitted by customers like you who bought this part.   

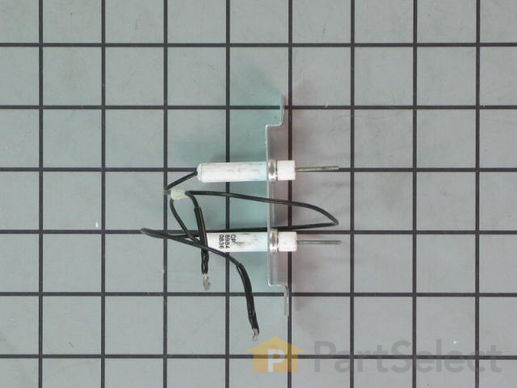
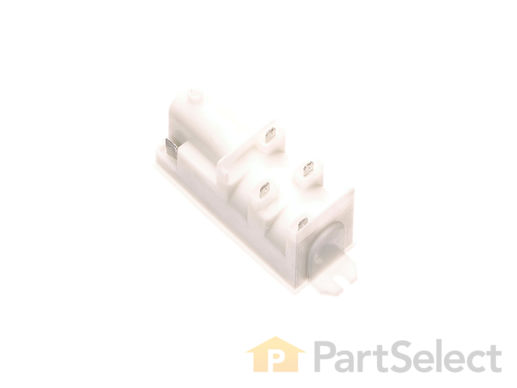
This part provides the spark to the burners.

$ 86.55
  In Stock
PartSelect Number PS11744110
Manufacturer Part Number WP74005890

Customer Repair Stories

Gas Burner Cartridge not Sparking to Light.

This cartridge fits my JennAir Downdraft Slide In Rage, part No. JDS9865BDP. The burner cartridge replaces a downdraft cooking grill module that comes with the original stove/Oven.
The spark quit on the cartridge side. I re-inserted the original cooking grill, and it lit fine. There are two components to look at. The sparker, and the burner igniter (one per each burner). Since both failed to light, I ordered the spark controller.
PartSelect has a video on how to test for failure, but I couldn't find that again.
Two screws mount the controller, two wires re-connected. and works perfect.
  • HARRY from BEND, OR
  • Difficulty Level:
    Very Easy
  • Total Repair Time:
    Less than 15 mins
  • Tools:
    Screw drivers
2 of 2 people found this instruction helpful.
Was this instruction helpful to you?
Thank you for voting!

Spark igniter out

The primary spark igniters failed. Take the (small) screws out of the sides and bottom of the pan. The front of the pan must be removed from the bottom, because the front burner igniter wire is too short to allow reassembly once attached. Only other is the screws for the attachment bracket are larger than the holes. Suggest routing them out slightly to get them to grip the screws. Otherwise it is quite simple. Pull the connections with a needlenose and press the new wire connection back on firmly. Screw the screws back in the pan.
  • Patricia from Overland park, KS
  • Difficulty Level:
    Easy
  • Total Repair Time:
    15 - 30 mins
  • Tools:
    Pliers, Screw drivers
18 of 26 people found this instruction helpful.
Was this instruction helpful to you?
Thank you for voting!
Fixes Symptom 9% of time
★★★★★
★★★★★
17 Reviews

Rated by 5 customers 


Really Easy 

15 - 30 mins 

Ratings submitted by customers like you who bought this part.   

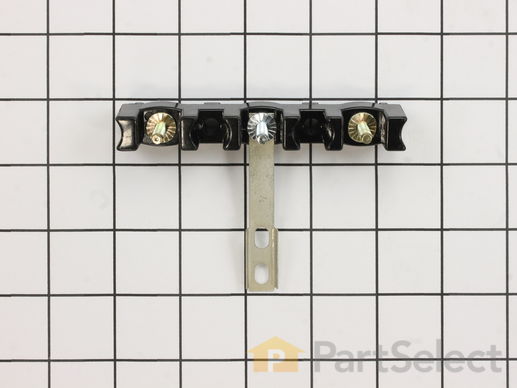
This part is for oven ranges, it connects individual wires and protects the device from electrical surges, voltages, and current. With this part, the house power is connected to the range wire harness. Some symptoms replacing the terminal block could be a solution for are little to no heat when baking, element will not heat and/or it will not start. This part will prevent loosening and will reduce damage caused by corrosion (by two different metals). Refer to the instructional diagram for further replacement guidance and exact placement. You must unplug the appliance before installing this part and wear gloves to protect your hands.

$ 34.09
  In Stock
PartSelect Number PS11750972
Manufacturer Part Number WPW10245259

Replacing your Maytag Range Terminal Block

Replacing your Terminal Block

Customer Repair Stories

Stove top wouldn't come on. Oven couldn't go higher than low heat

Had a technician from Home Advisor to check the problem out with my Whirlpool Double oven(1 1/2 old). Paid $60 to find the problem. According to the technician problem was control board and cost of labor and parts $465.00
Jumped on Part Select website, placed a question with my stove problem through the chat. Immediately they answered my question and told me the problem was the Terminal Block. Cost of part and shipping $25.00. Replaced it myself and everything works fine.
Thank you, Thank you Part Select for your help and honesty.

Sincerely
Peter from Maryland
  • Peter from FREDERICK, MD
  • Difficulty Level:
    Really Easy
  • Total Repair Time:
    Less than 15 mins
  • Tools:
    Screw drivers, Socket set
7 of 9 people found this instruction helpful.
Was this instruction helpful to you?
Thank you for voting!

Burned terminal block and filter board

Removed and replaced above named parts, rewired.Be sure to tighten all nuts that secure wires. I believe this is what caused the problem.
  • Joseph from Decatur, GA
  • Difficulty Level:
    Easy
  • Total Repair Time:
    30 - 60 mins
  • Tools:
    Nutdriver, Screw drivers, Socket set, Wrench set
90 of 192 people found this instruction helpful.
Was this instruction helpful to you?
Thank you for voting!
Fixes Symptom 9% of time
★★★★★
★★★★★
1 Review

Rated by 6 customers 


Easy 

15 - 30 mins 

Ratings submitted by customers like you who bought this part.   

This part sends enough current to the igniter to create a spark to the bottom of the burner cap.

$ 132.68
  In Stock
PartSelect Number PS2094592
Manufacturer Part Number 8215557

Customer Repair Stories

Gas range would not light

Replaced spark module but same problem persisted. Realized that the insulation on the spark ignitors were all cracked, causing a short.

Lesson learned: check the condition of the spark ignitors first as these have a tendency to crack. Even the smallest crack will cause a short.

Ordered new spark ignitors and plan to complete repair.
  • Mike from Menlo Park, CA
  • Difficulty Level:
    Really Easy
  • Total Repair Time:
    Less than 15 mins
  • Tools:
    Screw drivers
16 of 23 people found this instruction helpful.
Was this instruction helpful to you?
Thank you for voting!

top burners on stove won't ignite ,no clicking noise

remove small panel on right side of stove,then un clip moduke and put wires from old module to new one.
Exact fit nomproblems.
  • scott from centreville, VA
  • Difficulty Level:
    Easy
  • Total Repair Time:
    15 - 30 mins
47 of 71 people found this instruction helpful.
Was this instruction helpful to you?
Thank you for voting!
Fixes Symptom 4% of time
★★★★★
★★★★★
112 Reviews

Rated by 66 customers 


Really Easy 

15 - 30 mins 

Ratings submitted by customers like you who bought this part.   

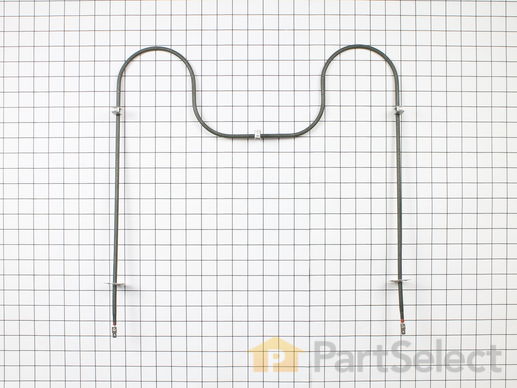
This bake element is for the bottom of your oven. The bake element supplies heat for baking. If you find there is little to no heat when baking, a burned out bake element, or food is taking too long to cook, these symptoms could be solved by replacing the bake element. Before starting this replacement, make sure the range is unplugged from the power source or shut off from the house circuit breaker. The tools needed is a Phillips screwdriver. For safety reasons, make sure to wear gloves.

$ 37.80
  In Stock
PartSelect Number PS11744404
Manufacturer Part Number WP74010750

Replacing your Maytag Range Bake Element

Replacing your Bake Element

Customer Repair Stories

bake element burned out.

First, I shut off power to stove(a must).
Removed two screws that hold element in place.
Gentley pulled element toward door opening.
Once wire is expose, hold back of element and pull gentley to seperate element from wire slot.
Connect new element to wire and replace screws.
  • alexander from Birmingham, AL
  • Difficulty Level:
    Easy
  • Total Repair Time:
    Less than 15 mins
  • Tools:
    Screw drivers
48 of 50 people found this instruction helpful.
Was this instruction helpful to you?
Thank you for voting!

The element broke in two pieces after food dried on it.

First, I unplugged the oven. Then, I removed the two screws that hold the element in place. After that, I gently pulled the element toward the front of the oven until the wires were exposed. I disconnected the wires from the old element, removed the old element and then attached the wires to the new baking element. I gently pushed the new element back into the screw holes and screwed the new element in place. When I plugged the oven back into the wall I heard a pop and thought I'd blown up the oven! Turns out the breaker popped...after fixing the breaker, I turned the oven on and the element worked just fine. I highly recommend PartSelect.com for their fast shipping and great products. I will be ordering from them again for future appliance parts.
  • Heather from Huntsville, AL
  • Difficulty Level:
    Really Easy
  • Total Repair Time:
    15 - 30 mins
  • Tools:
    Screw drivers
176 of 182 people found this instruction helpful.
Was this instruction helpful to you?
Thank you for voting!
Fixes Symptom 2% of time
★★★★★
★★★★★
1 Review

Rated by 1 customer 


Very Difficult 

More than 2 hours 

Ratings submitted by customers like you who bought this part.   

$ 79.32
  In Stock
PartSelect Number PS11744119
Manufacturer Part Number WP74006072

Customer Repair Stories

Grill Ignitor needed to be replaced : order # 20418333

Still not fixed. Waited about a year for the part to arrive, due to "COVID supply chain issue". Part finally arrived and was missing a sub component (ironically the worn out part). Now awaiting a reorder confirmation that this is being sent along with a return mailing label.
The re-order required me to obtain a better picture of the part from your competitor's web site, to prove the part sent was defective as your site was inadequate. My first call on this issue failed because of an absence of the better picture.
The 2nd call to customer service was very understanding and professional but I have yet to receive any confirmation on this re-order in the past 5 days.
  • Steven from SOUTH EASTON, MA
  • Difficulty Level:
    Very Difficult
  • Total Repair Time:
    More than 2 hours
1 person found this instruction helpful.
Was this instruction helpful to you?
Thank you for voting!
Fixes Symptom 2% of time
★★★★★
★★★★★
3 Reviews

Rated by 6 customers 


Easy 

30 - 60 mins 

Ratings submitted by customers like you who bought this part.   

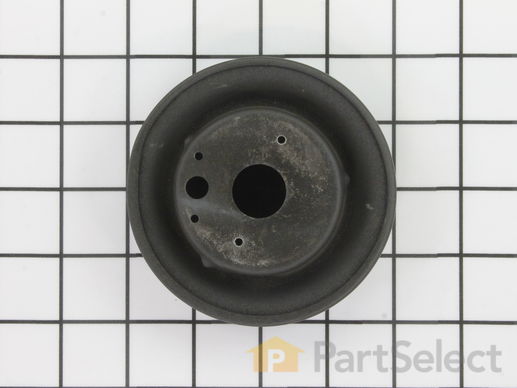
This surface burner head is for ranges. Surface burner head distributes the gas through holes or slots to create an even flame across the cooking area. Shut off the gas supply and unplug the range before installing this part. Wear work gloves to protect your hands.

$ 158.58
  In Stock
PartSelect Number PS11741675
Manufacturer Part Number WP3403M075-10

Customer Repair Stories

Gas was escaping from the bottom of the burner causing a big flare up

Mom and Dad are old now and when a repairman quoted them 225.00 to repair their stove top I told them to tell the repairman to take a hike. I found your website very easwy to navigate and ordered the part which cost about 27.00 with shipping. When the part arrived, I just had to use a phillip head screwdriver and repaced the burner in about 15 minutes. It worked GREAT!!. Mom called me over today for some good homade cooking....Thanks Partselect!!!!
  • Armando from Ovilla, TX
  • Difficulty Level:
    Really Easy
  • Total Repair Time:
    15 - 30 mins
  • Tools:
    Screw drivers
12 of 15 people found this instruction helpful.
Was this instruction helpful to you?
Thank you for voting!

flames from below the burner

Replaced fairly easily all 4 burners as the old ones were totally rusted and cracked (the reason why the flame emitted from below the burners)
  • Nikhil from Houston, TX
  • Difficulty Level:
    A Bit Difficult
  • Total Repair Time:
    30 - 60 mins
  • Tools:
    Screw drivers
16 of 17 people found this instruction helpful.
Was this instruction helpful to you?
Thank you for voting!
Fixes Symptom 1% of time
★★★★★
★★★★★
3 Reviews

Rated by 2 customers 


Really Easy 

Less than 15 mins 

Ratings submitted by customers like you who bought this part.   

$ 72.11
  In Stock
PartSelect Number PS11740768
Manufacturer Part Number WP3147265

Customer Repair Stories

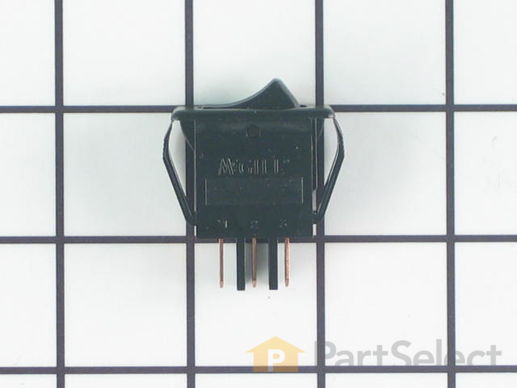
Removing the old fan rocker switch on our Jenn Air gas range and replacing it with the new one

It is really easy to replace IF you know that the tabs that hold the switch in are ON THE TOP AND NOT ON THE SIDES. I wasted a lot of time prying on the sides to get the switch out. It would have been really easy if I had known the tabs were on the top and bottom.
  • Donald from OURAY, CO
  • Difficulty Level:
    Really Easy
  • Total Repair Time:
    Less than 15 mins
  • Tools:
    Pliers
3 of 4 people found this instruction helpful.
Was this instruction helpful to you?
Thank you for voting!

The switch on the exhaust fan for the grill part of the stove went bad. I found the part on your site easily , ordered it and got it within 4 days.

I simply looked at the new switch , to see how it fastened in the stove. It had plastic clips that were easily depressed to allow the swithch to be removed. I removed it , (after turning the circuit breaker off to the stove) removed the three wires , and replace them on the new switch and simply pushed it in the space. It snapped in place , and the job was done . Works great!
  • Al from Abbeville, AL
  • Difficulty Level:
    Really Easy
  • Total Repair Time:
    Less than 15 mins
  • Tools:
    Pliers, Screw drivers
13 of 22 people found this instruction helpful.
Was this instruction helpful to you?
Thank you for voting!