


Models
>
JD968KK1CC
JD968KK1CC General Electric Range - Overview
Sections of the JD968KK1CC
[Viewing 7 of 7]


Manuals & Care Guides for JD968KK1CC
Click to downloadInstall
Installation Instructions
(0.75MB)
Manual
Owner's Manuals
(3.78MB)
Manual
Owner's Manuals
(3.71MB)
Keep searches simple, eg. "belt" or "pump".

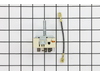
Oven Sensor
PartSelect #: PS236398
Manufacturer #: WB23T10015
The function of the oven sensor is to detect the temperature within the oven cavity. If you notice that the oven is too hot or too cold, or it is not heating evenly, you may need to replace the oven s...
$36.68
In Stock

Infinite Control Switch
PartSelect #: PS1016429
Manufacturer #: WB24T10119
This part is sold individually and is for ranges. The control switch turns the surface element on and off and determines the temperature of the element. This will need to be changed if the control swi...
$91.57
In Stock

Meat Probe Thermistor
PartSelect #: PS1481046
Manufacturer #: WB20T10024
This probe is used to check the internal temperature of the meat to ensure proper temperature is reached. Also known as a Meat Probe.
$56.73
In Stock


Screw
PartSelect #: PS271689
Manufacturer #: WH2X930
This screw is sold individually.
$12.22
In Stock

RANGE HALOGEN BULB KIT
PartSelect #: PS12342510
Manufacturer #: WB49X29679
This light bulb is used in the interior oven. NOTE: This bulb has looped pins, not the straight pins.
$49.10
In Stock

Broiler Pan - Large
PartSelect #: PS1517612
Manufacturer #: WB48X10056
This large broiler pan is found in the bottom of your oven and is used to catch drippings from broiling foods. This part includes the grate and bottom pan and is made of porcelain. The grate measures ...
$30.07
In Stock

Window Pack Assembly
PartSelect #: PS9493039
Manufacturer #: WB56X22160
This window pack assembly, also known as inner door glass, is supplied directly by the manufacturer for use in range ovens. It has measurements of approximately 22 inches by 14 inches. The inner door ...
$422.47
In Stock


Dual Burner Control Switch
PartSelect #: PS236785
Manufacturer #: WB24T10063
This switch controls the dual burner.
$87.11
On Order

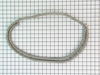
Door Gasket
PartSelect #: PS1019820
Manufacturer #: WB04T10050
This oven door gasket prevents heat from escaping the oven cavity when in use.
$52.78
In Stock

Questions And Answers for JD968KK1CC
We're sorry, but our Q&A experts are temporarily unavailable.
Please check back later if you still haven't found the answer you need.
Common Symptoms of the JD968KK1CC
[Viewing 6 of 6]Element will not heat
Fixed by
these parts
these parts


Show All
Little to no heat when baking
Fixed by
these parts
these parts


Show All
Oven not heating evenly
Fixed by
these parts
these parts
Show All
Little to no heat when broiling
Fixed by
these parts
these parts

Show All
Oven is too hot
Fixed by
these parts
these parts
Show All
Will Not Start
Fixed by
these parts
these parts
Show All


Keep searches simple. Use keywords, e.g. "leaking", "pump", "broken" or "fit".
Oven was not coming up to temperature
I had to remove the oven from the wall because the sensor plug connction is behind the unit. Two screws hold the sensor inside the oven and then I disconnected the lead and pulled the sensor out from the front. I installed the new sensor, tightened the two screws holding it in and connected the lead. Then reinstalled the oven into the wal
... Read more
l. Overall, a very easy repair once you get the oven out.
Read less
Parts Used:
-
Sean from Highlands Ranch, CO
-
Difficulty Level:Really Easy
-
Total Repair Time:15 - 30 mins
-
Tools:Nutdriver, Screw drivers
55 of 69 people
found this instruction helpful.
Was this instruction helpful to you?
Thank you for voting!
Switch failed
I turned off the circuit breaker and tested the cook top. I pulled the cook top out and laid a piece of plywood over the opening to work on the cook top and not scratch the granite counter top. The mistake I made was to turn the cook top upside down and separate the top from the housing. The dampening springs came off the burners and I
... Read more
could have damaged the elements (but they checked out ok). I turned the whole assembly right side up again and replaced the switch and put it all back together. It works great...thank you for the part.
Read less
Parts Used:
-
John from Fresno, CA
-
Difficulty Level:A Bit Difficult
-
Total Repair Time:30 - 60 mins
-
Tools:Nutdriver, Pliers, Screw drivers
34 of 48 people
found this instruction helpful.
Was this instruction helpful to you?
Thank you for voting!
Actual temperature did not match set temp
Removed the oven door for easy acces to oven. Unscrewed (philips screwdriver) the screw holding temp sensor in place. Gently pulled the wiring until quick connector was located. Pushed down on locking level on quick connect while holding other end of wiring (so wiring would not fall back behind oven). Connected the new sensor and scre
... Read more
wed back in place. Reinstalled oven door. Tested temperature settings by turning on oven and comparing with a separate oven thermometer.
Read less
Parts Used:
-
Brian from Fairfield, CA
-
Difficulty Level:Easy
-
Total Repair Time:15 - 30 mins
-
Tools:Screw drivers
21 of 26 people
found this instruction helpful.
Was this instruction helpful to you?
Thank you for voting!