


Models
>
JB988BH4BB
JB988BH4BB General Electric Range - Overview
Sections of the JB988BH4BB
[Viewing 6 of 6]


Manuals & Care Guides for JB988BH4BB
Click to downloadKeep searches simple, eg. "belt" or "pump".

Temperature Sensor
PartSelect #: PS10059162
Manufacturer #: WB21X22134
The temperature sensor, also known as the oven temperature sensor assembly is usually found in the back of the oven. The function of the oven temperature sensor assembly is to measure the temperature ...
$38.48
In Stock

REAR SUPPORT
PartSelect #: PS12709839
Manufacturer #: WB02X33180
This rear drawer support comes with the installation screw. This part has been redesigned. The new support inserts towards the rear of the drawer as opposed to the side.
$13.05
In Stock

Light Bulb - 40W
PartSelect #: PS217532
Manufacturer #: 40A15
This 40-Watt light bulb is sold individually and is a genuine OEM replacement option for your home appliances. It is specially designed to withstand extreme temperatures, so this bulb is compatible wi...
$11.02
In Stock

Foot - Leveller
PartSelect #: PS223802
Manufacturer #: WB02X10521
Sold individually.
$23.43
In Stock

Meat Probe Thermistor
PartSelect #: PS1481046
Manufacturer #: WB20T10024
This probe is used to check the internal temperature of the meat to ensure proper temperature is reached. Also known as a Meat Probe.
$56.73
In Stock

RECEPTACLE PUSH-IN
PartSelect #: PS752188
Manufacturer #: WB08T10026
This part is the replacement light socket for your oven. The oven light socket provides power to the light, and at the same time holds the light bulb in place.
$8.54
In Stock

Screw
PartSelect #: PS271689
Manufacturer #: WH2X930
This screw is sold individually.
$12.22
In Stock

Broiler Pan - Large
PartSelect #: PS1517612
Manufacturer #: WB48X10056
This large broiler pan is found in the bottom of your oven and is used to catch drippings from broiling foods. This part includes the grate and bottom pan and is made of porcelain. The grate measures ...
$30.07
In Stock


Door Pad
PartSelect #: PS222173
Manufacturer #: WB01T10026
This is the door pad only. The trim is sold separately.
$9.42
In Stock

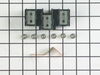
Terminal Block Kit
PartSelect #: PS953027
Manufacturer #: WB17T10011
This part provides a way of connecting individual electrical wires and offers protection of the device from electrical surges (voltages and/or currents).
$56.72
In Stock
Questions And Answers for JB988BH4BB
We're sorry, but our Q&A experts are temporarily unavailable.
Please check back later if you still haven't found the answer you need.
Sort by:
- < Prev
- 1
- Next >
Search filter:
Clear Filter
Your search term must have 3 or more characters.
Keep searches simple. Use keywords, e.g. "leaking", "pump", "broken" or "fit".
Sorry, we couldn't find any existing answers that matched.Try using some different or simpler keywords, or submit your new question by using the "Ask a Question" button above!
Edward
October 31, 2023
What year was this oven made?
For model number JB988BH4BB
Hi Edward, thank you for the question. Based on our research, your model was manufactured, most probably in 2003. To provide you with the exact age, we will require the serial number of the unit. Please contact us anytime if you require further assistance!
Was this helpful?
Thank you for voting!
- < Prev
- 1
- Next >
Common Symptoms of the JB988BH4BB
[Viewing 7 of 7]Little to no heat when baking
Fixed by
these parts
these parts


Show All
Oven not heating evenly
Fixed by
these parts
these parts
Show All
Element will not heat
Fixed by
these parts
these parts

Show All
Oven is too hot
Fixed by
these parts
these parts
Show All
Will Not Start
Fixed by
these parts
these parts
Show All
Door won’t close
Fixed by
these parts
these parts


Show All
Little to no heat when broiling
Fixed by
these parts
these parts
Show All


Keep searches simple. Use keywords, e.g. "leaking", "pump", "broken" or "fit".
Oven would go in to a F2 Error
Removed six 1/4" hex nuts on rear of oven. Then through front/inside removed a single 1/4" hex nut to actually remove sensor. Unplug sensor connector, remove. Reversed steps, push oven back in place and plugged in. Tested oven function.
Parts Used:
-
Peter from stamford, CT
-
Difficulty Level:Really Easy
-
Total Repair Time:15 - 30 mins
-
Tools:Nutdriver
142 of 205 people
found this instruction helpful.
Was this instruction helpful to you?
Thank you for voting!
Inner glass window of oven cracked
1. Removed the oven door -- this is a little tricky -- you need to lift to small metal covers on the hinges, then pull the door up and out from the broil (half open position). Replace the door the same way. It is important to insert the hinges with the door in the "broil" position, and after verifying that the door is aligned and closes
... Read more
normally -- then lift hinge covers to lock in place.
2. After door is removed the glass assembly can be removed and replaced by unscrewing two long (2-3 inch long) screws at the top. And three hex head screws at the bottom of the door. Note -- there is no need to removed the six screws (3 either side) on th ebottom of the door -- because these only hold the hinges to the door. The other 5 screws that you do need to remove actually hold the two halves of the door together.
3. Replace glass assembly and reassemble.
It is not so hard but you need "star" screwdrivers for the long screws... (not philips -- but 6-pointed stars), and a socket wrench is useful for the bottom 3 hex head screws...
If I were to do again it would only take me 15 minutes.... but I messed up by removing the hinges unnecessarily so it took me an hour.
Read less
Parts Used:

-
Charles from Sharon, MA
-
Difficulty Level:Easy
-
Total Repair Time:30 - 60 mins
-
Tools:Nutdriver, Screw drivers, Socket set
57 of 60 people
found this instruction helpful.
Was this instruction helpful to you?
Thank you for voting!
terminal block melted
The existing terminal block on my Ge oven/Range had melted due to a loose wire causing sparking and starting the plastic casing of the terminal block on fire and melting it, Part select made the part easy to find and had it at my house in 2 days. All I had to do was remove six screws to take the back sheet metal cover off of the oven. U
... Read more
nscrew the terminal connections remove two mounting screws that held the terminal on to the oven body. This was a little trickier than it should have been because the melted plastic had reformed making it very hard to access the mounting screws. i then mounted the new piece and plugged the oven in, it took 15 minutes and was very easy. definitely saved me at-least a $100 for the service call i would have made if finding the part wasn't so convenient
Read less
Parts Used:

-
jonathan from willow springs, IL
-
Difficulty Level:Easy
-
Total Repair Time:Less than 15 mins
-
Tools:Nutdriver, Screw drivers
53 of 67 people
found this instruction helpful.
Was this instruction helpful to you?
Thank you for voting!