Models > JB258DM1WW > Symptoms > Oven not heating evenly

Parts That Fix General Electric Range JB258DM1WW Oven not heating evenly

Oven not heating evenly is a commonly reported symptom for the JB258DM1WW General Electric Range, and we have put together a full guide on how to fix this. This advice is based on feedback from people who own this exact appliance. We have listed the most common parts for your JB258DM1WW General Electric Range that will fix Oven not heating evenly. We have included repair instructions, and helpful step-by-step video tutorials. If you are experiencing this issue, not to worry, DIYers just like you have fixed this, and shared their experience to help you!

Fixes Symptom 57% of time
★★★★★
★★★★★
48 Reviews

Rated by 29 customers 


Really Easy 

15 - 30 mins 

Ratings submitted by customers like you who bought this part.   

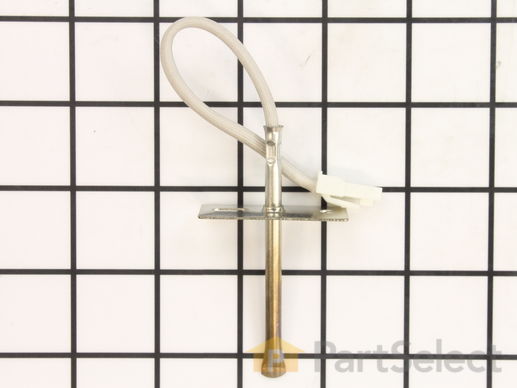
The temperature sensor, also known as the oven temperature sensor assembly is usually found in the back of the oven. The function of the oven temperature sensor assembly is to measure the temperature inside your oven while it is on and send the temperature back up to the electronic control, which adjusts as necessary. If your oven is having difficulty achieving warmer temperatures and/or keeping warmer temperatures up, you may want to test your temperature sensor. Before you make this repair remember to unplug your range from the power source, and turn off the gas shut off valve.

$ 38.48
  In Stock
PartSelect Number PS10059162
Manufacturer Part Number WB21X22134

Replacing your General Electric Range Temperature Sensor

Replacing your Temperature Sensor

Customer Repair Stories

Oven wouldn't preheat above 300 degrees

Unplugged appliance and removed 5 screws on back of stove/oven and removed plate. Disconnected the sensor and unscrewed it on the inside of the oven. Pulled the cord through and replaced with new sensor. Replaced all parts and plugged in the appliance and tested. Worked great.
  • Gerald from Cape Canaveral, FL
  • Difficulty Level:
    Really Easy
  • Total Repair Time:
    15 - 30 mins
  • Tools:
    Nutdriver
48 of 78 people found this instruction helpful.
Was this instruction helpful to you?
Thank you for voting!

Oven would go in to a F2 Error

Removed six 1/4" hex nuts on rear of oven. Then through front/inside removed a single 1/4" hex nut to actually remove sensor. Unplug sensor connector, remove. Reversed steps, push oven back in place and plugged in. Tested oven function.
  • Peter from stamford, CT
  • Difficulty Level:
    Really Easy
  • Total Repair Time:
    15 - 30 mins
  • Tools:
    Nutdriver
143 of 206 people found this instruction helpful.
Was this instruction helpful to you?
Thank you for voting!
Fixes Symptom 36% of time
★★★★★
★★★★★
151 Reviews

Rated by 110 customers 


Really Easy 

15 - 30 mins 

Ratings submitted by customers like you who bought this part.   

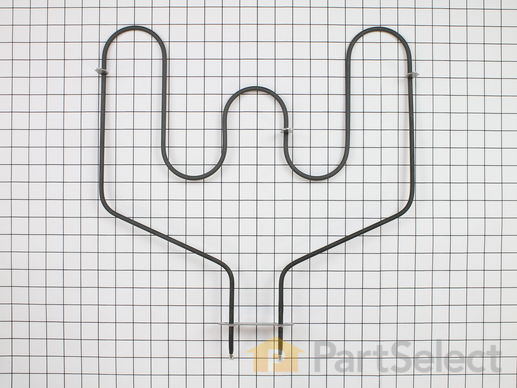
The bake element in your oven provides the cooking heat. This part can be found at the bottom of your oven, and attaches to the power source on the back wall. It has two terminals that fit into the power source receptacle. This part is made of metal, and is approximately 20 inches in length and 18 inches in width. This product is sold individually. Many of our customers have rated this repair as easy. To complete this repair, simply lift the old element up and out of your oven, and replace it with the new one. Be sure to disconnect power from the oven before you begin this repair.

$ 88.10
  In Stock
PartSelect Number PS249286
Manufacturer Part Number WB44T10011

Customer Repair Stories

The baking assembly in the oven burst into flames one day, then broke apart.

After the element cooled down, I pulled the racks out of the oven, turned off the oven at the breaker box, then, using a nut driver, loosened the screws that held the baking assembly in the back of the oven, and pulled the connecting wires off. I bent the wires to make sure they would stay out, because if they get back in the insulation, they are hard to find. I would recommend getting a pair of locking pliers and putting them on the ends of the wires just to keep them from getting back into the insulation. Then I attached the left connection wire and then the right one, pushed them back into the insulation, tightened the baking assembly to the back wall of the oven, turned it back on at the breaker box, then tested the oven to see if it heated up. It did. Total repair time 15 -20 minutes. Would have been less if I didn't have to chase one of the wires back in the insulation. Shamless plug for the company ...By paying extra for 2-day shipping to receive the part, I saved just over $20 from buying it at Sears, which would have had to order the part anyway.
  • Theresa from Sherman, TX
  • Difficulty Level:
    Easy
  • Total Repair Time:
    15 - 30 mins
  • Tools:
    Nutdriver, Pliers
141 of 151 people found this instruction helpful.
Was this instruction helpful to you?
Thank you for voting!

oven element burned itself up

Turned off circuit breaker to range.
Removed the 2 oven racks. Removed two screws in back of oven compartment. Pulled element forward and the terminal connections get exposed.
The right terminal clip disconnected by itself and the wire went back into the stove and could not be retrieved.
Removed range draw under the oven and pulled entire range out from wall about 4 feet.. Removed metal backing with a socket wrench and exposed the oven element wires and terminals.
Reinstalled new element and metal backing.
Since range was out from wall, cleaned and vacuumed before pushing stove back in place.
Since range draw was out re-leveled by setting adjustable feet.
Reinstalled drawer and racks.
Turned on circuit breaker.
Tested element by setting bake cycle on.
  • Dennis from Bondville, VT
  • Difficulty Level:
    Really Easy
  • Total Repair Time:
    15 - 30 mins
  • Tools:
    Screw drivers, Socket set
262 of 285 people found this instruction helpful.
Was this instruction helpful to you?
Thank you for voting!
Fixes Symptom 4% of time
★★★★★
★★★★★
53 Reviews

Rated by 29 customers 


Really Easy 

30 - 60 mins 

Ratings submitted by customers like you who bought this part.   

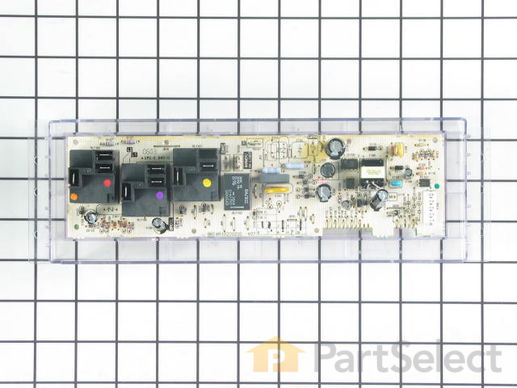
This part is also known as the "brains" of the appliance. ***NOTE: The wiring could be different than the original control. This part may need to be installed by an appliance repair person.

$ 198.44
  On Order
PartSelect Number PS16873547
Manufacturer Part Number WB27X45466

Customer Repair Stories

after lightning cooktop worked oven did not

called service co. and described problem while i was looking at parts diagram and he agreed with my feeling what part got fried. he told me the part would be 183.00 plus labor and drive time. when i told him i was looking at the part on line for 65 dollars he hung up on me. i recieved the part and was slightly dissapointed to know there was a sepperate adhesive overlay. i saw that it was a sepperate part but if i knew it was adhesive i would have spent the extra 20 dollars for a new one. but, to my surprise the old one peeled off easily and gently re-apllied it to the new conrol board alighning it well seemed to be the trickiest part of the job. took the five wires with connectors out of the old one and inserted them into the same place on the new one. removed the old one from the frame (4 pan phillp sheet metal screws) and then screwed the new wired control board in. plugged in the unit and pressed the bake button and then mixed the brownie batter. replaced the back panel cover. 65 dollars and 15 minutes.

thanks

bob
  • robert from OXFORD, CT
  • Difficulty Level:
    Really Easy
  • Total Repair Time:
    15 - 30 mins
  • Tools:
    Screw drivers
46 of 56 people found this instruction helpful.
Was this instruction helpful to you?
Thank you for voting!

Blown Oven Control Board

After removing the back of the range the oven control board was visible and accessible by removing four nuts. There was some resistance removing the leads from the oven coils and light-bulb mechanisms but with some leverage and pliers they came loose. The only challenge was the face plate of the unit is attached using adhesive and needed to be carefully peeled off and added to the new oven control board. Getting this right was just a matter of taking time and lining up the components correctly. After applying the face, the new control board went right in. I reattached the back, plugged the unit back in, and the over has worked great for the past week. Part select being able to identify the part numbers listed from the component likely saved me at least $100 of having a GE certified repair technician come in.
  • Julien from Barnhart, MO
  • Difficulty Level:
    A Bit Difficult
  • Total Repair Time:
    15 - 30 mins
  • Tools:
    Nutdriver, Screw drivers
52 of 58 people found this instruction helpful.
Was this instruction helpful to you?
Thank you for voting!
Fixes Symptom 3% of time
★★★★★
★★★★★
11 Reviews

Rated by 7 customers 


Really Easy 

15 - 30 mins 

Ratings submitted by customers like you who bought this part.   

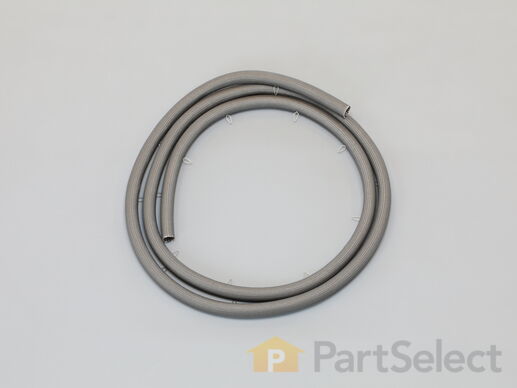
The oven door gasket creates a seal between the oven door and the opening of the oven to prevent heat from escaping when the oven is closed.

$ 51.47
  In Stock
PartSelect Number PS8753695
Manufacturer Part Number WB04T10086

Customer Repair Stories

Oven door gasket was fraying and started to fall apart.

1.) I removed the old oven door gasket by taking out the ends of the gasket out of the bottom of the oven door first.
2.) Pry up on each one of the retainer clips, they easily pop out of their slots.
3.) Work your way around the oven door gasket.
4.) If any remain stuck you can just wiggle the clip around and it should pop out of each hole. If need be you could use pliers, but I did not need to.
5.) Take your new gasket, it should already have new clips, so you can throw away the old ones.
6.) Work your way around the oven door making sure the clips are nicely seated.
7.) Finish off by inserting the ends back into the 2 holes on each side of the bottom of the oven door, I just used a small spoon to make sure the tops were nicely placed in.
8.) If your gasket needs to compress, you can close the oven door and lock it that should hold it in place and compress it.
9.) All done!
  • Zachary from ARLINGTON, TX
  • Difficulty Level:
    Very Easy
  • Total Repair Time:
    Less than 15 mins
  • Tools:
    Pliers
3 of 3 people found this instruction helpful.
Was this instruction helpful to you?
Thank you for voting!

Oven door gasket needed replacement

Replacement was extremely easy. The new part fit perfectly and installed very easily without tools. Also, I received the part within a few days
  • JUDITH from DANVILLE, NH
  • Difficulty Level:
    Really Easy
  • Total Repair Time:
    Less than 15 mins
21 of 31 people found this instruction helpful.
Was this instruction helpful to you?
Thank you for voting!