


Models
>
IBMS1455DS00
IBMS1455DS00 Whirlpool Microwave - Overview
Sections of the IBMS1455DS00
[Viewing 7 of 7]


Keep searches simple, eg. "belt" or "pump".


Door Switch - 250V
PartSelect #: PS2338920
Manufacturer #: W10211972
This door switch (Primary and Secondary) keeps the microwave from running when the door is open.
NOTE: Two switches required. Sold individually.
$44.72
In Stock

Halogen Light Bulb
PartSelect #: PS11765655
Manufacturer #: W10886919
This part is the replacement halogen light bulb for your range. The bulb is 10 watts and 12 volts. The halogen lamp lights up the inside of the oven you can see the cooktop more effectively in darknes...
$17.79
In Stock

Button Holder
PartSelect #: PS12114309
Manufacturer #: W11116990
This is the button holder for #6 on the diagram.
$25.32
In Stock


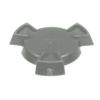
SHAFT-TURN
PartSelect #: PS12578368
Manufacturer #: W11223840
This part accepts a D-shaped shaft.
$25.30
On Order


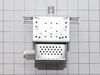
Microwave Inverter
PartSelect #: PS2342258
Manufacturer #: W10217711
The inverter acts like the brain for the microwave. It sends high voltage to the magnetron to produce heat.
$293.16
On Order
Questions And Answers for IBMS1455DS00
We're sorry, but our Q&A experts are temporarily unavailable.
Please check back later if you still haven't found the answer you need.
Common Symptoms of the IBMS1455DS00
[Viewing 5 of 5]Won’t turn on
Fixed by
these parts
these parts


Show All
Tray won’t turn
Fixed by
these parts
these parts


Show All
Touchpad does not respond
Fixed by
these parts
these parts
Show All
No heat
Fixed by
these parts
these parts

Show All
Noisy
Fixed by
these parts
these parts
Show All
Keep searches simple. Use keywords, e.g. "leaking", "pump", "broken" or "fit".
The display kept asking me to close the door, even though the door was closed. The interior light stayed on.
I used a Google search to show how to access the area behind the front panel. There was a folded paper copy with a schematic and wiring diagram in that space.Then I used a multi-meter to determine which of the THREE micro-switches was causing the problem. I called your help line and ordered a replacement switch. The switch was delayed
... Read more
in transit so your agent credited me with the cost of shipping.
When the part arrived, it had three terminals instead of two as shown in the on-line picture but that did not cause any difficulty in using it. It took about 20 minutes to remove and replace the old switch.
All seems to be working well now.
Finding which of the THREE switches was the problem was the most difficult part of the repair. All three "clicked" but the defective one did not click as easily. It needed to be depressed more than the door latch can would provide. Old age?
Read less
Parts Used:
-
E G from SILVERDALE, WA
-
Difficulty Level:A Bit Difficult
-
Total Repair Time:30 - 60 mins
-
Tools:Pliers, Screw drivers
7 of 8 people
found this instruction helpful.
Was this instruction helpful to you?
Thank you for voting!
Burnt out Microwave Lamp
IMPORTANT: DO NOT TOUCH THE REPLACEMENT LAMP WITHOUT WEARING CLEAN GLOVES. FILM OR FINGER PRINTS ON THE LAMP GLASS WILL CAUSE PREMATURE FAILURE OF THE LAMP.
Remove the 4 screws on right and left mounting rails that hold the unit to the kitchen cabinet.
Remove the oven door
Remove the chrome oven vent strip below the ... Read more oven door. This allows a pry point beneath the combo microwave oven assembly to lift up the unit while pulling it out. (Assembly weighs 250 pounds)
Pull the unit out from the cabinet housing about 2-3 inches to reveal the right and left sides and the 4 screws holding the the control panel.
Remove the 4 control panel screws and pull off the face of the control panel
Remove the 2 harness connectors and the ground wire holding the control panel to the unit.
Unclip the circuit board above the lamp connector and slide it back out of the way. The lamp is now accessible.
Remove the lamp spring holding the lamp to the cabinet.
Remove the old lamp
Install the new lamp using clean gloves
Reassemble in reverse order.
Read less
Parts Used:
-
Donald from SOLVANG, CA
-
Difficulty Level:Difficult
-
Total Repair Time:30 - 60 mins
-
Tools:Screw drivers
5 of 5 people
found this instruction helpful.
Was this instruction helpful to you?
Thank you for voting!
IKEA Nutid microwave start button stopped working. Gently removed button with ouer edge, saw sensor was disconnected
First - Be certain to order both button and button holder, in same order (I ordered separately, after realizing I would need both, since interlocking, paid 2 delivery charges)
Turn off breaker, unscrew from cabinet, pull out far enough to access 4 tiny star screws (2 each side) line up button and insert into holder, push into hole in ... Read more glass. Sensor clicks into button holder. Look at other buttons to see alignment. Screw back together
Turn off breaker, unscrew from cabinet, pull out far enough to access 4 tiny star screws (2 each side) line up button and insert into holder, push into hole in ... Read more glass. Sensor clicks into button holder. Look at other buttons to see alignment. Screw back together
Read less
Parts Used:
-
Cecilia from HOUSTON, TX
-
Difficulty Level:Very Easy
-
Total Repair Time:Less than 15 mins
-
Tools:Screw drivers
4 of 4 people
found this instruction helpful.
Was this instruction helpful to you?
Thank you for voting!