We're sorry, but our Q&A experts are temporarily unavailable.
Please check back later if you still haven't found the answer you need.
6 questions answered by our experts.
Sort by:
< Prev
1
2
Next >
Search filter:
Clear Filter
Your search term must have 3 or more characters.
Keep searches simple. Use keywords, e.g. "leaking", "pump", "broken" or "fit".
Sorry, we couldn't find any existing answers that matched.Try using some different or simpler keywords, or submit your new question by using the "Ask a Question" button above!
Hector
December 5, 2019
On the display panel I have a l50 blinking :)
For model number GXSH40V00
Hi Hector,
Thank you for your question. This issue is likely caused by the electronic control board and it may need to be replaced. The part number listed under your model number for the electronic control board is PS11727025. According to your owner's manual, if you are seeing an error code on the display, unplug the external power supply then remove the control cover and release the clips on the side. Check for any loose or incorrect wiring connections to the electronic control board or switch. Reconnect as required. Reassemble the control cover, plug in the transformer and wait 8 minutes for the error code to reappear. If it reappears, you will need to have the water softener serviced. For more information on your water softener, enter your model number into our search engine and on the next page, click on the link for your owner's manual. I hope this helps. Thank you and have a great day!
2 people found this helpful.
Was this helpful?
Thank you for voting!
Clayton
May 30, 2022
The display panel doesn’t show gallons per minute. Gallons per day used or allow me to recharge Does panel need to be replaced ?
For model number GXSH40V00
Hi Clayton,
Thank you for your question. If nothing appears on the electronic control board display, then it will need to be replaced. The part number listed under your model number for the electronic control board is PS11727025. If you need help placing an order for it, customer service is open 7 days a week and anyone will be happy to assist you. Please feel free to give us a call. We look forward to hearing from you!
My unit has a constant drip from the discharge hose.
For model number GXSH40V00
Hi Tom, thank you for contacting us. Based on our research, the issue is with the brine valve assembly, part number PS6447789. It controls the water flow through the salt tank during the brine cycle. We would recommend replacing the brine valve to fix the issue. We hope this solves your problem!
I have an error message, and water in the motor area
For model number GXSH40V00
Hi Sammy, thank you for reaching out. If there is water leaking in your water softener, you will need to check the rotor valve for damages or leaks and the o-rings in the bypass valve. Check if the tank is not leaking any water, if the tank is leaking you will need to replace it. Check the hoses and pipes that connect to the unit for leakages. We hope this information is helpful.
My water saftener isn't emptying. It is still softening my water.
For model number GXSH40V00
Hello Brenda, thank you for your inquiry. We have found that a restriction in the drain hose may prevent the water softener from emptying. Make sure the drain hose is not pinched or plugged. If the drain hose is elevated too high, the unit cannot drain. The nozzle and venturi may also be dirty or improperly assembled if they were recently cleaned. If these are not the issues, then you may need to replace the drain hose, part number PS311099, to fix the problem. Glad to be of assistance!
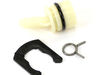
water softener was leaking due to a broken clip. turned off water and drained the pipes. some how managed to remove the broken clip from the inlet side. i than was able to remove the good clip from the outlet side, without breaking it. i replaced the washer on the leaking side, cleaned and resealed all the joints. finally i reattached the
... Read more manifold to the water softener. no leaks so far. next time i will discarge the unit before repair.
Turned off water to softener and took it out of service. Ordered 2 plastic clips and 2 O-rings on Friday evening, May 1. All items were listed as "in stock." Total cost was $44.55, including shipping cost of $7.75. On Monday, May 4 two clips and one O-ring were shipped. Second O-ring was shipped the following day, May 5. Received 2 cl
... Read moreips and 1 O-ring on May 8, but that would not permit repair of softener, so I waited and waited and waited with softener out of service. Second O-ring finally arrived on May 19--some 18 days after order was placed and 14 days after it was shipped. I never would have placed the order had I known that $7.75 in shipping costs would translate to 18 days for delivery. According to the Operating Service Standards for USPS, had that simple O-ring been inserted into an envelope with a first class stamp, it would have been delivered in not longer than 3 days. So I rate what should have been a rather easy repair job as very difficult and the time to repair as 18 days. I am extremely disappointed and will choose a different part supplier in the future.
Remove the top back lid/unlatch 2 clips. Unscrew the small brine tube nut (white) from left side of control unit. Cut the tube to remove nut from old tube with utility knife. Keep nut for use on new assembly. Not included. Remove brine well cover. Pull the tube out of the top and from behind resin tank and remove assembly from brine well
... Read more. Discarded the old brine valve assembly. Removed the bit of old tube from the nut, w/ utility knife. Careful not to damage the old nut. Snake the new brine tube from front right side through the back of the resin tank to the old hole on the left. Follow the old path. Insert the new brine tube into the top section through the hole the old one came out of. Attached nut to new brine tube. Screw nut/new brine tube to the connector of control unit. Small fingers help. Adjust/slide the float assembly 6-8 inches inches above the valve, e.g. Styrofoam/Metal Weight slides up/down the white stalk. Re-inserted the brine assembly into the brine tank. Replace top. Manually regenerate to make sure new brine assembly is not leaking and filling the brine tank properly. Done.