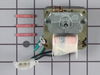
This Defrost Timer works like a clock by switching on the defrost heater circuit after a predetermined amount of compressor run time. This allows the defrost circuit to clear the evaporator of ice or ...
$38.64
In Stock
Order within the next 4 hrs and your part ships today!
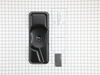
This OEM 40 watt appliance light bulb is used for some ranges, refrigerators, freezers, and microwaves. Simply locate the existing bulb, unscrew it from its socket, and replace with new light bulb. If...
$19.73
In Stock
Order within the next 4 hrs and your part ships today!
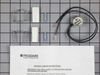
This limiter thermostat cuts out when the temperature inside your refrigerator reaches 55 degrees Fahrenheit and kicks back in when the internal temperature drops to 20 degrees Fahrenheit. If you disc...
$22.68
In Stock
Order within the next 4 hrs and your part ships today!
The evaporator fan motor kit is specifically made for your refrigerator to run the evaporator fan in your refrigerator. It is mounted on the center hub and has three lead wire terminals; its shaft has...
$101.85
In Stock
Order within the next 4 hrs and your part ships today!
This water valve kit, also known as a single outlet water valve kit, is used in refrigerators. The kit includes a union, two screws, and some tubing pieces. If one of the solenoids in your water valve...
The ejector drive gear is a part for your refrigerator. This icemaker drive gear is for the ejector blades. The part rotates the cube ejector arm, which cycles the icemaker and pushes the cubes out an...
$21.03
In Stock
Order within the next 4 hrs and your part ships today!
Fridge is a side by side. The freezer is pretty narrow for a guy with wide shoulders.
Pulled plug.
Had to remove bottom drawers then used nut driver to remove screws closest to back wall in drawer runners. Once the back screws were removed the runners could be swung up or down out of way so back cover could be re
... Read moremoved.
Once back cover was removed thermostat was located attached to top pipe going into coil using a spring clamp.
Cut the wires just outside the crimp connectors going into thermostat. Released the spring clamp buy squeezing botton together.
Removed old badly corroded thermostat.
I wish I had attached the crimp connectors to the new thermostat wires before mounting it. Reaching way in the back, while turning shoulders verticly and trying to get the wire connectors set from both sides was awkward and uncomfortable...The biggest PIA of the whole task.
Once connected I let the fridge (thermostat) cool for 10 min. Turned the dial defrost timer to get it into defrost mode. Stupidly touched the heating element to see if it was getting warm...it was very hot.
Coils steamed...every looked like it was working. Unplugged, put back cover back on and retattached drawer mounts.
My freezer was frozen but my refrigerated side was not cooling, the temp was actually around 60-degrees. After inspecting i noticed no air was flowing through the vent from freezer side to fridge side. I removed everything from freezer and took the back wall panel off inside freezer section and immedietely noticed alot of ice on coils etc
... Read more. After researching i found the defrost timer was not working and thus allowing frost and ice to build up on coils and block air flow. My defrost timer was located on the front bottom left behind kick panel, using a phillips screwdriver i removed 2 screws and then disconnected wire harness to the defrost timer. Then i inserted new defrost timer and connected wire harness and then put the 2 screws back in. My fridge is now working great and the ice build-up is gone and i am getting good air flow .. temps on fridge side are now between 32-34degrees. This was an easy project and saved me alot of money doing myself
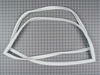
I pulled off the old door gasket which came off really easy. I was hoping the new one would go on as easy as just popping it in place but it didnt work. I had to remove the inside door panel. The gasket wouldnt lay entirely flat in the inside groove so I used a bead of RTV around the entire circumference which helped to hold it in place w
... Read morehile reattaching the panel back onto the door. The screws fit on the under side of the magnetic portion of the gasket. In order to access the screw holes the gasket has to be lifted which sometimes causes the gasket to pull from the lip on the back side of the panel making the RTV get everywhere. After every screw was in place and lightly tightened the panel had to be adjusted to allow for the proper closing of the door. This was the worst part, fortunatly the screws left a slight indentation of where they were before I removed them so it gave me a nice reference. The hinge part of the new gasket requires a lubricant so it wont bind up when the door is closed. I didnt know about this until my order arrived and a part number was recommended for the type of lube. I just used Vasolene and it works fine. The pin bearing was really easy. Just unload the contents from the door, mine was the freezer door. I popped off the cap covering the screws and removed the screws while holding the door so it wouldnt drop on the floor. Once off I used a flat head screwdriver to pry out the old one and a light tap of a hammer to replace it with the new. I put it all together the way it came off. Now my fridge runs much less and the freezer door doesnt sag.