


Models
>
GTH18DBMALWW
GTH18DBMALWW General Electric Refrigerator - Overview
Sections of the GTH18DBMALWW
[Viewing 6 of 6]


Manuals & Care Guides for GTH18DBMALWW
Click to downloadKeep searches simple, eg. "belt" or "pump".

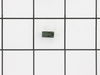
Evaporator Fan Grommet - Red
PartSelect #: PS963756
Manufacturer #: WR02X12008
If you notice that your refrigerator or freezer is noisy or too warm, you may need to replace the evaporator fan grommet. This part is red in color, and is about 1 inch in diameter. The evaporator fan...
$13.21
In Stock

Evaporator/Condensor Fan Grommet
PartSelect #: PS284555
Manufacturer #: WR02X10098
This evaporator fan motor grommet, or condenser fan grommet is built for refrigerators. It provides a cushion between the fan motor and the motor mounting bracket. It is made or round, black plastic a...
$11.59
In Stock

Light Switch
PartSelect #: PS8758429
Manufacturer #: WR23X10725
The interior light of your refrigerator is controlled by a switch that is activated when the door is opened and closed. If your refrigerator light will not turn on, there could be an issue with the sw...
$8.56
In Stock

Light Bulb - 40W
PartSelect #: PS217532
Manufacturer #: 40A15
This 40-Watt light bulb is sold individually and is a genuine OEM replacement option for your home appliances. It is specially designed to withstand extreme temperatures, so this bulb is compatible wi...
$11.02
In Stock

Compression Ring
PartSelect #: PS1015726
Manufacturer #: WR02X12149
This compression ring is meant to hold the evaporator fan motor in place in the freezer compartment of your refrigerator. This is is a genuine OEM part. The tools needed to complete this repair are a ...
$9.88
In Stock

Lid Bumper
PartSelect #: PS284979
Manufacturer #: WR02X10540
The lid bumper or evaporator fan motor bumper in your refrigerator prevents the fan motor from scraping against the side bracket. If your refrigerator/freezer is noisy, the bumper could be worn down o...
$10.97
In Stock

Door Hinge Nylon Washer
PartSelect #: PS12344581
Manufacturer #: WR01X27364
This is the replacement hinge washer for your refrigerator. The hinge washer is mounted on the top of the door hinge pin, and supports the refrigerator door, allowing it to open and close easily. The ...
$9.47
In Stock

Screw
PartSelect #: PS1020128
Manufacturer #: WR01X10590
This refrigerator door handle mounting screw connects your refrigerator door to the handle. The part is less than 1 inch in length, and can come in both silver and gold colors. When installing this sc...
$8.06
In Stock


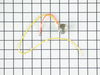
Defrost Heater
PartSelect #: PS303768
Manufacturer #: WR51X10038
Also known as Heater Conduction.
$75.77
In Stock

Snack Pan Slide - Left Side
PartSelect #: PS306780
Manufacturer #: WR72X10055
This part is the replacement snack pan slide rail for your refrigerator. It is made of white plastic and is approximately 16 inches by 2 inches. The crisper draw will slide in and out along this rail....
$20.07
In Stock

Snack Pan Slide - Right Side
PartSelect #: PS651938
Manufacturer #: WR72X10086
This snack pan slide rail, also known as a drawer slide rail, is a genuine OEM replacement part for your refrigerator. This slide rail is white in color, and serves to help your snack pan slide in and...
$21.23
In Stock
Questions And Answers for GTH18DBMALWW
We're sorry, but our Q&A experts are temporarily unavailable.
Please check back later if you still haven't found the answer you need.
Common Symptoms of the GTH18DBMALWW
[Viewing 10 of 10]Noisy
Fixed by
these parts
these parts


Show All
Light not working
Fixed by
these parts
these parts

Show All
Fridge too warm
Fixed by
these parts
these parts

Show All
Freezer section too warm
Fixed by
these parts
these parts
Show All
Freezer not defrosting
Fixed by
these parts
these parts
Show All
Door won’t open or close
Fixed by
these parts
these parts

Show All
Clicking sound
Fixed by
these parts
these parts
Show All
Leaking
Fixed by
these parts
these parts

Show All
Will Not Start
Fixed by
these parts
these parts

Show All
Frost buildup
Fixed by
these parts
these parts
Show All


Keep searches simple. Use keywords, e.g. "leaking", "pump", "broken" or "fit".
Sticking Light Switch
I applied some tips learned by reading other reviews. So before I started I grabbed my trusty vise grip pliers and a small screw driver. I locked onto the switch actuator, the part that the refrigerator door pushes in, with the vise grips and pulled on it just hard enough to get the screw driver inserted in the right side to push in the c
... Read more
atch clip so the switch could be pulled out further each time the catch clip was depressed to the next detent. Then I used the screw driver on the left site to encourage the switch past the detents on the left and very quickly the switch was out of the mount. The wires from the refrigerator pulled out with the old switch. I unplugged the old switch from the wires and plugged in the new switch and shoved the new switch back into the mount, wiggled it a couple of times to make sure it was secure and the job was done. Once I applied the vise gripes at first, the whole job took less than a minute.
Read less
Parts Used:
-
Jonathan from Lilburn, GA
-
Difficulty Level:Really Easy
-
Total Repair Time:Less than 15 mins
-
Tools:Pliers, Screw drivers
116 of 144 people
found this instruction helpful.
Was this instruction helpful to you?
Thank you for voting!
Freezer coils icing up, fridge too warm
Had to remove inside panels to expose coils in freezer. Used hair dryer and towels to de-ice. Reading online learned about defrost heater (long thin glass tube with wire coil in it I could not see b/c up under the inside of the coils). Who would have guessed freezers have heaters in them!! And learned the defrost timer (inside the fridge)
... Read more
is just a continuous clock turning on and off the defrost heater. Anyways I used a screwdriver to turn the timer to defrost mode and by disconnecting the wires from each end of the heater and measuring the voltage, I found 70 volts there. Hmmm. I didn't know what was the right volt amount.
Reading online I also found out the defrost Thermostat is basically a temp actuated on/off switch for that heater, so that while the timer is sending *120* volts to the heater (which gets red hot by the way) the therm switches the heater off when the temp gets high in the freezer.
I eyeballed the therm ( it looks like a little can) and I saw that it was coming apart. The key at this moment is you can cut out and bypass the therm to see if the heater works. If it does you know the therm is the bad boy. But only do this as a momentary test or the heater will probably set your fridge on fire after a while!
Always remember to unplug the fridge when you are messing with the wires! And dry it up inside before putting your hands and tools in there!
So I ordered a therm using the model # of the fridge. Had to cut the old out and strip / wire nut the new one in.
Took too long b/c I was hung up on the heater being bad (after all it didn't heat up when I put the timer in defrost) and not knowing about the rights volts to the heater.
PartSelect helped out great! Thanks!
Read less
Parts Used:

-
Tim from West Palm Beach, FL
-
Difficulty Level:Easy
-
Total Repair Time:15 - 30 mins
-
Tools:Nutdriver
32 of 35 people
found this instruction helpful.
Was this instruction helpful to you?
Thank you for voting!
The refrigirator light would not come on.
Poped out with screwdriver the old swithch and unplugged the two wires. Plugged in the wires to the new swithch and pushed it back in the hole where the old switch was before.
Parts Used:
-
Jania from Novato, CA
-
Difficulty Level:Really Easy
-
Total Repair Time:Less than 15 mins
-
Tools:Screw drivers
24 of 38 people
found this instruction helpful.
Was this instruction helpful to you?
Thank you for voting!