Models > GSD3200J00WW > Symptoms > Not draining

Parts That Fix General Electric Dishwasher GSD3200J00WW Not draining

Not draining is a commonly reported symptom for the GSD3200J00WW General Electric Dishwasher, and we have put together a full guide on how to fix this. This advice is based on feedback from people who own this exact appliance. We have listed the most common parts for your GSD3200J00WW General Electric Dishwasher that will fix Not draining. We have included repair instructions, and helpful step-by-step video tutorials. If you are experiencing this issue, not to worry, DIYers just like you have fixed this, and shared their experience to help you!

Fixes Symptom 61% of time
★★★★★
★★★★★
19 Reviews

Rated by 70 customers 


Really Easy 

15 - 30 mins 

Ratings submitted by customers like you who bought this part.   

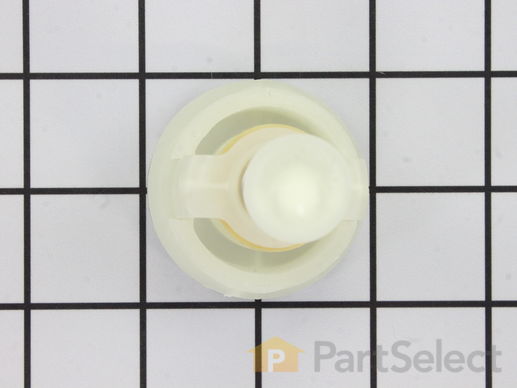
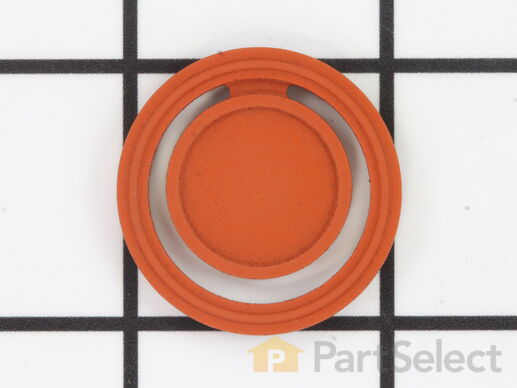
This is used for the check valve.

$ 24.34
  In Stock
PartSelect Number PS260690
Manufacturer Part Number WD24X10018

Replacing your General Electric Dishwasher Piston and Nut Assembly

Replacing your Piston and Nut Assembly

Customer Repair Stories

Nothing more than a worn out check valve,easilly accessible and easilly changed. The valve wouldnt close fully due to deteriation of the piston stopper.

Removed bottom tray from the dishwasher and in the back there is a screen with 5 hex head screws. Removed the screws and then lifted the screen out to expose the vavle. Unscrewed the valve by hand an installed the new one,hand tighten only. Reversed order for reassembly.
  • Kevin from Roanoke, VA
  • Difficulty Level:
    Really Easy
  • Total Repair Time:
    Less than 15 mins
  • Tools:
    Nutdriver
17 of 19 people found this instruction helpful.
Was this instruction helpful to you?
Thank you for voting!

Dishwasher wouldn't fully drain

I removed the four screws holding the screen and molded plastic cage inside the rear of the dishwasher to expose the check valve assembly. I then unscrewed the piston and nut assembly with my hand and replaced it with the new one. I found that the rubber cone shaped valve on the old piston and nut assembly was entirely disintegrated. This easy repair solved the problem.
  • Dan from Minnetonka, MN
  • Difficulty Level:
    Really Easy
  • Total Repair Time:
    Less than 15 mins
  • Tools:
    Nutdriver
189 of 204 people found this instruction helpful.
Was this instruction helpful to you?
Thank you for voting!
Fixes Symptom 15% of time
★★★★★
★★★★★
4 Reviews

Rated by 25 customers 


Easy 

30 - 60 mins 

Ratings submitted by customers like you who bought this part.   

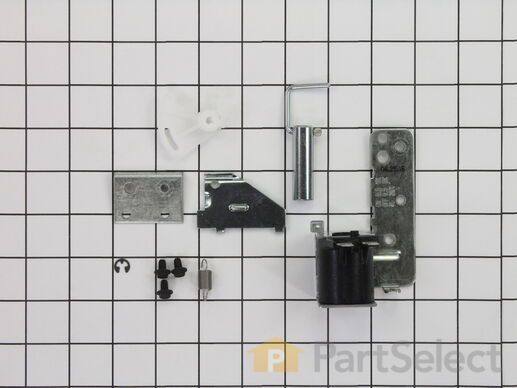
This kit includes the armature and linkage assembly.

$ 78.79
  In Stock
PartSelect Number PS260117
Manufacturer Part Number WD21X10060

Replacing your General Electric Dishwasher Drain Solenoid Kit

Replacing your Drain Solenoid Kit

Customer Repair Stories

Dishwasher not draining

Actually, the problem started with a Timer Motor failure, and that let the dishwasher run for 4 hours (doh!). Immediately, I tested and ordered the timer, which unfortunately didn't come as just a motor, it came as an assembly. I installed it, and the dishwasher ran the cycle just fine.

Except it didn't drain.

After poking around, I noticed the drain solenoid had apparently been overworked; the timer must have failed on DRAIN. The solenoid was severely overheated, and thankfully didn't cause a fire, but it was somewhat melted. Replaced the solenoid, and all is well, especially when my wife was eyeballing a $1000 Bosch!
  • Christopher from Woodbridge, VA
  • Difficulty Level:
    Really Easy
  • Total Repair Time:
    Less than 15 mins
  • Tools:
    Pliers
15 of 17 people found this instruction helpful.
Was this instruction helpful to you?
Thank you for voting!

D/W would not drain. Water standing in bottom.

It is a simple process to replace the drain solenoid on these dishwashers, having replaced several in the past few months.

After removing the front bottom panels, I removed the 2 screws holding the old solenoid, unplugged the wire harness, and then switched over the springs to the new solenoid. Assembly was installing 2 screws, and plugging in the wire harness.

I work on a 260 + unit property, as well as working for a property management company who rents single family homes.

PartSelect.com is an excellent source of parts, shipping in a quick manner, allowing the repairs to be completed in a timely manner. Thank you.
  • Ed from Cornelius, NC
  • Difficulty Level:
    Really Easy
  • Total Repair Time:
    Less than 15 mins
  • Tools:
    Nutdriver, Screw drivers
65 of 71 people found this instruction helpful.
Was this instruction helpful to you?
Thank you for voting!
Fixes Symptom 7% of time
★★★★★
★★★★★
9 Reviews

Rated by 57 customers 


Easy 

1- 2 hours 

Ratings submitted by customers like you who bought this part.   

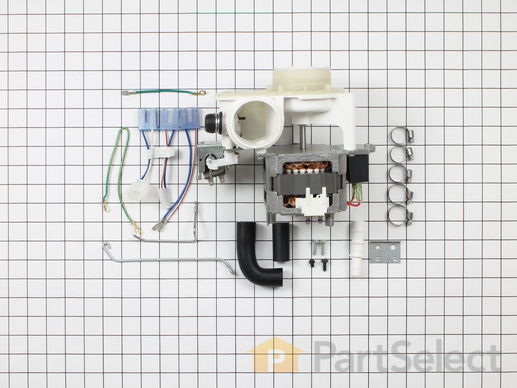
This is a pump and motor kit for your dishwasher. This assembly replaces many old-style pump and motor kits that were manufactured since 1970. The instructions are included with this kit in to assist you. Take note that this is a completely redesigned kit by the manufacturer and now includes the drain solenoid. You may need to replace this part is if your appliance is leaking, not draining properly, noisy, or will not start or clean your dishes properly.

$ 249.86
  In Stock
PartSelect Number PS260801
Manufacturer Part Number WD26X10013

Replacing your General Electric Dishwasher Motor and Pump Kit

Replacing your Motor and Pump Kit

Customer Repair Stories

dishwasher pump valve leaking at shaft

took dishwasher out- put on table to work on-removed wire brace- disconected drain outlet- disconnected top drive seal- removed wire clip connector- removed motor unit----------------
installed new motor/drain unit--used new longer wire brac used adapter to connect electical leads-
tightened clamps and bingo it worked and didnt' leak. good job on the supplying of all the necessary adapers.
  • richard from las vegas, NV
  • Difficulty Level:
    Easy
  • Total Repair Time:
    1- 2 hours
  • Tools:
    Screw drivers, Socket set, Wrench (Adjustable)
40 of 47 people found this instruction helpful.
Was this instruction helpful to you?
Thank you for voting!

Motor was getting noisier every time we used the dishwasher. We knew it was just a matter of time before it totally quit.

The most difficult part was removing the dishwasher from below the counter. Once that was complete, I simply turned the washer onto it's front surface to access the pump easier. Simply disconnected the electrical connectors, loosened the three hose clamps holding the hoses to the pump. Lastly removed a stiff arm bracket holding the pump. Reversed the order to install the new one using a longer bracket provided with the new unit. Hooked up the electrical connections last and slid the washer back in place. The washer runs like new now and is not making noise. The replacement part was a perfect match.
  • Glenn from Clemmons, NC
  • Difficulty Level:
    Easy
  • Total Repair Time:
    30 - 60 mins
  • Tools:
    Nutdriver, Pliers, Screw drivers
48 of 51 people found this instruction helpful.
Was this instruction helpful to you?
Thank you for voting!
Fixes Symptom 7% of time

Rated by 5 customers 


Easy 

30 - 60 mins 

Ratings submitted by customers like you who bought this part.   

  No Longer Available
PartSelect Number PS263956
Manufacturer Part Number WD8X219
Fixes Symptom 2% of time
★★★★★
★★★★★
1 Review

Rated by 3 customers 


Really Easy 

30 - 60 mins 

Ratings submitted by customers like you who bought this part.   

  No Longer Available
PartSelect Number PS260545
Manufacturer Part Number WD22X10024

Customer Repair Stories

accumulation of dirt in behind screen in back of washer

Pulled dishwasher out. Unscrewed 4 screws holding body valve, disconnected 2 hoses and replaced valve, put machine back together in reverse order.
  • William from Belmar, NJ
  • Difficulty Level:
    Really Easy
  • Total Repair Time:
    15 - 30 mins
  • Tools:
    Screw drivers, Wrench set
14 of 20 people found this instruction helpful.
Was this instruction helpful to you?
Thank you for voting!

22 Yr Old Dishwasher Would Not Pump Out Water

22 Year old dishwasher . . . Not worth repairing I thought so I pulled it out to dispose of it. Before I did, I went online to see if any parts were still available. . . To my surprise partselect. Com had it all! My problem was a plugged chamber located on rear wall of unit. A 20 minute repair once the new part arrived. Part arrived in 3 days but was broken inside of pkg. I called and the operator apologized profusely. . . She told me to keep the defective and explained my cc would temporarily be charged for replacement but as soon as they received a credit from supplier my credit will appear on my cc stmt. I had a replacement the following day. . . What a company!!!!
  • Joseph from Lowell, MA
  • Difficulty Level:
    Really Easy
  • Total Repair Time:
    1- 2 hours
  • Tools:
    Pliers, Screw drivers, Wrench (Adjustable)
14 of 19 people found this instruction helpful.
Was this instruction helpful to you?
Thank you for voting!
Fixes Symptom 2% of time

Rated by 2 customers 


Easy 

30 - 60 mins 

Ratings submitted by customers like you who bought this part.   

$ 7.68
  In Stock
PartSelect Number PS258169
Manufacturer Part Number WD01X10177
Fixes Symptom 2% of time
★★★★★
★★★★★
5 Reviews

Rated by 13 customers 


Easy 

30 - 60 mins 

Ratings submitted by customers like you who bought this part.   

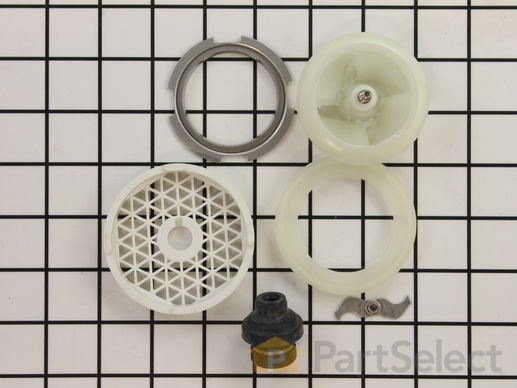
The impeller and seal kit is used in a dishwasher. The kit includes all the parts needed to do this repair, including the impeller, seal, blade, filter, skidder and skidder holder. If your washer is leaking, not cleaning dishes properly, or not draining, then replacing some parts in the pump can help solve the issues mentioned. The tools needed for this installation project are: 5/16 nut driver, 1/4 inch nut driver, flat-blade screwdriver, Phillips screwdriver, and pliers. Refer to the manual provided by the manufacturer for installation instructions and accurate guidance. Remember to unplug your dishwasher from the power source and wear work gloves as a safety precaution.

  No Longer Available
PartSelect Number PS259598
Manufacturer Part Number WD19X10032

Replacing your General Electric Dishwasher Impeller and Seal Kit

Replacing your Impeller and Seal Kit

Customer Repair Stories

Dishwasher was leaking between the pump motor and pump assembly

The repair went smoothly. There were actually instructions included with the parts, so that was nice. The only "gotcha" I found was that . . . after you take off the old food-chopper, you have unscrew the old impeller from the motor shaft. This was a bit difficult and you'll want some good pliers to do it. Don't worry about stripping where the food chopper screwed on-to, that part is attached to the impeller and there is a new one on the new impeller. When I re-installed everything onto the dishwasher, it rattled the first couple of times while the wear-ring was finding it's seat. Don't worry, that's normal. It went away by the third wash. I think I still have a small crack in the pump housing, though. The pump housing is two halves of molded plastic fused together along a seam, and I think the seam is starting to leak. It's about one drop every 45 seconds. I'm thinking JB Weld will fix it.
  • Jesse from Royal Oak, MI
  • Difficulty Level:
    A Bit Difficult
  • Total Repair Time:
    30 - 60 mins
  • Tools:
    Pliers, Screw drivers
10 of 13 people found this instruction helpful.
Was this instruction helpful to you?
Thank you for voting!

Dishwasher pump leaked all the time

I received my dishwasher as a hand me down, my Aunt never liked the way it cleaned. After it sitting for about 2 years i installed it in my house and found that it leaked all the time from where motor shaft went into the pump housing. After disassembling everything and scouring parts sites online, I found the parts, ordered them. 3 days later i had the parts, and the next day I had a fully functioning leak free dishwasher.
  • Rob from Newell, IA
  • Difficulty Level:
    A Bit Difficult
  • Total Repair Time:
    30 - 60 mins
  • Tools:
    Pliers, Screw drivers, Socket set, Wrench (Adjustable)
15 of 21 people found this instruction helpful.
Was this instruction helpful to you?
Thank you for voting!
Fixes Symptom 1% of time
★★★★★
★★★★★
4 Reviews

Rated by 5 customers 


Really Easy 

30 - 60 mins 

Ratings submitted by customers like you who bought this part.   

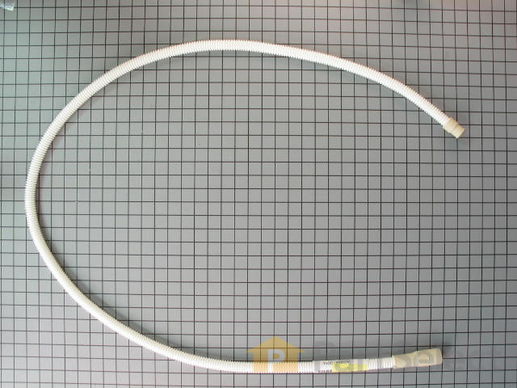
This drain hose is an OEM, manufacturer-approved replacement part for your dishwasher. The drain hose filters out the wastewater from the dishwasher. If there is a hole in it, water will leak out of your dishwasher. Shut off the water and power to the unit before beginning this repair. Accessing the drain hose involves unscrewing the dishwasher and pulling it out. Remove the clamp holding the hose in place to its connection under the sink, using a 5/16ths socket. Disconnect the fill line. Use a 1/4 inch nut driver to loosen the clamp at the other end of the drain hose. Keep a towel handy for any water still inside. Keep the clamps for use on your new drain hose. Reinstall all hoses and lines in reverse order.

$ 34.01
  In Stock
PartSelect Number PS260686
Manufacturer Part Number WD24X10014

Customer Repair Stories

Couldn't drain water

I connected one end of hose to the drain using a hose clamp and screwdriver then connected the other end to the dishwasher using anouther hose clamp and a screwdriver..
  • Janice from Rockville, MO
  • Difficulty Level:
    Really Easy
  • Total Repair Time:
    Less than 15 mins
  • Tools:
    Screw drivers
4 of 9 people found this instruction helpful.
Was this instruction helpful to you?
Thank you for voting!

Stinky Dishwasher

I pulled the dishwasher out and detached the drain hose. I attached the new drain hose after cleaning out the connection to the garbage disposal.

Now my dishwasher doesn't stink anymore!
  • Jeremy from Hailey, ID
  • Difficulty Level:
    Easy
  • Total Repair Time:
    30 - 60 mins
  • Tools:
    Screw drivers, Socket set
8 of 9 people found this instruction helpful.
Was this instruction helpful to you?
Thank you for voting!
Fixes Symptom 1% of time
★★★★★
★★★★★
14 Reviews

Rated by 28 customers 


Easy 

30 - 60 mins 

Ratings submitted by customers like you who bought this part.   

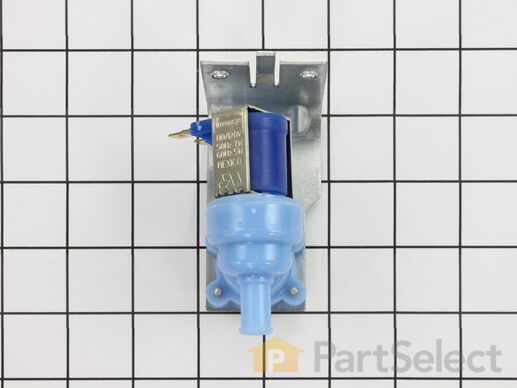
This water inlet valve should be located behind the lower kickplate panel in either the right or left corner. The attaching solenoids on the valve open and close according to the desired amount of water needed. This valve has a 3/8" inlet and comes with the mounting bracket.

$ 95.46
  In Stock
PartSelect Number PS259368
Manufacturer Part Number WD15X10003

Replacing your General Electric Dishwasher Water Inlet Valve

Replacing your Water Inlet Valve

Customer Repair Stories

Dishwasher was not filling with water or cycling.

In order to access the fill valve, dishwasher had to be removed from under countertop. Disconnected water supply line and drain hose under sink. Unplugged unit and removed 2 screws holding unit to countertop. I was then able to pull unit out and replace valve. After reinstallation, the same problem existed. Further research pointed to the control module, approx. $100.00 or the motor, approx. $250.00 - $300.00. I than began looking at new dishwashers, but I did email GE with the problem. They suggested I use citric acid or vinegar in hot water, pour into right rear portion of tub and wait 1/2 hour. After doing that, the dishwasher worked perfectly.
  • Jeffrey from Punta Gorda, FL
  • Difficulty Level:
    A Bit Difficult
  • Total Repair Time:
    30 - 60 mins
  • Tools:
    Screw drivers, Wrench set
41 of 46 people found this instruction helpful.
Was this instruction helpful to you?
Thank you for voting!

Dish washer is not running through cycles

First and formost before you buy read everything in trouble shooting your dishwasher. Then you do not buy parts you do not need. First you turn off power, then water. Remove two screws, a rubber hose and a hard line by unscrewing if you are lucky some contractors might sweat this on. No biggie just two extra steps that's all. do in reverse to assemble...
  • mike from huntley, IL
  • Difficulty Level:
    Easy
  • Total Repair Time:
    Less than 15 mins
  • Tools:
    Pliers, Screw drivers, Wrench (Adjustable), Wrench set
93 of 107 people found this instruction helpful.
Was this instruction helpful to you?
Thank you for voting!
Fixes Symptom 1% of time
★★★★★
★★★★★
12 Reviews

Rated by 56 customers 


Really Easy 

15 - 30 mins 

Ratings submitted by customers like you who bought this part.   

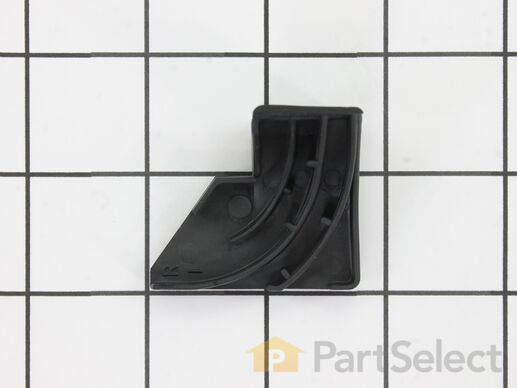
This baffle fits the lower right hand corner of some dishwashers. It is black rubber and has a matching left hand lower corner baffle. It is recommended that you replace and install both left and right at the same time. It will become evident that this part needs to be replaced if you are experiencing leaking or lack of draining. This is a very easy repair that requires no tools. Open the dishwasher door and simply use your hands to remove the baffle found in the lower right hand side of the dishwasher. Clean out any dirt and insert your new one into place.

$ 25.92
  In Stock
PartSelect Number PS263963
Manufacturer Part Number WD8X227

Replacing your General Electric Dishwasher Corner Tub Baffle - Lower Right

Replacing your Corner Tub Baffle - Lower Right

Customer Repair Stories

Dishwasher was leaking water on the lower right side.

Merely pushed the baffle into the slots in the lower right corner and the leak stopped.
  • Frances from Garner, NC
  • Difficulty Level:
    Really Easy
  • Total Repair Time:
    Less than 15 mins
Was this instruction helpful to you?
Thank you for voting!

The dishwasher leaked all over the floor.

I am a helpless old lady living alone. My dishwasher leaked......not bad at first. I put a towel in front of it. It got worse. I was adding towels each time I ran it. I asked my son to look at it. He said to find out where it was leaking from. I noticed it was coming from the right side. I looked and saw this thing (the real name was corner baffle) that looked kinda used up. I told my son what it was and he said go online and order it. I did. It came I took the old one out. It just lifted out. I cleaned all the debris out from where it sat with a toothbrush and put The new one in. Easy peasy. Don't need a grown son. I can take care of myself.
  • Linda from Fairfield, OH
  • Difficulty Level:
    Really Easy
  • Total Repair Time:
    Less than 15 mins
0 of 1 people found this instruction helpful.
Was this instruction helpful to you?
Thank you for voting!
Fixes Symptom 1% of time
★★★★★
★★★★★
19 Reviews

Rated by 53 customers 


Really Easy 

15 - 30 mins 

Ratings submitted by customers like you who bought this part.   

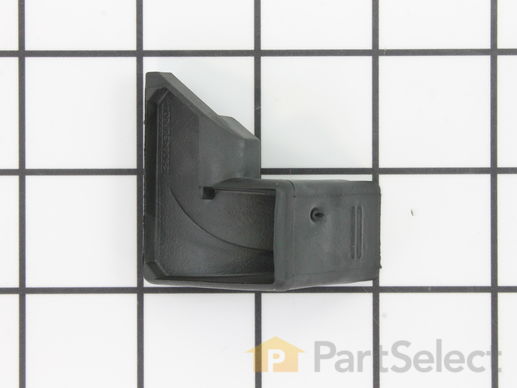
The corner tub baffle may also be known as the door baffle and is a part used on your dishwasher. The left and right side baffle on your dishwasher should be installed and replaced at the same time. This specific part is for the lower left side of your appliance, the right-side is sold separately. The function of the tub corner baffle is to prevent water from leaking through your dishwasher door. The function of this specific one is to stop water from leaking through the bottom left hand side of your dishwasher door. You will not need any tools to make this installation.

$ 23.87
  In Stock
PartSelect Number PS263964
Manufacturer Part Number WD8X228

Replacing your General Electric Dishwasher Corner Tub Baffle - Lower Left

Replacing your Corner Tub Baffle - Lower Left