Enter the code DIYDAD10 at checkout to apply your discount. Discount will be applied at checkout when the code is entered & applies to all parts. Cannot be combined with any other coupon or special offer & cannot be applied to a previously placed order. Not valid toward tax or shipping & handling. Discount has no cash value. Discount expires on June 17 at 11:59pm EST.
You've Got 10% Off Your First Order!Save 10% with code at checkout *click to copy coupon code
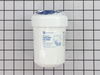
This OEM ice and water filter fits side-by-side and bottom-freezer GE models. The most common reason you would need to change this part is if you have never updated your model and it is no longer filt...
This sensor (Temperature Sensor, Thermistor, Refrigerator Temperature Sensor) sends the temperature reading of the compartment to the control board. If you notice your refrigerator is too warm, too co...
The interior light of your refrigerator is controlled by a switch that is activated when the door is opened and closed. If your refrigerator light will not turn on, there could be an issue with the sw...
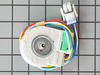
This evaporator fan motor circulates air to the fresh food compartments for efficient cooling. It powers the evaporator fan that draws air from the refrigerator and circulates it over the evaporator c...
This part is the replacement door handle fastener for your refrigerator. It is made of white plastic and metal, is sold individually, and measures approximately 1-1/4 inches by 1 inch. The door handle...
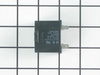
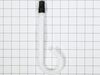
This part helps the compressor kick on and off while maintaining a constant temperature to keep things frozen in your freezer. This part has been updated by the manufacturer and may appear different t...
This evaporator fan blade is for your refrigerator, and it circulates air so that the temperature of the fridge is regulated. This model has 3 blades, and is a little more than 4 inches in diameter. I...
This part is a replacement filter bypass cap for your refrigerator. If you intend to use an external water filtration system for your refrigerator, the bypass cap will allow you to do so. To use a fil...
This door bin is for refrigerators. The door bin attaches to the inside of the refrigerator door and typically holds jars and bottles. Follow the instructions in the owner's manual for installing this part. (right hand)
We're sorry, but our Q&A experts are temporarily unavailable.
Please check back later if you still haven't found the answer you need.
2 questions answered by our experts.
Sort by:
< Prev
1
Next >
Search filter:
Clear Filter
Your search term must have 3 or more characters.
Keep searches simple. Use keywords, e.g. "leaking", "pump", "broken" or "fit".
Sorry, we couldn't find any existing answers that matched.Try using some different or simpler keywords, or submit your new question by using the "Ask a Question" button above!
Jack
January 6, 2024
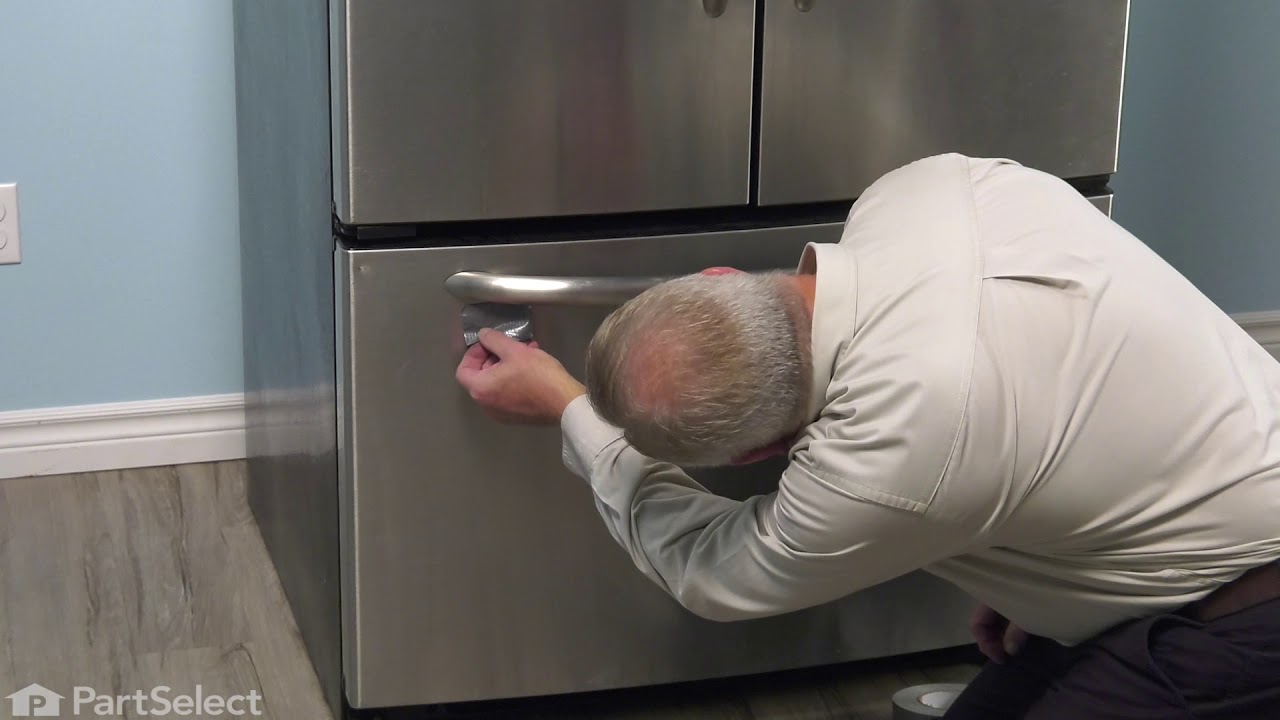
How to replace freezer door handle
For model number GNE25JMKFFES
Hello Jack, thank you for your question. The Freezer door handle is sold within a kit PS11736941. We found a video link for a similar model. . We hope this helps.
My freezer door handle is loose there are no set screws too remove. How do I remove the handle to tighten it.
For model number GNE25JMKFFES
Hi David,
Thank you for your question. According to your owner's manual, to install the freezer door handle, align the slots inside the handle endcap with the mounting fasteners on the door. Be careful to avoid scratching the door finish when aligning it on the door. Once the handle has been properly aligned, slide the handle to the right until it comes to a hard stop. Then use a rubber mallet to gently tap the left side of the handle until the handle can no longer move left or right. Use a few taps rather than heavy force when using the mallet. We hope this helps!
I went to a GE repair center to explain my problem, the service center reccomended that I have a techinician come out o look at it. $75.00 for the visit and what ever labor and materials wuld cost.
I went on line to see if there were others having this same problem and found that there were many with the same problem.
... Read more />After reading some of the ways that people found out what was wrong ...it became a matter of three components, the timer, heater or thermostat.
I tried the most common component and the less expensive one first , the thermostat switch I installed it very easily snipping two wires and attaching the news using wire nuts I used the diagram on this website to pinpoint the component and there has not been a problem since.
Unscrew old filter and remove(counterclockwise). Line up arrow on new filter with arrow on connection housing. Turn clockwise till resistance met. Do not overtighten. Follow directions. Simple.