This part is the replacement water line or tube for your refrigerator. It is made of white plastic and is sold individually. This tube supplies water to the ice maker and water dispenser If your refri...
$19.22
In Stock
Order within the next 6 hrs and your part ships today!
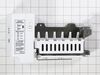
This part is the replacement ice tray for your refrigerator. The tray is made of white plastic and is approximately 9 inches in length, and 3 inches in width. It has the capacity for 8 ice cubes. The ...
$11.55
In Stock
Order within the next 6 hrs and your part ships today!
The wire harness is NOT available separately. Refrigerator ice maker kit AEQ36756901 is an original equipment manufacturer (OEM) part that fits some refrigerators in these series: Kenmore 795; Kenmore...
$304.94
In Stock
Order within the next 6 hrs and your part ships today!
Order within the next 6 hrs and your part ships today!
Questions And Answers for GM-L277USRH
Ask our experts a question about this model and we'll get back to you as soon as possible!
1 question answered by our experts.
Sort by:
< Prev
1
Next >
Search filter:
Clear Filter
Your search term must have 3 or more characters.
Keep searches simple. Use keywords, e.g. "leaking", "pump", "broken" or "fit".
Sorry, we couldn't find any existing answers that matched.Try using some different or simpler keywords, or submit your new question by using the "Ask a Question" button above!
H
February 26, 2023
How to replace the ice maker push in door, the switch is good?
For model number GM-L277USRH
Hello, thank you for contacting us. We have found the instructions for the replacement of the cap assembly, part number PS3530701. They may not exactly be of the same model, but the general instructions are the same. Firstly, get the front cover off by putting a putty knife under the panel and lifting it up a little bit to get the panel out. Now remove the plug connected to the wire harness. Then you have to remove the two quarter-inch screws that hold the plastic bracket. Now unthread the screw that holds the ice lever, and then take out the outer transparent plastic cover. Now remove the cap lever by pulling out the spring and detaching the strip connected to the lever. Replace the new cap kit by fitting the spring into its place and then re-screwing the screw that holds the cover of the ice cap assembly. Now put the two screws back on the plastic cover in order to put the panel back. Now plug in the back of the wire harness and make sure it locks into place. Lastly, you have to fit that front panel back into its place and make sure it will completely fit into its hooks. We hope this helps, good luck with this repair!
The replacement gasket does not have as strong a magnet as the original one. I removed the old one carefully so as not to cause more damage in case I have to put it back. Using Tongue suppressor I pushed new gasket into place and put a thin coating of protelem jelly on the gasket. I just have to make sure the door is closed each time to
... Read morebe sure of good seal.
To replace the warped tray, I found the service manual (pg. 124 below) which took some interpreting. Removed the lever. Then removed the assembly by two screws that are forward to the unit and go upwards. The insulation, sensor, and sensor cover are simply pulled down and off and the unit separated to removed the tray, and
... Read morethen insert the new tray. Proceed in reverse. Takes only a few minutes.
Examined old ice maker. It is held by some Philips screws. There are many screws you don't need to unscrew so look carefully. Then disconnected th dual in line connector. There is a little push tab to squeeze to release. Then the ground is connected with a screw. It's a little hard to see but unscrew that. My replacement came with no
... Read more instructions or screws so try not to drop the screws down in the netherlands of the fridge. The hardest part was maneuvering the icemaker to reattach the power and ground. Even with that pretty straight forward replacement.