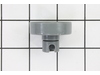
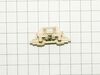
This is a replacement wheel and stud for your lower dish rack. This part is sold individually. The wheels are easy to replace, you just need to snap them in place after removing the old one.
$13.21
In Stock
Order within the next 10 hrs and your part ships today!
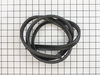
This part is the replacement tub gasket for your dishwasher. It is black in color and is made of rubber. The tub gasket fits around the circumference of your dishwasher tub, and creates a seal that pr...
$31.49
In Stock
Order within the next 10 hrs and your part ships today!
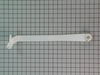
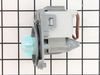
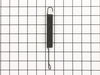
This door spring is approximately 7 inches long. The dishwasher door spring applies tension to the dishwasher door through the door hinge to prevent the door from dropping too quickly when the unit i...
Order within the next 10 hrs and your part ships today!
Questions And Answers for GLDT690D00BB
We're sorry, but our Q&A experts are temporarily unavailable.
Please check back later if you still haven't found the answer you need.
1 question answered by our experts.
Sort by:
< Prev
1
Next >
Search filter:
Clear Filter
Your search term must have 3 or more characters.
Keep searches simple. Use keywords, e.g. "leaking", "pump", "broken" or "fit".
Sorry, we couldn't find any existing answers that matched.Try using some different or simpler keywords, or submit your new question by using the "Ask a Question" button above!
John
December 31, 2019
Where can i get a replacement 'fibe filter's?
For model number GLDT690D00BB
Hello John and thank you for writing.
Filter part number: PS2355907 is in the list of compatible items for your model. We hope this helps. Please contact us anytime. If you would like to place an order with our company or inquire about pricing, availability, and shipping, you will have to contact our customer service. You can do so one of two ways: online: www.partselect.ca or telephone: 800-901-6912
. Thank you.
We ordered a whole new set for the lower rack and even though they were smaller than the original ones, we replaced them all and now the rack slides in and out of the dishwasher with ease!
I had to buy the inner door assembly since the seal at the bottom was not available separately. $104 for a $10 part.
Before you take anything apart, shut off the power. There is 110V in the door, and it’s pretty unforgiving.
The inner door assembly is manufactured with razor sharp edges all around. It is fastened w
... Read moreith approximately 11,000 Phillips screws, all of which fall under the dishwasher upon removal. The outer door will fall to the floor to indicate you have removed all the screws. Or, you could support the outer door, if you are smarter than I am.
Putting the new inner door on isn’t too bad. Mine was bent a little in shipping, but I bent it straight again, pretty much. I had my 19 year old son help hold it in place, so I could learn how “lame” this activity was. Once a couple of screws are installed, he can go back to sleeping 15 hours a day. Make sure the lower seal is aligned as you tighten the bottom screws.
Once you’re done, turn on the power and run the dishwasher. You’ll learn that the leak is due to a clogged discharge hose, and you just burned an hour an $104.
I pulled the dishwasher out, and discovered that the translucent pipe leading up the back of the machine was leaking at the point at which it fed into the middle tray.


 – Part Number: WD12X10319")