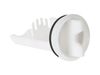
This part is the replacement door plunger or door strike for your washer. It is made of white plastic and is approximately 2 inches by 1.5 inches. The door strike attaches to the washer door and activ...
Ask our experts a question about this model and we'll get back to you as soon as possible!
1 question answered by our experts.
Sort by:
< Prev
1
Next >
Search filter:
Clear Filter
Your search term must have 3 or more characters.
Keep searches simple. Use keywords, e.g. "leaking", "pump", "broken" or "fit".
Sorry, we couldn't find any existing answers that matched.Try using some different or simpler keywords, or submit your new question by using the "Ask a Question" button above!
Luigi
March 8, 2022
Front door seal tirred a piece so now it leaks
For model number GFWS3505L0MS
Hi Luigi,
Thank you for your question. Where the door gasket is damaged it will need to be replaced. The part number listed under your model number for the door gasket is PS3487281. If you need help placing an order for it, customer service is open 7 days a week and anyone will be happy to assist you. Please feel free to give us a call. We look forward to hearing from you!
Remove bottom kick plate of washer. Remove 4 screws behind door that hold the latch/lock assembly. Reach up inside the washer from underneath to unplug 3 wire connectors. (This is a very tight spot). Once wires are off, part comes right out. Connect wires to the new part - this is by far the most difficult part of the job because it
... Read moreis way up inside the washer. Replace all bolts. Overall, pretty easy to do - just reconnecting the wires is a pain, but if you are patient it is not a big deal.
Removed three 7mm sheet metal screws from the bottom front panel. The drain pump is in the front right. Removed the manual drain screen to drain residual water from the system. A bucket was necessary to collect all the water. Disconnected the inlet and outlet hose. Disconnected the electric supply. Removed two Phi
... Read morellips screws holding the pump to the bottom of the machine. Slid the pump towards the rear to clear the support pegs and removed it from the front opening. Installation is the reverse of those steps.