This OEM 40 watt appliance light bulb is used for some ranges, refrigerators, freezers, and microwaves. Simply locate the existing bulb, unscrew it from its socket, and replace with new light bulb. If...
$19.73
In Stock
Order within the next 11 hrs and your part ships today!
The Frigidaire light bulb lens covers the interior light bulb in an oven. No tools are necessary to replace this item. After unplugging the appliance, slide off the wire bracket to remove the existing...
$10.90
In Stock
Order within the next 11 hrs and your part ships today!
This OEM broiler pan and grate insert are cooking accessories used in your oven to broil food. The pan catches drippings and prevents them from falling into the appliance, while the grate insert ensur...
$68.24
In Stock
Order within the next 11 hrs and your part ships today!
The door lock switch, or simply door switch, is used in ranges and ovens. The switch activates signals to the oven control board about the state of the door lock. If the light in the oven is not turni...
$42.78
In Stock
Order within the next 11 hrs and your part ships today!
The oven light socket allows you to screw in a light bulb so that you can see the inside of your oven. The light socket is located in the back of your oven, so you will need to remove the back panel t...
$46.58
In Stock
Order within the next 11 hrs and your part ships today!
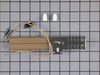
This flat glow bar igniter is designed for gas ovens. The function of the part is to ignite the gas to light the oven burner. If your gas igniter does not glow, or if it glows but will not light, you ...
$146.60
In Stock
Order within the next 11 hrs and your part ships today!
This is a light lens retainer clip and it is used in conjunction with the oven on your range. This retainer clip secures the light lens to the oven cavity. The part is made entirely of metal, and it i...
Turned power off at electrical panel. Pulled oven away from wall. Removed back cover (6 screws), then unplugged wires from old receptacle. I had to pull the squeeze clips backwards & break them to remove the old receptacle - couldn't squeeze them enough to remove them otherwise. The old receptacle came out through the inside of the oven,
... Read moreand the new one snapped in easily from inside the oven as well. Replaced wiring, installed new bulb, restored power & tested. Replaced back cover. Good time to vacuum under/behind where the oven usually lives before sliding it back to the wall.
Pull old switches out with pliers and replugged new switches. On main oven, plug casing was melted (wife left broiler on with oven door closed) so had to break apart old casing and individually plug the the wires into new switch and amazingly, it worked! Just gotta keep the door open when broiling.............
2) Remove oven door. There requires that you remove the two square drive (SD) bolts on the inside, partially close the door and lift it off the hinges.
3) Remove the grills.
4) At the back remove the rear shield (aluminum panel held by 2 SD sheet metal screws
... Read more.
5) this exposes the broiler igniter and its two wires. If its been replaced in past, there should be two porcelain screw-on wire connectors. Undo the connectors by turning them counter-clockwise. With a volt-ohmmeter, measure the resistance across the igniter. If its open circuited, its broken. If not, then its in the circuit board, and this help stop here. If this is the original igniter, it ends in a plastic connector. Disconnect by pulling it apart from its mating plug and again, check the continuity of the igniter. If its defective, reconnect the connector and cut each wire on the igniter side. Strip back about 1/2 inch of insulation on each lead.
6) inside the oven, using the SD driver, remove the 4 screw securing the broiler burner from the roof of the oven. The burner can now be removed, pulling the burner away from the gas jet on the right.
7) The igniter is now exposed and can be remove by removing the two SD drive screws.
8) Replace with the new igniter, being careful not to touch the black element, and feeding the wires though the rear oven wall.