Models > FFGF3052TSA > Symptoms > Will Not Start

Parts That Fix Frigidaire Range FFGF3052TSA Will Not Start

Will Not Start is a commonly reported symptom for the FFGF3052TSA Frigidaire Range, and we have put together a full guide on how to fix this. This advice is based on feedback from people who own this exact appliance. We have listed the most common parts for your FFGF3052TSA Frigidaire Range that will fix Will Not Start. We have included repair instructions, and helpful step-by-step video tutorials. If you are experiencing this issue, not to worry, DIYers just like you have fixed this, and shared their experience to help you!

Fixes Symptom 38% of time
★★★★★
★★★★★
14 Reviews

Rated by 11 customers 


Really Easy 

30 - 60 mins 

Ratings submitted by customers like you who bought this part.   

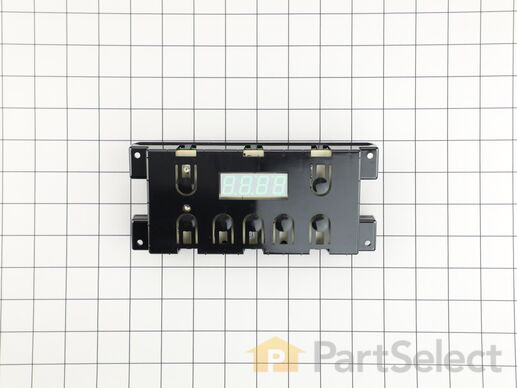
This part is a replacement electronic clock/timer for your oven. The clock timer will display the time, and can be used to set a timer. If the clock will not start, will not allow you to program the time or timer, or if the touchpad does not respond at all, you may need to replace the clock. As you will be working around electricity for this repair, be sure to disconnect power from the oven before you begin. This part is sold individually.

$ 152.82
  In Stock
PartSelect Number PS12717913
Manufacturer Part Number 5304518661

Customer Repair Stories

The clock unit went out so the oven could not work.

The screws had to be removed to take top off stove back and remove the unit. New unit was put in place and screws put back in.
  • Carol from Newberry Springs, CA
  • Difficulty Level:
    Easy
  • Total Repair Time:
    30 - 60 mins
  • Tools:
    Nutdriver, Screw drivers
31 of 36 people found this instruction helpful.
Was this instruction helpful to you?
Thank you for voting!

We had a transformer go out in our block and made a surge which blew out the electronic oven control

The repair of the oven was really easy . I removed a total of 7 screws with a 1/4 inch nut driver to remove the back cover of the instrument panel. I then unplugged the wires from the from the oven control and with a phillups screw driver I removed 4 screws that hold the oven control,the face plate with the words on it has to be taken off the old control and put on the new one . I then installed the new oven control by putting the 4 screws back on and plugging back the wires. I then replaced the back cover with the 7 screws and plugged the power back in the outlet, The clock has to be adjusted and your done.
  • Alberto from Houston, TX
  • Difficulty Level:
    Really Easy
  • Total Repair Time:
    15 - 30 mins
  • Tools:
    Nutdriver
86 of 98 people found this instruction helpful.
Was this instruction helpful to you?
Thank you for voting!
2 PROBE
Fixes Symptom 24% of time
★★★★★
★★★★★
22 Reviews

Rated by 5 customers 


Really Easy 

15 - 30 mins 

Ratings submitted by customers like you who bought this part.   

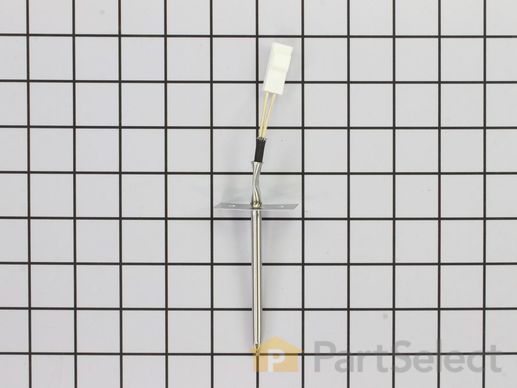
Note: Connector could be different than original. If so cut & splice wires together with porcelain wire nuts.

$ 22.77
  On Order
PartSelect Number PS11731754
Manufacturer Part Number 316233903

Replacing your Frigidaire Range PROBE

Replacing your PROBE

Customer Repair Stories

Error message on display ff30

Slid oven out removed one screw one plug replaced part took 5 minutes.told parts repair the error message and they sent me the correct part in two days will use them again saved me from Repair man wanted 85 dollars just to look at it my cost was 28 for probe and 8 dollars for shipping already helped neighbor with their stove they needed new ignighter 12 dollars repair place want 110 to come look at it this site walks you through repair best service!!!!
  • Roger from CHICAGO, IL
  • Difficulty Level:
    Really Easy
  • Total Repair Time:
    Less than 15 mins
  • Tools:
    Pliers
6 of 7 people found this instruction helpful.
Was this instruction helpful to you?
Thank you for voting!

Range would not come on

Turned off power, took back off stove removed old probe.
I had to splice wires since new probe ends did not match up.
the instructions were to splice the wires. I had the breaker off for about 3 hours. this is not in the instructions, but being a widow, I had to ask a few people why it would not come on after I connected the wires.
After waiting, I turned the breaker on and my range came back on.
  • MaryLou from Monroe, NC
  • Difficulty Level:
    Easy
  • Total Repair Time:
    30 - 60 mins
  • Tools:
    Pliers, Screw drivers
103 of 188 people found this instruction helpful.
Was this instruction helpful to you?
Thank you for voting!
Fixes Symptom 20% of time
★★★★★
★★★★★
28 Reviews

Rated by 10 customers 


Really Easy 

15 - 30 mins 

Ratings submitted by customers like you who bought this part.   

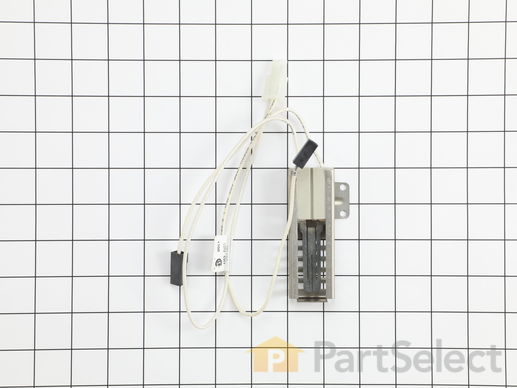
This is an oven igniter for various ranges. This part is used to ignite the burner within gas ovens. If your oven is not heating properly this igniter has likely failed and is in need of replacement. To replace this igniter, you will need pliers, a screwdriver, and a wrench. This igniter is an OEM part and does not come with any other accompanying parts or accessories.

$ 135.55
  In Stock
PartSelect Number PS12071409
Manufacturer Part Number 5304509706

Customer Repair Stories

Oven would not heat

Unplug the range, remove racks. Remove 2 screws from the bottom back corners ( this was the hardest part. I used a stubby screwdriver, but a longer one would be better. They are fairly long screws). Remove oven bottom, lifting from the rear. Remove burner cover. Bottom left corner is a triangle cover. Remove this too. Remove the 2 screws holding the old igniter in place. The igniter unplugs easily. ( I used pliers, the plug has a clip, and pliers grip better.) Install new igniter ( it only fits in one way ) reinstall mounting screws and covers. Replace oven bottom. (I didn't replace the 2 screws. The bottom sits solidly, and they are a bit of a pain.) Plug in, set clock, test for oven to fire up.
  • Aaron from MILLPORT, NY
  • Difficulty Level:
    Really Easy
  • Total Repair Time:
    15 - 30 mins
  • Tools:
    Screw drivers, Wrench (Adjustable)
4 of 5 people found this instruction helpful.
Was this instruction helpful to you?
Thank you for voting!

Long time before oven would light / propane smell

Unplug range, remove oven racks, remove 2 screws at the rear of oven bottom sheet metal panel. Lift the back of the panel and slide to the rear a little , then remove panel. Remove nut on top of heat shield and remove shield.. Open broiler draw slightly Note wire connections to gas valve. Remove Philips head screw from sheet metal guard bottom left rear to access wire connection. remove 2 hex head screws the hold igniter in place and install new igniter. remove spade connectors from gas valve and connect spade connectors from new igniter. , remove molex connector from bottom left rear and connect one from new igniter..Install shield in left rear bottom. install heat shield over burner and install nut. Install sheet metal panel in bottom of oven and 2 rear screws.. install oven racks and plug range back in. set clock and test your repair.
  • Thomas from CAMPTON, NH
  • Difficulty Level:
    Really Easy
  • Total Repair Time:
    30 - 60 mins
  • Tools:
    Nutdriver, Screw drivers
21 of 24 people found this instruction helpful.
Was this instruction helpful to you?
Thank you for voting!
Fixes Symptom 9% of time
★★★★★
★★★★★
2 Reviews

Rated by 2 customers 


Really Easy 

15 - 30 mins 

Ratings submitted by customers like you who bought this part.   

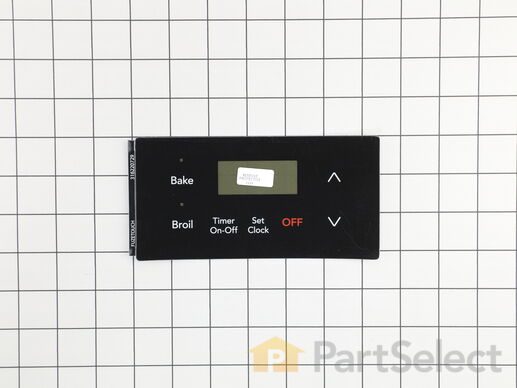
This part is a replacement clock overlay for your range. It is black in color and approximately 7 inches by 3 inches. The clock overlay is found on the control panel, and it covers and labels the selection buttons of the oven control board. If the touchpad will not respond, or the oven will not start, you may need to replace the clock overlay. Be sure to disconnect the range from the power source before you begin this repair. This part is sold individually and is an authentic OEM part.

$ 42.07
  In Stock
PartSelect Number PS12114509
Manufacturer Part Number 316220729

Customer Repair Stories

Broken control panel housing

I actually had to buy two parts, the cover and the control panel. But unfortunately I could not get them from the same place. But I replaced the control panel and the cover in about 15 minutes. No issues. Everytihg lokks brand new and works like a new stove. So I am very pleased.
  • Marc from Gastonia, NC
  • Difficulty Level:
    Really Easy
  • Total Repair Time:
    Less than 15 mins
  • Tools:
    Nutdriver, Screw drivers
Was this instruction helpful to you?
Thank you for voting!
Fixes Symptom 5% of time
★★★★★
★★★★★
4 Reviews

Rated by 1 customer 


Easy 

30 - 60 mins 

Ratings submitted by customers like you who bought this part.   

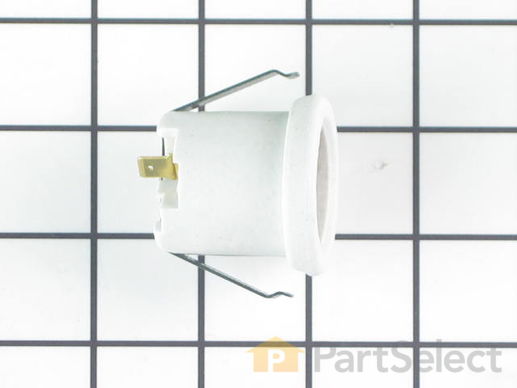
The oven light socket allows you to screw in a light bulb so that you can see the inside of your oven. The light socket is located in the back of your oven, so you will need to remove the back panel to access the socket for the repair. You will also need to remove the current light bulb and the light lens cover so that the old socket can be removed. As you will be working around electrical circuits for this repair, be sure to disconnect the power source from the oven before you begin work on the oven.

$ 46.67
  In Stock
PartSelect Number PS439060
Manufacturer Part Number 316116400

Replacing your Frigidaire Range Oven Light Socket

Replacing your Oven Light Socket

Customer Repair Stories

Oven light receptacle broken - bulb base broke off

Turned power off at electrical panel. Pulled oven away from wall. Removed back cover (6 screws), then unplugged wires from old receptacle. I had to pull the squeeze clips backwards & break them to remove the old receptacle - couldn't squeeze them enough to remove them otherwise. The old receptacle came out through the inside of the oven, and the new one snapped in easily from inside the oven as well. Replaced wiring, installed new bulb, restored power & tested. Replaced back cover. Good time to vacuum under/behind where the oven usually lives before sliding it back to the wall.
  • Paul from Spokane Valley, WA
  • Difficulty Level:
    Easy
  • Total Repair Time:
    30 - 60 mins
  • Tools:
    Screw drivers
64 of 94 people found this instruction helpful.
Was this instruction helpful to you?
Thank you for voting!
Fixes Symptom 4% of time
★★★★★
★★★★★
2 Reviews

Rated by 1 customer 


A Bit Difficult 

1- 2 hours 

Ratings submitted by customers like you who bought this part.   

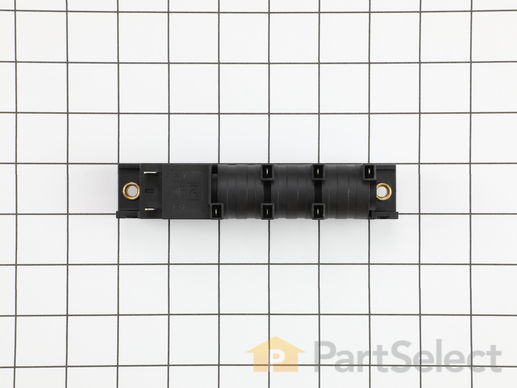
This part sends enough current to the igniter to create a spark to the bottom of the burner cap.

$ 67.44
  In Stock
PartSelect Number PS11770793
Manufacturer Part Number 808608804

Customer Repair Stories

Gas stove won’t light on half the appliance

First we replaced the wiring harness because a multi-meter said it wasn’t getting power. That was only partially true. The wiring harness was burned looking so we just kept it instead of sending it back. When the spark module got here the burner caps were removed and then the wires were noted where they went on the module and then the power and gas were turned off. The spark module was removed and then the stove was tested and we were back in business.
  • Julieta from ELMIRA, NY
  • Difficulty Level:
    A Bit Difficult
  • Total Repair Time:
    1- 2 hours
  • Tools:
    Screw drivers, Socket set
4 of 7 people found this instruction helpful.
Was this instruction helpful to you?
Thank you for voting!