


Models
>
FEX831FS0
FEX831FS0 Frigidaire Washer Dryer Combo - Overview
Sections of the FEX831FS0
[Viewing 8 of 8]


Manuals & Care Guides for FEX831FS0
Click to downloadInstall
Installation Instructions
(0.86MB)
Install
Installation Instructions
(2.81MB)
Manual
Owner's Manuals
(1.34MB)
Manual
Owner's Manuals
(1.55MB)
Care
Use and Care Manual
(0.52MB)
Wiring
Wiring Diagram
(0.28MB)
Keep searches simple, eg. "belt" or "pump".

Rear Drum Bearing Kit
PartSelect #: PS459829
Manufacturer #: 5303281153
This rear drum bearing kit is designed for use with dryers. It supports the rear of the drum in your appliance as it tumbles your clothes during the drying cycle. If your drum will not tumble, or if i...
$62.48
In Stock

Drum Support Bearing
PartSelect #: PS418807
Manufacturer #: 131825900
If your dryer does not tumble, will not start, is noisy, or is leaving marks on your clothing, you may need to replace the drum support bearing. The drum is supported at the rear by a bearing, which a...
$6.33
In Stock

Drum Glide - White
PartSelect #: PS5574052
Manufacturer #: 137513300
This white drum glide is used in a clothes dryer to ensure the front of the dryer drum is supported as it does rotations. *Please note: these are sold individually, however there are two of these in y...
$28.03
In Stock

Drive V-Belt
PartSelect #: PS1146950
Manufacturer #: 134511600
This rubber V-style drive belt slips on the motor pulley to bring the basket to the required speed. If you notice a burning rubber smell or grinding noises coming from your washer, your washer does no...
$24.93
In Stock

Dryer Lint Screen
PartSelect #: PS12585473
Manufacturer #: 5304516871
This dryer lint screen is for laundry centers.
Dryer lint screen captures lint and debris from the exhaust air flowing from the dryer.
Follow the instructions in the owner's manual when installing this part.
$51.85
In Stock

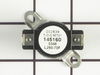
Thermal Limiter - Limit 220
PartSelect #: PS419402
Manufacturer #: 134120900
The dryer thermal limiter, also known as a thermal fuse, blows the fuse to cut off power to the dryer when the dryer begins to overheat. Once the dryer reached 220 degrees Fahrenheit, the heat cuts ou...
$27.24
In Stock

Door Catch
PartSelect #: PS418433
Manufacturer #: 131658800
The door catch on your dryer is an important part as it keeps your dryer door closed, in order to ensure no air or clothes can escape. This part works by holding the door strike, which allows the door...
$62.67
In Stock

Multi-Rib Drum Belt
PartSelect #: PS3408299
Manufacturer #: 137292700
The multi-rib drum belt is also known as a drive belt and is a part for your dryer. The function of the drum belt is to attach to the motor pulley. It will then spin the drum as the motor rotates. Ove...
$17.23
In Stock

Lower Front Felt Seal with Adhesive
PartSelect #: PS832645
Manufacturer #: 5303937183
The lower front felt seal with adhesive, also known as a drum felt seal, is used in dyers and allows the drum to easily glide on the front panel. For this repair project, you will need the following t...
$19.85
In Stock

Drain Pump - 120V 60 Hz.
PartSelect #: PS7783938
Manufacturer #: 137221600
This is a 120 volt, 60 hertz drain pump that is manufactured to remove water from the tub of your washer once your clothes are washed. This part is the pump and motor assembly, which includes a red fl...
$165.56
In Stock

Timer Knob
PartSelect #: PS418916
Manufacturer #: 131873304
This knob accepts a D-shaped shaft.
$47.15
In Stock

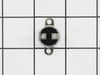
Dryer Drum Bearing Bracket
PartSelect #: PS12579101
Manufacturer #: 131724301
This drum bearing bracket is for dryers. Drum bearing bracket holds and supports the drum bearing
$10.64
In Stock
Questions And Answers for FEX831FS0
We're sorry, but our Q&A experts are temporarily unavailable.
Please check back later if you still haven't found the answer you need.
Sort by:
- < Prev
- 1
- 2
- Next >
Search filter:
Clear Filter
Your search term must have 3 or more characters.
Keep searches simple. Use keywords, e.g. "leaking", "pump", "broken" or "fit".
Sorry, we couldn't find any existing answers that matched.Try using some different or simpler keywords, or submit your new question by using the "Ask a Question" button above!
Loise
July 3, 2022
The tub is not filling with water to rinse please help.
For model number FEX831FS0
Hello Loise, Thank you for the question. If water is filling during the fill cycle but not the rinse cycle, this could indicate the timer switch is not going through the cycles properly. If you need help placing an order, customer service is open 7 days a week. Please feel free to give us a call. We look forward to hearing from you!
2 people found this helpful.
Was this helpful?
Thank you for voting!
Related Parts:
Timer


$249.58
In Stock
Barbara
March 5, 2024
Pump water out but don’t spin
For model number FEX831FS0
Hello Barbara, thank you for reaching out. Based on our understanding of the issue, we would suggest checking the spin bearing, part number PS446536, to solve the problem. Glad to be of help!
1 person found this helpful.
Was this helpful?
Thank you for voting!
Related Parts:
Spin Bearing

$77.44
In Stock
Eileen
March 22, 2024
What is the size of screws on inside of dryer drum
For model number FEX831FS0
Hi Eileen, thank you for contacting us. The dimensions of the screws on the inside of the dryer drum are approximately length 0.5 inches, width 0.25 inches, and height 0.25 inches. We hope this helps!
Was this helpful?
Thank you for voting!
David
September 20, 2022
what is part number for water inlet valve
For model number FEX831FS0
Hey David, thank you for reaching out. We have researched your model number and found that Water Inlet Valve, part number PS815533, is compatible with your model. We hope this helps! If you need help placing an order, customer service is open 7 days a week. Thanks again for your great question.
Was this helpful?
Thank you for voting!
Related Parts:
Valve

$180.51
In Stock
William
December 29, 2022
After the washer has completed its cycle, water continues to run into the tub. Both hot and cold. Has to shut off at the cut off faucets.
For model number FEX831FS0
Hello William, thank you for your question. The part that controls the water intake is the Water Inlet Valve PS815533. Thank you and have a great day.
Was this helpful?
Thank you for voting!
Related Parts:
Valve
$180.51
In Stock
- < Prev
- 1
- 2
- Next >
Common Symptoms of the FEX831FS0
[Viewing 12 of 12]Noisy
Fixed by
these parts
these parts


Show All
Door won’t close
Fixed by
these parts
these parts


Show All
Will not drain
Fixed by
these parts
these parts


Show All
Marks left on clothes
Fixed by
these parts
these parts

Show All
Leaking
Fixed by
these parts
these parts


Show All
Will not agitate
Fixed by
these parts
these parts


Show All
Burning smell
Fixed by
these parts
these parts

Show All
Too hot
Fixed by
these parts
these parts

Show All
Spins slowly
Fixed by
these parts
these parts
Show All
Will Not Start
Fixed by
these parts
these parts

Show All
Drum Not Spinning
Fixed by
these parts
these parts

Show All
Not draining
Fixed by
these parts
these parts
Show All


Keep searches simple. Use keywords, e.g. "leaking", "pump", "broken" or "fit".
Loud Squeaking
1. Unplug dryer from outlet
2. Using Lg. flat screwdriver, pry under the front edge of the top and release two spring tabs
3. Lift up top and tilt back out of your way
4. Unscrew two phillips scews on inside of front panel
5. Lift up and out the front panel. Two spring clips at bottom.
6. Rlease tension on drum be ... Read more lt at the motor. Access panel at rear of dryer.
7.Unscrew 3 screws from inside, center rear of drum.
8. Remove drum through the front of the dryer. You may have to spread the sides apart a little bit for it to fit
9. Lift up on the rear drum bearing to remove it from the bearing retainer. ( U shaped plastic socket)
10. unsrew 2 screws and remove the bearing retainer, ground ball. Ball retainer is on outside of dryer.
11. Vacuum everything--duct, blower, lint trap, ect.
12. Intall new bearing retainer and grounding ball, an assistant is helpful at this time, one to hold ball retainer on rear of dryer, one to screw it in from the inside
13. reassemble remainder of parts in reverse order.
Read less
Parts Used:
-
Frank from Boyertown, PA
-
Difficulty Level:Easy
-
Total Repair Time:15 - 30 mins
-
Tools:Nutdriver, Screw drivers
333 of 349 people
found this instruction helpful.
Was this instruction helpful to you?
Thank you for voting!
replace broken drive belt
carefully pry up on front washer top to release plastic keeper pins,remove 2 phillips screws from beneath lower front washer panel,slightly lift upward on panel to release.remove old broken belt,push new belt beneath large tub pulley,put belt on small motor pulley,push back belt tension /idler arm,start belt on large tub pulley,turn tub p
... Read more
ulley by hand to run belt on,release tension on idler arm.replace front panel and lower top.WALAAH!!!! you are done.
Read less
Parts Used:
-
rodney from fairfield bay, AR
-
Difficulty Level:Really Easy
-
Total Repair Time:15 - 30 mins
-
Tools:Screw drivers
276 of 308 people
found this instruction helpful.
Was this instruction helpful to you?
Thank you for voting!
Thermal Limiter opened
Unplugged Dryer.
Opened top of Dryer, over the drum.
Removed Thermal Limiter.
Tested the Thermal Limiter - found it was open.
Checked all vents and exhaust tube for lint build-up.
Replaced Thermal Limiter.
Closed top of dryer.
Plugged Dryer back.
Tested Dryer - it works.
Opened top of Dryer, over the drum.
Removed Thermal Limiter.
Tested the Thermal Limiter - found it was open.
Checked all vents and exhaust tube for lint build-up.
Replaced Thermal Limiter.
Closed top of dryer.
Plugged Dryer back.
Tested Dryer - it works.
Parts Used:
-
Stephen from Newnan, GA
-
Difficulty Level:A Bit Difficult
-
Total Repair Time:15 - 30 mins
-
Tools:Pliers, Screw drivers
242 of 318 people
found this instruction helpful.
Was this instruction helpful to you?
Thank you for voting!