Models > FEC32C4AS1

FEC32C4AS1 Frigidaire Cooktop - Overview

Sections of the FEC32C4AS1

[Viewing 4 of 4]

Manuals & Care Guides for FEC32C4AS1

Click to download
Keep searches simple, eg. "belt" or "pump".
Drip Bowl - 8" – Part Number: 316048413
Drip Bowl - 8"
★★★★★
★★★★★
(100)
PartSelect #: PS437595
Manufacturer #: 316048413
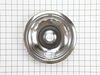
This chrome drip bowl is designed for use with electric cooktops and ranges. This drip bowl is sold individually. At the widest point this part has a diameter of approximately 10 inches. It sits benea...
$12.59
  In Stock
Chrome Drip Bowl - 6" – Part Number: 316048414
Chrome Drip Bowl - 6"
★★★★★
★★★★★
(78)
PartSelect #: PS437596
Manufacturer #: 316048414
The drip bowl catches grease and spills that come from cooking on your stove top. They are located under the heating elements. Drip bowls are often neglected and can become rusted and cracked. If your...
$7.46
  In Stock
Terminal Block Kit – Part Number: 5303935058
Terminal Block Kit
★★★★★
★★★★★
(37)
PartSelect #: PS470125
Manufacturer #: 5303935058
This part connects the wire harness to the surface element and is used for ranges. The kit includes interchangeable mounting brackets, ceramic wire nuts, heat shrink protective tubing, and wires. If y...
$16.24
  In Stock
Surface Burner Switch – Part Number: 318293827
Surface Burner Switch
★★★★★
★★★★★
(6)
PartSelect #: PS2342883
Manufacturer #: 318293827
$68.44
  In Stock
Single Control Knob – Part Number: 318196633
Single Control Knob
★★★★★
★★★★★
(1)
PartSelect #: PS648840
Manufacturer #: 318196633
This is only 1 knob and is sold individually.
$56.95
  On Order
Red Indicator Light Lens – Part Number: 318250801
Red Indicator Light Lens
PartSelect #: PS2349641
Manufacturer #: 318250801
This indicator light lens protects bulbs in ranges, ovens, stoves, and humidifiers. The lens keeps the bulb from getting cracked, scratched, and damaged. It is 1 inch long and 1 inch wide. If your len...
  No Longer Available
Surface Burner Coil Element - 8" - 2100W – Part Number: 5308011964
Surface Burner Coil Element - 8" - 2100W
★★★★★
★★★★★
(2)
PartSelect #: PS473948
Manufacturer #: 5308011964
$152.66
  In Stock
Burner Infinite Switch - 240V – Part Number: 318293818
Burner Infinite Switch - 240V
PartSelect #: PS1529263
Manufacturer #: 318293818
$71.41
  In Stock
Surface Element - 6" – Part Number: 316439802
Surface Element - 6"
PartSelect #: PS2342726
Manufacturer #: 316439802
$146.58
  Special Order
BUSHING – Part Number: 318146010
BUSHING
PartSelect #: PS443802
Manufacturer #: 318146010
$15.58
  In Stock
SCREW – Part Number: 08002868
SCREW
PartSelect #: PS411156
Manufacturer #: 08002868
$11.75
  Special Order
Indicator Light – Part Number: 5303323991
Indicator Light
PartSelect #: PS467720
Manufacturer #: 5303323991
  No Longer Available

Questions And Answers for FEC32C4AS1

Be the first to ask our experts a question about this model!

Common Symptoms of the FEC32C4AS1

[Viewing 3 of 3]
Element will not heat
Fixed by
these parts
Fixing Fixing Fixing
Show All
Will Not Start
Fixed by
these parts
Fixing
Show All
Oven not heating evenly
Fixed by
these parts
Fixing
Show All
Keep searches simple. Use keywords, e.g. "leaking", "pump", "broken" or "fit".
Old pans/bowls were corroded
Very easy---simply unplug the burners, remove the old pans and replace with the new ones

I was extremely pleased with the easy ordering and prompt delivery of parts that actually fit as they should!
Parts Used:
Chrome Drip Bowl - 6" Drip Bowl - 8"
  • John from Nisswa, MN
  • Difficulty Level:
    Really Easy
  • Total Repair Time:
    Less than 15 mins
48 of 53 people found this instruction helpful.
Was this instruction helpful to you?
Thank you for voting!
Burner would consistantly go to high no matter where the dial was positioned.
First I unplugged the stove.Removed the upper control panel back (10 phillips screws). Removed the plastic dial( pulls straight off). Removed the 2 screws behind the dial that is holding the switch in the control panel. Took one wire at a time off the old switch and put them on the new switch according to each electrical spade marking. L1, L2, H1, H2 and P. Installed the new switch in the control panel securing it with the 2 screws. Installed the dial, installed the upper back panel using the old screws. Plugged the stove back in and tested it.
Note: My new switches shaft was 1/8 of an inch longer so it does put the dial a little further away from the control panel. Wife says: It's OK, don't worry about it.
Parts Used:
Surface Burner Switch
  • Gary from Herrick, IL
  • Difficulty Level:
    Really Easy
  • Total Repair Time:
    15 - 30 mins
  • Tools:
    Screw drivers
32 of 37 people found this instruction helpful.
Was this instruction helpful to you?
Thank you for voting!
corroded terminals
was more of a job of splicing wires together than anything else. Loved the heat shrink electrical tubing
to put over the wires for insulation. used a hair
dryer. must buy more of that amazing stuff
Parts Used:
Terminal Block Kit
  • Gary from hollywood, FL
  • Difficulty Level:
    Easy
  • Total Repair Time:
    15 - 30 mins
22 of 24 people found this instruction helpful.
Was this instruction helpful to you?
Thank you for voting!