This drip bowl is used for electric cooktops and ranges, it is designed to sit under a 6-inch surface burner. It catches the drips and spills coming from the cookware on the surface burner. This drip ...
The surface burner plug-in block kit features a newer-style terminal block. This kit is designed for use with ranges and cooktops. This terminal block is how the coil element on your stove connects to...
This tub spring is also known as suspension spring, balance spring, or counterweight spring. It is sold individually. The function of the part is to counterbalance the weight of the motor on the front...
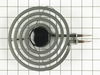
This is a delta frame surface unit, also known as coil element, for a stove, range, or oven. It is a 6-inch surface burner with a reinforced delta frame that carries 1250 watts and 240 volts. The burn...
This temperature sensor is used with self cleaning ovens. Its 1000 ohm resistance increases with temperature. This sensor has male leads and comes with ceramic wire nuts.
This surface burner control switch kit comes with screws, mounting plate, push on locking nut, shaft adapter, and instruction sheet. The burner switch is universal for 6 and 8 inch elements. It featur...
This electric range delta frame surface element with looped terminal ends measures eight inches and has five turns. It carries 2600 watts the center medallion is black in color.
Two screws remove the front of the sensor (put a pan under the sensor to catch the screws), One nut removes the rear cover to access the rear of the sensor. Separating the two halves of wiring harness takes a little dexterity. BIG TIP! Tie a string to the back of the sensor wire and pull the sensor out from the front making sure the strin
... Read moreg still shows thru the back. If you don't you have a 15 minute job trying to fish the wires at an angle thru the insulation (a very frustrating task). Untie the string from the old and tie it securely to the new. Pull the string from the back and Voila! your new sensor can be plugged in or wirer nutted to the old connection on the back of the stove. Replace the nut and the two screws and you're done!
The tub was out of alignment and water fell behind it and onto the floor. My brother-in-law suggested my problem could be the tub balancing spring and when I moved my washing machine, there it was on the ground. The schematic does not show where it hooks up. So after I did what I thought looked right, the machine still did not wo
... Read morerk properly. Then I replaced the three suspension springs and that didn't solve the problem. I found a whirlpool "do-it-yourself" repair book at the library and was prepared to tear into the machine. However, I did not have the tub balancing spring in the correct spot at one end. It hooks up from one of the outer bracket to the back of the housing unit along between the legs. There is a hole that had rusted through. I simply drilled a new hole nearby and low and behold it works! Easy fix - the frustration was with the poor schematic.
First i shut off the power since this is an electric cook top/range. I then removed the knob and the two screws that hold the burner switch in place. I removed the wires one at a time and connected each to the new switch. I then reattached the screws to the switch. The most difficult part to me was breaking off the switch stem at the
... Read moreright level. I got that done and finally selected the appropriate adapter for the stem/knob fit.