


Models
>
ESS38
ESS38 Caloric Range - Overview
Sections of the ESS38
[Viewing 6 of 6]


Keep searches simple, eg. "belt" or "pump".

Light Bulb - 40W
PartSelect #: PS884734
Manufacturer #: 8009
This an authentic OEM 40-Watt replacement light bulb, used in a number of household appliances. It is specially designed to withstand extreme temperatures, which is why these replacement bulbs are mos...
$11.73
In Stock

Surface Burner Plug-In Block Kit
PartSelect #: PS340571
Manufacturer #: 330031
The surface burner plug-in block kit features a newer-style terminal block. This kit is designed for use with ranges and cooktops. This terminal block is how the coil element on your stove connects to...
$13.42
In Stock

2 Piece Broiler Pan
PartSelect #: PS971245
Manufacturer #: 4396923
This is cookware designed for use in your range or oven. It is a two-piece dish that is used to grill or cook food while the broil function is on, meaning it can withstand high temperatures. This set ...
$37.51
In Stock

Wire Oven Rack
PartSelect #: PS11740769
Manufacturer #: WP314763J
This wire oven rack is used on some ovens and ranges. It is twenty-three inches long and it is made of metal.
$40.86
In Stock

Hinge Kit - Right Side
PartSelect #: PS2172201
Manufacturer #: R0706011
The hinge kit, or oven door hinge, is used in ranges and wall ovens. The hinge attaches to the right side of the door and controls how fast the door opens. At a specific angle, it allows the door to r...
No Longer Available
 – Part Number: WPY0063531")
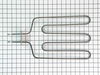
Bake Element (13.5" long x 18.5" wide)
PartSelect #: PS11757429
Manufacturer #: WPY0063531
This bake element, used in ranges, supplies heat for baking purposes and is located at the bottom of the oven. The terminals have a depth of three inches. The element is 13 1/2 inches long and 18 1/2 ...
$77.76
In Stock


Receptacle Mounting Bracket
PartSelect #: PS2177513
Manufacturer #: W10116809
This terminal block mounting bracket is a little over two inches long. It is made of metal.
No Longer Available

Flourescent Lamp
PartSelect #: PS11757431
Manufacturer #: WPY0067945
Sold individually.
$21.55
Special Order

KNOB, TOP ELEMENT
PartSelect #: PS2187004
Manufacturer #: Y0060235
This surface burner knob is two inches in diameter. It is black in color and has white lettering denoting the temperature range. This knob also has a metallic trim around its perimeter. Plus, this kno...
No Longer Available


Questions And Answers for ESS38
We're sorry, but our Q&A experts are temporarily unavailable.
Please check back later if you still haven't found the answer you need.
Common Symptoms of the ESS38
[Viewing 4 of 4]Element will not heat
Fixed by
these parts
these parts

Show All
Little to no heat when baking
Fixed by
these parts
these parts

Show All
Little to no heat when broiling
Fixed by
these parts
these parts
Show All
Door won’t close
Fixed by
these parts
these parts

Show All


Keep searches simple. Use keywords, e.g. "leaking", "pump", "broken" or "fit".
One burner didn't work all the time the other would go red hot
I unplugged the stove from the outlet, then removed the two burners I was going to be working on and the drip pans. Then I raised the top part of the stove and removed the screws holding the plug-in blocks to the stove. Then I cut the two wires going to the old plug-in block and stripped the wires back to match the new wire parts. Then I
... Read more
placed the sleeves over the new wires, then I placed the new wire beside the wire I stripped on the stove and screw on the wire cap making sure it was tight. I repeated this three more times, once I had all four wires connected I then placed the sleeves over the connections and heated them up until they were formed around the connection. Once I had all the connections done I placed one wire at a time into the plug-in block until it locked into place ( I looked at my old plug-in blocks first to make sure I placed the new wires in the correct way ).I then used the metal mounting bracket that matched my old ones and snapped the correct one onto each plug-in block. Before mounting them onto the stove I compared them to my old ones to make sure they were correct. Then I used the new screws to mount them to the stove. I took a second look at everything I had done before closing the top cover of my stove. After lowering the cover back into place I put both the drip covers in place and then installed the burners.I then plugged the stove back into the outlet and tried the burners. This was very simple and the video on the web site shows this very well which made my job very simple.
Read less
Parts Used:

-
Phillip from Pekin, IL
-
Difficulty Level:Really Easy
-
Total Repair Time:15 - 30 mins
-
Tools:Screw drivers
14 of 15 people
found this instruction helpful.
Was this instruction helpful to you?
Thank you for voting!
Purchased home but stove had no broiler pan.

-
Raymond from BLOOMINGTON, MN
-
Difficulty Level:Very Easy
-
Total Repair Time:Less than 15 mins
14 of 20 people
found this instruction helpful.
Was this instruction helpful to you?
Thank you for voting!
the broiler element burnt out
first I unplugged the stove,took the screws out of the pan that holds the element to the stove, then unplugged the element.then I plugged in the new element, then screwed the screws into the pan that holds the element into the stove. it was very easy.
Parts Used:

-
Deborah from Cumberland, RI
-
Difficulty Level:Really Easy
-
Total Repair Time:Less than 15 mins
-
Tools:Screw drivers
9 of 11 people
found this instruction helpful.
Was this instruction helpful to you?
Thank you for voting!