Models > E36DF76GPS5

E36DF76GPS5 Electrolux Range - Overview

Sections of the E36DF76GPS5

[Viewing 7 of 7]

Manuals & Care Guides for E36DF76GPS5

Click to download
Keep searches simple, eg. "belt" or "pump".
Main Terminal Block Kit – Part Number: 5304409888
Main Terminal Block Kit
★★★★★
★★★★★
(12)
PartSelect #: PS471605
Manufacturer #: 5304409888
Terminal block kits are also known as terminal boards, or terminal strips, and they are found in a wide variety of household appliances. Most often in ranges, wall ovens, and dryers. This kit attaches...
$9.37
  In Stock
Screw,control mtg. – Part Number: 5304453707
Screw,control mtg.
PartSelect #: PS1151895
Manufacturer #: 5304453707
$13.50
  In Stock
Indicator Light Lens – Part Number: 318228310
Indicator Light Lens
★★★★★
★★★★★
(5)
PartSelect #: PS1765368
Manufacturer #: 318228310
This is a red indicator light lens for an oven that covers the indicator light for the surface element. The indicator light signifies when the element is on and heated. This part is sold individually....
$11.23
  In Stock
Temperature Sensor – Part Number: 5304504897
Temperature Sensor
★★★★★
★★★★★
(6)
PartSelect #: PS11758156
Manufacturer #: 5304504897
$45.51
  In Stock
Steel Washer – Part Number: 316008401
Steel Washer
PartSelect #: PS436497
Manufacturer #: 316008401
This steel washer is also known as the range washer and is used on your oven door. The measurements for the steel washer are a three quarter inch outer diameter, and a one quarter inch inner diameter....
$11.23
  In Stock
Igniter/Orifice Mounting Screw – Part Number: 316240600
Igniter/Orifice Mounting Screw
★★★★★
★★★★★
(1)
PartSelect #: PS440022
Manufacturer #: 316240600
This part is the igniter/orifice mounting screw for your cooktop or range. It is approximately ½ an inch in length and is made of metal. The mounting screw connects the orifice to the cooktop. If the ...
$12.23
  In Stock
Left Front Orifice - 9.5K – Part Number: 316527500
Left Front Orifice - 9.5K
★★★★★
★★★★★
(2)
PartSelect #: PS2332664
Manufacturer #: 316527500
$17.23
  On Order
Right Rear Orifice – Part Number: 316527504
Right Rear Orifice
★★★★★
★★★★★
(1)
PartSelect #: PS2349573
Manufacturer #: 316527504
$18.32
  On Order
Screw with White Top -#10-32 X 3/4 – Part Number: 240442708
Screw with White Top -#10-32 X 3/4
PartSelect #: PS1765209
Manufacturer #: 240442708
Sold individually.
$9.35
  In Stock
MOTOR – Part Number: 5304528973
MOTOR
PartSelect #: PS16555576
Manufacturer #: 5304528973
$42.23
  In Stock
Burner Orifice - 14K – Part Number: 316527511
Burner Orifice - 14K
★★★★★
★★★★★
(1)
PartSelect #: PS2364101
Manufacturer #: 316527511
$22.72
  In Stock
Sealed Burner - 9.5K – Part Number: 316558300
Sealed Burner - 9.5K
★★★★★
★★★★★
(2)
PartSelect #: PS2364157
Manufacturer #: 316558300
$43.94
  In Stock

Questions And Answers for E36DF76GPS5

Ask our experts a question about this model and we'll get back to you as soon as possible!

1 question answered by our experts.
Sort by:
  • 1
Sorry, we couldn't find any existing answers that matched.Try using some different or simpler keywords, or submit your new question by using the "Ask a Question" button above!
Randall
October 20, 2023
We recently pulled out the oven to clean the floor and wall. Everything was in good working order. Once back in place and turned on the convection fan is now very noisy on start up.
For model number E36DF76GPS5
PartSelect logo
Hi Randall, thank you for contacting us. Based on the description that you have provided, the issue with convection fan blade, part number PS3409337. We would recommend checking the convection fan blades to fix the issue. We hope this solves your problem!

Was this helpful?
Thank you for voting!
Related Parts:
  • 1

Common Symptoms of the E36DF76GPS5

[Viewing 7 of 7]
Little to no heat when baking
Fixed by
these parts
Fixing Fixing
Show All
Will Not Start
Fixed by
these parts
Fixing Fixing
Show All
Element will not heat
Fixed by
these parts
Fixing Fixing Fixing
Show All
Oven is too hot
Fixed by
these parts
Fixing
Show All
Oven not heating evenly
Fixed by
these parts
Fixing Fixing
Show All
Little to no heat when broiling
Fixed by
these parts
Fixing
Show All
Door won’t open after self cleaning cycle
Fixed by
these parts
Fixing
Show All
Keep searches simple. Use keywords, e.g. "leaking", "pump", "broken" or "fit".
Cord was not tightened enough by delivery crew.
PF alarm appeared on display. Noticed clicking when cord was moved. Had arced for some time and melted original block. New part slightly different. Only has 3 lugs, old one had six. Stack using washers provided. Take note of colors before disassembly. Use caution while working through access opening. The edges are sharp. Only tools needed are phillips screwdriver, deep socket for lug nuts. Nut driver optional. Hope this is helpful.
Parts Used:
Main Terminal Block Kit
  • Timothy from Spring Valley, AL
  • Difficulty Level:
    Really Easy
  • Total Repair Time:
    15 - 30 mins
  • Tools:
    Screw drivers, Socket set
95 of 148 people found this instruction helpful.
Was this instruction helpful to you?
Thank you for voting!
Oven wouldn't operated. Error code F9
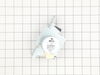
I called a repair place. They charged $54 to diagnose, (said it needed a new latch motor) then wanted $220 to complete the repair. I checked online prices and did it myself for about 15 minutes work and the latch motor itself ($44?).

Was necessary to uplug the range, pull it away from the wall and remove the back panel sheet metal, then 3 screws that mount the motor. Replace motor, reattach sheet metal. Plug in. Done. Ready to bake cookies.
Parts Used:
MOTOR
  • Richard from Centennial, CO
  • Difficulty Level:
    Really Easy
  • Total Repair Time:
    Less than 15 mins
  • Tools:
    Nutdriver
57 of 67 people found this instruction helpful.
Was this instruction helpful to you?
Thank you for voting!
Lens missing for burner "on" indication
Lifted the oven top, removed the controls cover, slipped the lens into the hole and slid the light holder device onto the lens
Parts Used:
Indicator Light Lens
  • Carol from Houma, LA
  • Difficulty Level:
    Really Easy
  • Total Repair Time:
    Less than 15 mins
  • Tools:
    Screw drivers
21 of 26 people found this instruction helpful.
Was this instruction helpful to you?
Thank you for voting!