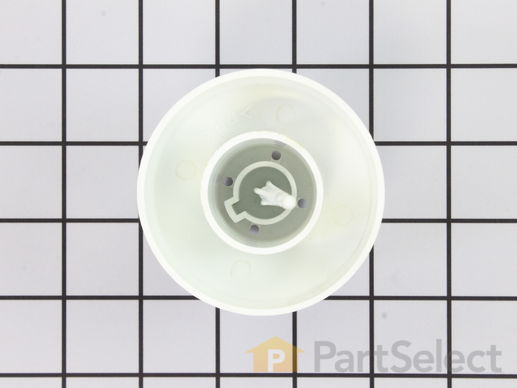
Part Location Diagram of WP99002363 Whirlpool Float Assembly
See part 32 in the diagram
( Grid squares measure 1x1 inch )
Customer Service Representative

Get in touch, we're here to help!

Daily 8am - 9pm EST

customerservice@partselect.com

Float Assembly WP99002363

 Fits your DU2J3 Dishwasher!
★★★★★
★★★★★
1 Review

Rated by 9 customers 

Easy 

15 - 30 mins 

Ratings submitted by customers like you who bought this part.

$ 11.10
  In Stock

Get this part fast! Average delivery time for in-stock parts via standard shipping: 1.8 days.

 Fits your DU2J3 Dishwasher!
PartSelect Number PS11747672
Manufacturer Part Number WP99002363
Manufactured by Whirlpool
Product Description

Float Assembly Specifications

This float assembly is all white in color and is made of plastic. Water that fills your dishwasher lifts this float, and when it reaches a certain level, it shuts off the flow of water into the dishwasher.
How Buying OEM Parts Can Save You Time and Money

How Buying OEM Parts Can Save You Time and Money

Troubleshooting
This part fixes the following symptoms:
Leaking | Will not fill with water | Not draining
This part works with the following products:
Dishwasher.
This part works with the following products:
Maytag, Jenn-Air, Magic Chef, Amana.
Part# WP99002363 replaces these:
9-12687, 912687, 99001004, 99001918, 99001922, 99002363, Y912687
Back to Top
Customer Reviews
Average Rating:
★★★★★
★★★★★
1 Review
5.0
Filter By Rating:
  • 5 Stars
    1
  • 4 Stars
    0
  • 3 Stars
    0
  • 2 Stars
    0
  • 1 Star
    0
Sort by:
  • 1
Sorry, we couldn't find any existing reviews that matched. Try using some different or simpler keywords.
  • 1
Customer Repair Stories
 Average Repair Rating: 3.8 / 5.0, 9 reviews. What's this?
Sort by:
  • 1
Sorry, we couldn't find any existing installation instruction that matched.
broken float assembly
I went to take the bottom front panel off and ended up dropping the screw down behind the baseboard and then found that I did not need to take the panel off. The broken end of the float was not obstructing and I was able to just drop the new float in place. I spent more time looking for a replacement screw than any thing else. Ran it and it works fine.
  • Ruth from Cresco, IA
  • Difficulty Level:
    Really Easy
  • Total Repair Time:
    15 - 30 mins
  • Tools:
    Screw drivers, Socket set
3 of 5 people found this instruction helpful.
Was this instruction helpful to you?
Thank you for voting!
Water Leaking Into Bottom Of Refridgerator Cabinet
First I turned off the refrigerator and allowed it to defrost. I had to use a blow dryer to save time since it iced up so bad. Removed all the racks, ice maker, and back panel in the freezer. Found the bimetal defrost thermostat, cut it loose from wiring harness and attached new one by matching the wires and reconnecting with two butt connectors. I then ran the hot blow dryer on the drain in the rear until the ice melted and it was open again since it was frozen up causing the water in the bottom of the refrigerator. Reassembled freezer compartment. Then I replaced the defrost timer by removing two screws, lowering the refridgerator control box. Removed old timer and installed the new one. I broke both studs used to hold it tight trying to pry them off but there was enough left to drop the timer in place without fasteners, you can not easily use the screws provided due to the location of the timer. Reconnected the wires as shown in the installion instruction and the wiring schematic found in the control box. Reassembled the control box and plugged in refrigerator. Waited about 15 minutes for it to recycle and problem was solved. Inially I thought something was wrong because it did not come on instantly but after 15-20 minutes it cut on and got cold. I replaced both components that typically cause the problem but you can determine exactly which one or both using an ohm meter. I did the entire job myself for just parts which is less than $75. 00 For a service call. Thanks, you folks are the greatest.
Other Parts Used:
Float Assembly Defrost Timer Bimetal Defrost Thermostat
  • TERRY from LAKELAND, FL
  • Difficulty Level:
    A Bit Difficult
  • Total Repair Time:
    30 - 60 mins
  • Tools:
    Nutdriver
9 of 18 people found this instruction helpful.
Was this instruction helpful to you?
Thank you for voting!
Leaking from the dishwasher on left side
Took off the float, the jam nut was hard to get off, we ended up breaking the bottom piece of the float to get it off, but that was okay because we had a new float. The new float went on real easy and the jam nut went back on real easy. The foam insulation strip was real easy to get off we got a good hold of one end and striped it off slowly so there was nothing left on the door, then we cleaned the surface and put on the new insulation strip. We ran dishwasher to test it and there was no leak. Awesome. Cheap and easy to repair. We were impressed.
Other Parts Used:
Inner Door Foam Insulation Strip Float Assembly
  • Theresa from Zimmerman, MN
  • Difficulty Level:
    Easy
  • Total Repair Time:
    Less than 15 mins
  • Tools:
    Pliers, Screw drivers
6 of 8 people found this instruction helpful.
Was this instruction helpful to you?
Thank you for voting!
was not getting enough water
first i unhooked the 2 hoses then removed the 2 screws holding the valve in place, I then removed the hose fitting from the old unit and installed it on the new one. I then bolted on the new valve and reconnected the hoses and it worked fine.
Other Parts Used:
Float Assembly Water Valve
  • Robert from Core, WV
  • Difficulty Level:
    Easy
  • Total Repair Time:
    15 - 30 mins
  • Tools:
    Nutdriver, Pliers
2 of 3 people found this instruction helpful.
Was this instruction helpful to you?
Thank you for voting!
Leaking lower inner door foam seal. Float leaking
Make sure dishwasher is powered off. Remove all inner door panel screws. Lift inner door panel upward and lean against the tub. Use a putty knife or spatula to lift old lower foam seal. Make sure door seal area is clean. Start at one end, butt new foam against the side of door and slowly pull glue strip backing while pressing foam down from left to right. Reverse door assembly.

Make sure dishwasher if off and door unlatched. Remove lower kick panel 4 screws and remove 1 screw securing float switch arm. Hold float stem with pliers and remove bottom stem nut. Remove float and re-install the new float with reverse procedure listed.
Super fast shipping on items!! Great service.
Other Parts Used:
Inner Door Foam Insulation Strip Float Assembly
  • Ronald from Seekonk, MA
  • Difficulty Level:
    Easy
  • Total Repair Time:
    15 - 30 mins
  • Tools:
    Pliers, Screw drivers
8 of 11 people found this instruction helpful.
Was this instruction helpful to you?
Thank you for voting!
Water leak from Bottom of Float Assembly
Remove the Palnut Screw from bottom of Float assembly using pliers, Remove Pivot pin from Actuator lever w/ screw driver. Replace the Float , install new palnut Screw and re-install pivot pin on actuator lever.

That's it !!!!!!!!!!!!!!!!
Other Parts Used:
Actuator Lever Pivot Pin Float Assembly Actuator Lever Float Palnut
  • Michael from Cheshire, CT
  • Difficulty Level:
    Easy
  • Total Repair Time:
    15 - 30 mins
  • Tools:
    Pliers, Screw drivers
8 of 11 people found this instruction helpful.
Was this instruction helpful to you?
Thank you for voting!
Dishwasher leaks water
I removed the two plates located below the dishwasher door to expose the float switch. I removed the two screws holding float switch, I removed screw holding switch actuator, then I removed float assembly.
Installed new float assembly, but could not use the float palnut, it had too small of a hole, I substituted a larger one that fit the float better. Note I fitted the palnut to the float (the nut cuts it's own threads in the float) before installing the float. This made installation easier. Next I transferred the two wires from the old float switch to the new float switch in the same positions as the existing switch wires. Then I installed the float switch. Finally, I cleaned up the float switch actuator and screw so that the actuator moves freely on the screw. I then installed the float switch actuator and ran the dishwasher to check for proper operation. Note: this float and switch control the water level in the dishwasher. If the actuator sticks, the dishwasher will fill with too much water and leak. If the float has collected dirt inside, it will weigh more and the water level will be too high, causing the dishwasher will fill with too much water and leak. If the switch sticks or fails the water level will be too high, causing the dishwasher will fill with too much water and leak. That is why I relaced the parts: float and switch. I don't want to go back and work on this again.
Lastly, after a few days of proper operation, I installed the two plates located below the dishwasher door. Job done!
Other Parts Used:
Float Switch Float Assembly Float Palnut
  • Andrew from Northfield, OH
  • Difficulty Level:
    Easy
  • Total Repair Time:
    15 - 30 mins
  • Tools:
    Nutdriver, Screw drivers
65 of 80 people found this instruction helpful.
Was this instruction helpful to you?
Thank you for voting!
Water Leaking
Simply remove the washer nut,then pull the float assembly. As far the lever,just unscrew the screw and replace the actuator lever. What was great about everything I was able to go to the presented diagram. This allowed me to find the exact parts I needed. Of course make sure you have the model number.
Other Parts Used:
Actuator Lever Pivot Pin Float Assembly Actuator Lever Float Palnut
  • Benjamin from Montrose, CO
  • Difficulty Level:
    Really Easy
  • Total Repair Time:
    15 - 30 mins
  • Tools:
    Pliers, Screw drivers
8 of 10 people found this instruction helpful.
Was this instruction helpful to you?
Thank you for voting!
float leaking
float was missing palnut and letting the float slide up too much causing small leak around the float
Other Parts Used:
Actuator Lever Pivot Pin Float Assembly Actuator Lever Float Palnut
  • phillip from hodges, AL
  • Difficulty Level:
    A Bit Difficult
  • Total Repair Time:
    30 - 60 mins
  • Tools:
    Nutdriver, Screw drivers, Socket set
26 of 37 people found this instruction helpful.
Was this instruction helpful to you?
Thank you for voting!
  • 1
Questions and Answers

Ask our experts a question about this part and we'll get back to you as soon as possible!

8 questions answered by our experts.
Sort by:
  • 1
Sorry, we couldn't find any existing answers that matched.Try using some different or simpler keywords, or submit your new question by using the "Ask a Question" button above!
Kleber
January 8, 2020
There is a leak when this valve moves up and down. Replacing it should take care of the leak or i need something else as well? Should i replace the float palnut (partselect number ps11746847) as well? It was mentioned before this valve does not come with the gaskets, which gaskets do i need? Thanks!
For model number PDB3600AWX
PartSelect logo
Hello Kleber, Thank you for your question. You would likely only need to replace the water valve under part PS11747602 for your model to fix the leak, but the gasket for the record is under part PS11746830 for your model. We hope this helps!

4 people found this helpful.

Was this helpful?
Thank you for voting!
Related Parts:
Theresa
November 6, 2018
Sitting water in bottom of machine will not drain, float looks good. Dial is making noises like it wants to works and the dial is moving through the cyces, but its not running.Thinking the sitting water wont allow the machine to work.
For model number CDB3100AWE
PartSelect logo
Hi Theresa, Thank you for your question. If the dishwasher has standing water that will not drain after a cycle, the issue is likely food debris that has clogged the drainage system. To verify if there is food debris clogging the dishwasher, you will first need to remove standing water as best you can and then remove the lower spray arm. If the screen has food debris in it, clean it out. Also check and clean the rest of the drainage system. Once you have finished cleaning, try running any dishwasher cycle to see if you have any standing water after the cycle is complete. If there is standing water left after the cycle, you will need to check deeper in into the drainage system to see if there is a clog somewhere else. If you are not comfortable doing this, you may have to get a technician to help you. I hope this helps. Thank you and have a great day!

2 people found this helpful.

Was this helpful?
Thank you for voting!
Eric
August 16, 2017
Does this part come with all the necessary gaskets
PartSelect logo
Hi Eric, Thank you for your inquiry. This part does not come with any gaskets. They would have to be ordered separately. Good luck with your repair.

Was this helpful?
Thank you for voting!
Charles
November 18, 2017
My dishwasher is not filling. I have checked inlet valve, float switch and door switch. They all have continuity. So i believe that the problem is the float lever and assembly. It seems like when i pull up on the float the lever is not making contact with the needle, which might indicate a worn out spring. Do you have any advice?
For model number MDB4000AWB
PartSelect logo
Hi Charles, Thank you for the question. The only way to know for sure is to uninstall the parts and look them over for wear or damage.Hope this helps!

Was this helpful?
Thank you for voting!
Tim
March 1, 2018
I just replaced the water inlet valve and at first it would not fill. I moved the water valve up and down and now it is working properly. I notice underneath when it ran that if leaking a little when the valve moves up and down. If i get this new part will it solve the problem or is there something else that i need to replace as well. I hope you can help me out. Thanks.
For model number MDB7100AWW
PartSelect logo
Hi Tim, Thank you for your question. If the dishwasher is not filling with water and you have already replaced the water inlet valve, you will need to check the float switch and the float assembly. I hope this helps. Thank you and have a great day!

Was this helpful?
Thank you for voting!
Carroll
August 26, 2019
My dishwasher works just fine, however, for the past year or so it leaks a small amount of water onto the lower cover. I have noticed a calcium buildup on the chrome trim and occasionally there is a small puddle in front of the dishwasher but not all the time. We have already replaced the door gasket and the float switch in an effort to fix this minor problem but it still persists. What should we try next?
For model number DWU8260AAX
PartSelect logo
Hi Carroll, Thank you for your question. If there is a small puddle of water that you are finding in front of the dishwasher, check to see if both the pump and the water inlet valve are working correctly. You will need to test the parts with a multimeter. Here is a link to one of our videos on YouTube that you may reference on how to use one, https://www.youtube.com/watch?v=bWC44fHn0As. I hope this helps. Thank you and have a great day!

Was this helpful?
Thank you for voting!
David
November 21, 2023
I have a small dripping leak coming down the shaft of the float valve, past the pal nut which is about half way up the shaft from the bottom. It seems that if I replace the float valve, I'll still have a small leak down the shaft because I cannot see any gasket or seal around the shaft. Is there supposed to be a gasket or seal around the shaft? If not, why is there a small leak coming down the shaft?
For model number MDB6000AWA
PartSelect logo
Hi David, thank you for reaching out. Based on the description you have provided, it seems that there is an issue with the float switch, part number PS11747680. It shuts the water fill valve off if the water level gets too high before the timed fill cycle ends. There is no seal around the shaft. You may need to replace the float switch to fix the issue. We hope that helps!

Was this helpful?
Thank you for voting!
Related Parts:
STANLEY
December 10, 2023
HOW DOES THE FLOAT ASSY COME APPART ? I FOUND THE LITTLE BUTTON FLOATING IN THE WATER AFTER THE WATER DIDNT DRAIN .. I THINK IT WAS PART OF THIS ... ALSO HOW DO YOU REPLACE THIS ? thanks , stan ...
For model number DWU8860AAX
PartSelect logo
Hello Stanley, Thank you for your inquiry. This float is manufactured as a solid piece and does not come apart. The float will come out just by pulling it straight up and it will snap back into place. We have included a link to our video on how to replace a similar float. We hope this helps.

Was this helpful?
Thank you for voting!
  • 1
You May Also Need ?
Model Cross Reference
This part works with the following models:
PartSelect Number: PS11747672
Manufacturer Part Number: WP99002363
Brand
Model Number
Description
Amana
ADW662EAB
Dishwasher
Amana
ADW662EAB-PADW662EAB0
Dishwasher - Amana Dishwasher Model ADW662EAB-PADW662EAB0 (ADW662EABPADW662EAB0, ADW662EAB PADW662EAB0) Parts
Amana
ADW662EAC
Dishwasher
Amana
ADW662EAC-PADW662EAC0
Dishwasher - Amana Dishwasher Model ADW662EAC-PADW662EAC0 (ADW662EACPADW662EAC0, ADW662EAC PADW662EAC0) Parts
Amana
ADW662EAS
Dishwasher
Amana
ADW662EAW
Dishwasher
Amana
ADW662EAW-PADW662EAW0
Dishwasher - Amana Dishwasher Model ADW662EAW-PADW662EAW0 (ADW662EAWPADW662EAW0, ADW662EAW PADW662EAW0) Parts
Amana
ADW862EAB
Dishwasher
Amana
ADW862EAC
Dishwasher
Amana
ADW862EAS
Dishwasher
Amana
ADW862EAW
Dishwasher
Magic Chef
CDB3100AWE
Dishwasher
Magic Chef
CDB3100AWT
Dishwasher
Magic Chef
CDB3100AWX
Dishwasher
Magic Chef
CDB6100AWE
Dishwasher
Magic Chef
CDB6100AWN
Dishwasher
Magic Chef
CDB6100AWX
Dishwasher
Crosley
CDC400B
Dishwasher
Crosley
CDC450B
Dishwasher
Crosley
CDC5J
Dishwasher
Crosley
CDC610B
Dishwasher
Crosley
CDU20J
Dishwasher
Crosley
CDU250B
Dishwasher
Crosley
CDU250V
Dishwasher
Crosley
CDU2J
Dishwasher
Crosley
CDU2J3
Dishwasher
Crosley
CDU400B
Dishwasher - Undercounter
Crosley
CDU450B
Dishwasher
Crosley
CDU450V
Dishwasher
Crosley
CDU510B
Dishwasher
Customer Service Representative

Get in touch, we're here to help!

Daily 8am - 9pm EST

Contact Customer Service