This an authentic OEM 40-Watt replacement light bulb, used in a number of household appliances. It is specially designed to withstand extreme temperatures, which is why these replacement bulbs are mos...
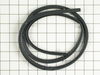
This broil igniter assembly comes with its own metallic mounting bracket and a 7-inch-long dual wire lead with a plastic plug. This part will need to be repaired if your oven element is giving off no ...
This is a surface burner igniter, also known as a top burner ignitor and stove top spark electrode. It is used to generate the spark that lights the surface burner. If your stove will not start, eleme...
This is a leveling leg for your oven, range, or stove. The leveling legs on your oven allow your appliance to sit perfectly flat. The new one may be longer in length than your original, but will work...
The temperature sensor on your oven detects the temperature within the oven cavity. If you notice your oven is too hot, not hot enough, or does not heat evenly, the short oven sensor kit may need repl...
The burner head cap with spark electrode directs the gas to the front and back burner heads and will equally distribute the gas across cooking areas. This part can help the following symptoms: if your...
This is a multi-use and multi-appliance screw. It can be used on a microwave, refrigerator, range/oven, air conditioner, dehumidifier, washer, or dryer. The measurements of this screw are 8 x 1/2 inch...
This is a replacement oven rack and it is designed for use with ranges and ovens. This is a genuine OEM replacement part. The rack provides a level and stable surface for cookware inside of your appli...
This door seal is used for ranges and ovens. The seal prevents hot air escaping from the oven to maintain a certain temperature when baking. The clips sticking out of the seal help secure it to the ra...
This orifice tube assembly is a genuine OEM replacement part for your gas range. This is a very easy repair. Start by removing the grates and use a strap wrench to loosen the burner heads. Disconnect ...
This part is the replacement orifice and tube assembly for your range. It is approximately 18 inches by 4 inches and is made of metal. The orifice and tube assembly controls the gas coming from the su...
$96.06
In Stock
Questions And Answers for CGR1425ADW
Ask our experts a question about this model and we'll get back to you as soon as possible!
2 questions answered by our experts.
Sort by:
< Prev
1
Next >
Search filter:
Clear Filter
Your search term must have 3 or more characters.
Keep searches simple. Use keywords, e.g. "leaking", "pump", "broken" or "fit".
Sorry, we couldn't find any existing answers that matched.Try using some different or simpler keywords, or submit your new question by using the "Ask a Question" button above!
BARBARA
March 17, 2020
The burners want strick you have to light with a match
For model number CGR1425ADW
Hi Barbara,
Thank you for your question. A normally functioning igniter will typically click up to three times before it sparks. But, every now and then you may run into instances where the igniter continues to click or tick even after the burner is lit, or the burner never lights at all. A clicking igniter typically is not dangerous and may continue to click if the gas is shut off. One of the most common sources of this issue is that the burner cap is out of place. Make sure the cooktop is completely cooled and remove the Burner Grate to access the cap. Try removing the cap and center it on the base. If the burner cap is askew, it can prevent the burner from lighting. If that doesn’t work, check for moisture. If you recently had a pot boil over on burner, a food or grease spill, or cleaned the cooktop, there may still be moisture present even if it looks dry. Remove the burner cap and give the burner time to air dry. To speed up the process, make sure all the burners are off and towel off the top of the range. You can then either use a fan aimed at the range top or set your oven to 350°F and leave it on for around 30 minutes to speed up dry time. If you see that there is debris stuck in the holes in the burner, that could also potentially be the culprit. You can use a metal pin or paper clip to clear the debris out of the grooves. Never use items such as toothpicks to do this, they may break off and get lodged inside. If you get through all of these tips and still have the clicking problem, it may be the spark module, spark ignition switch or the igniter itself. You can find replacements for your model stove for purchase on our website. If you feel comfortable, this is a repair you can do yourself. But, if you are ever unsure do not hesitate to contact a technician and consult your owner’s manual. We hope this helps. Thank you and have a great day.
Was this helpful?
Thank you for voting!
Richard
February 21, 2024
Top surface wont spark and has to be lit manually When oven is on they spark and light but not after the oven is off
For model number CGR1425ADW
Hi Richard, thank you for reaching out. Based on our understanding, we would recommend checking the spark ignition switch and wire harness, part number PS11749701. You may need to replace it to fix the issue. We hope that helps!
My oven has two igniters so I needed to determine which one was the problem.
Using the amp/multi meter I tested the connection between the igniters and the valve, with the oven turned on, to find the bad igniter. Depending on the model of stove you have, the amp reading you need for a properly functioning igniter will vary. My
... Read more lower igniter read 2.7 amps with a rated amp between 3.3 and 3.6. So that was the culprit.
Replacing the igniter was easy. Two screws and a wire connected with a plug. I was able to do the diagnosis and unplug the wire without pulling the oven out. I pulled the drawer out and removed the two screws in a cover behind where the drawer was. You may not be so lucky…I have long arms.
I found removing the oven door made it easier to reach the igniter itself. To remove the door just open it slightly and pull up, it should come off easy…and replace in opposite manner.
Keep track of your screws and put it back together the way you found it except for the igniter that is.
Anyone with moderate technical skill could easily do this repair. The diagnosis is the hard part. I estimate I saved about $200 doing it myself.
Repair tech checked oven and said the control panel was bad and needed to be replaced. The new control panel would cost over $450.00! I found that the oven sensor was bad and replaced it for $30.00. The old oven sensor had failed following a self cleaning cycle. I found that the wires coming out of it were burnt.
Replacing
... Read morethe oven sensor was very easy. I removed the back panels 6 screws to gain access to the sensor's connection. I then removed the 2 screw that hold the sensor in place inside the oven and pulled the old sensor out through the oven. I reversed this process to place the new sensor in the oven.
Lift out sealed burner assembly rear of stove first while careully sliding to rear to disengage ignitor probes.Remove philips head screws from bottom sheet metal housing to expose bottom of burners Remove gas tube assembly screws and move tube away carefully.Unplug wires from ignitor.Remove screws for ignitor .Remove ignitor, I noticed t
... Read morehat rust and dirt had built up around burner to pan connection.I used my oil filter wrench to turn slightly the burner to remove it from the pan to clean.Reassembled in reverse order.


 Diagram and Parts List for Magic Chef Range")


.gif "SUPPLEMENTAL INFORMATION Diagram and Parts List for Magic Chef Range")