


Models
>
B40
B40 - Overview
Models starting with B40
Click on the best match to narrow your results.
- B40 Shindaiwa Brush Cutter (Brushcutter)
- B4000 Shindaiwa Brush Cutter (O. E. M. Swisher Brushcutters (B))
- B4007B0 Roper Range (Freestanding, Gas)
- B4007B1 Roper Range (Freestanding, Gas)
- B4007X0 Roper Range (Freestanding, Gas)
- B4052 (Type 1) Black and Decker (7in/9in 6000rpm Sndr)
- B4052 (Type 2) Black and Decker (7in/9in 6000rpm Sndr)
- B4052 (Type 3) Black and Decker (7in/9in 6000rpm Sndr)
- B4052 (Type 4) Black and Decker (7in/9in 6000rpm Sndr)
- B4052 (Type 5) Black and Decker (7in/9in 6000rpm Sndr)
- B4052 (Type 6) Black and Decker (7in/9in 6000rpm Sndr)
Exact Part matches for your search term
[Viewing 1 of 1]
DISCONTINUED
This part number matches the current model number B40
PartSelect #: PS4093144
Manufacturer #: B40
No Longer Available
Keep searches simple, eg. "belt" or "pump".

Light Bulb - 40W
PartSelect #: PS884734
Manufacturer #: 8009
This an authentic OEM 40-Watt replacement light bulb, used in a number of household appliances. It is specially designed to withstand extreme temperatures, which is why these replacement bulbs are mos...
$11.73
In Stock

Surface Burner Plug-In Block Kit
PartSelect #: PS340571
Manufacturer #: 330031
The surface burner plug-in block kit features a newer-style terminal block. This kit is designed for use with ranges and cooktops. This terminal block is how the coil element on your stove connects to...
$13.42
In Stock

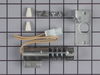
Heating Element Connection Wire Kit
PartSelect #: PS334206
Manufacturer #: 279457
This kit is used for electric clothes dryers, and it comes with a yellow wire nut.
$11.06
In Stock

SEAL
PartSelect #: PS12745423
Manufacturer #: W11415783
This seal comes with the adhesive backing.
$17.93
In Stock

Round Carborundum Oven Igniter
PartSelect #: PS360921
Manufacturer #: 4342528
This round style gas oven igniter, or also known as a broil or bake igniter, has an amperage range between 2.5 and 3.0. It glows white hot to ignite the gas for the oven. The igniter does this by attr...
$51.37
In Stock

2 Piece Broiler Pan
PartSelect #: PS971245
Manufacturer #: 4396923
This is cookware designed for use in your range or oven. It is a two-piece dish that is used to grill or cook food while the broil function is on, meaning it can withstand high temperatures. This set ...
$37.51
In Stock

Temperature Sensor
PartSelect #: PS11744825
Manufacturer #: WP8053344
This temperature sensor is used to measure the inside temperature of a self-cleaning oven. Its 1000-ohm resistance increases with temperature. The sensor has male leads, is 6 inches in length, and com...
No Longer Available

Hex Nut
PartSelect #: PS11738304
Manufacturer #: WP112432
This 10-32-inch hex nut works with multiple appliances in your home as a fastener. This specific model is sold individually. Hex nuts usually have 6 even sides and together they are used with bolts an...
$8.04
In Stock

Screw
PartSelect #: PS11742733
Manufacturer #: WP489128
This screw is sold individually.
$13.17
In Stock

Rocker Switch - Black
PartSelect #: PS11742364
Manufacturer #: WP4314961
This rocker switch can be used for both the oven selector and/or the oven light.
$72.51
In Stock

Nut
PartSelect #: PS8969875
Manufacturer #: 43302206460
This OEM Nut is a silver, metal, individually sold part. It can be installed using a wrench or socket by torquing to the manufacturer specifications.
This part may become damaged over time due to fa...
$4.99
In Stock

Filter, Fuel
PartSelect #: PS11826309
Manufacturer #: A369000460
The Fuel Filter is a white and silver, individually sold, steel part. It reuires pliers to install and its installation is rated as Easy.
The part attaches inside of the fuel tank and is used to cle...
$8.60
In Stock
Common Symptoms of models starting with B40
[Viewing 8 of 8]Element will not heat
Fixed by
these parts
these parts

Show All
Will Not Start
Fixed by
these parts
these parts

Show All
Little to no heat when baking
Fixed by
these parts
these parts
Show All
Gas igniter glows, but will not light
Fixed by
these parts
these parts
Show All
Oven not heating evenly
Fixed by
these parts
these parts
Show All
Oven is too hot
Fixed by
these parts
these parts
Show All
Not Heating
Fixed by
these parts
these parts

Show All
Noisy
Fixed by
these parts
these parts

Show All


Keep searches simple. Use keywords, e.g. "leaking", "pump", "broken" or "fit".
The lower burner would not ignite.
First I removed the oven racks. Then I loosened the two screws in the back of the oven floor and figured out how to remove it. Then I loosened the two screws at the front of the diverter and, with some pushing and pulling and twisting, was able to get that to come out, too. Then I tried lighting the oven and noticed that the igniter wa
... Read more
s not glowing. When I saw that the upper (broiler) burner was working fine, I hoped that the problem was the lower igniter itself. I checked the wires and they seemed fine. I saw that two bolts held the igniter onto its bracket, so with a socket wrench (which size I got right on the first guess!) I removed those bolts and the igniter came loose. I found the connecter for the wires when I removed the drawer under the oven and was able to pull it apart easily. The igniter came out completely. There was nothing unusual about it, but I decided to take a chance and order a new one, hoping that replacing it would solve the problem. I put the rest of the oven together and waited. About three days later the part arrived (it was sent on a holiday; FedEx is soooo much better than USPS). I retraced the steps of taking the oven apart, put the two bolts into the new igniter to attach it to the bracket, and went back underneath behind the drawer to connect the wires. Then came the moment of truth: I tried turing on the oven. I held the button down to keep the light off, and after a few seconds I saw it: IT GLOWED!! It worked!! After yelling a satisfying "YEAH!!," I turned it off, put back the drawer, the diverter (more pulling and pushing and twisting), and the oven floor. Now it's all working perfectly and it took a very short time to fix. And a little luck that the problem was with such a simple part.
Read less
Parts Used:
-
Mark from Rego Park, NY
-
Difficulty Level:Easy
-
Total Repair Time:Less than 15 mins
-
Tools:Screw drivers, Socket set
80 of 86 people
found this instruction helpful.
Was this instruction helpful to you?
Thank you for voting!
Replace clogged fuel filter.
Thru fuel cap, insert copper wire with hook formed on end. Fish around until you grab the fuel line. Pull the fuel line and filter thru the fuel fill neck.
Pull off old filter and replace with new. Push back into fuel tank & be done.
Pull off old filter and replace with new. Push back into fuel tank & be done.
Parts Used:

-
Keith from NORWOOD, NJ
-
Difficulty Level:Really Easy
-
Total Repair Time:Less than 15 mins
20 of 32 people
found this instruction helpful.
Was this instruction helpful to you?
Thank you for voting!
One burner didn't work all the time the other would go red hot
I unplugged the stove from the outlet, then removed the two burners I was going to be working on and the drip pans. Then I raised the top part of the stove and removed the screws holding the plug-in blocks to the stove. Then I cut the two wires going to the old plug-in block and stripped the wires back to match the new wire parts. Then I
... Read more
placed the sleeves over the new wires, then I placed the new wire beside the wire I stripped on the stove and screw on the wire cap making sure it was tight. I repeated this three more times, once I had all four wires connected I then placed the sleeves over the connections and heated them up until they were formed around the connection. Once I had all the connections done I placed one wire at a time into the plug-in block until it locked into place ( I looked at my old plug-in blocks first to make sure I placed the new wires in the correct way ).I then used the metal mounting bracket that matched my old ones and snapped the correct one onto each plug-in block. Before mounting them onto the stove I compared them to my old ones to make sure they were correct. Then I used the new screws to mount them to the stove. I took a second look at everything I had done before closing the top cover of my stove. After lowering the cover back into place I put both the drip covers in place and then installed the burners.I then plugged the stove back into the outlet and tried the burners. This was very simple and the video on the web site shows this very well which made my job very simple.
Read less
Parts Used:
-
Phillip from Pekin, IL
-
Difficulty Level:Really Easy
-
Total Repair Time:15 - 30 mins
-
Tools:Screw drivers
14 of 15 people
found this instruction helpful.
Was this instruction helpful to you?
Thank you for voting!