


Models
>
ART6100WW
ART6100WW (P1142685NWW) Amana Range - Overview
Sections of the ART6100WW
[Viewing 7 of 7]


Keep searches simple, eg. "belt" or "pump".

Light Bulb - 40W
PartSelect #: PS884734
Manufacturer #: 8009
This an authentic OEM 40-Watt replacement light bulb, used in a number of household appliances. It is specially designed to withstand extreme temperatures, which is why these replacement bulbs are mos...
$11.73
In Stock

2 Piece Broiler Pan
PartSelect #: PS971245
Manufacturer #: 4396923
This is cookware designed for use in your range or oven. It is a two-piece dish that is used to grill or cook food while the broil function is on, meaning it can withstand high temperatures. This set ...
$37.51
In Stock

Wire Oven Rack
PartSelect #: PS11740769
Manufacturer #: WP314763J
This wire oven rack is used on some ovens and ranges. It is twenty-three inches long and it is made of metal.
$40.86
In Stock

Broil Element
PartSelect #: PS11757430
Manufacturer #: WPY0063532
This broil element is found on the roof of the oven and allows for an even heat when cooking food. The element may have shorted out and not be heating the oven, which might indicate it will need to be...
$82.67
In Stock

Installation Screw
PartSelect #: PS11741612
Manufacturer #: WP3400882
This screw is sold individually.
$8.04
In Stock

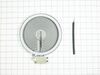
Radiant Surface Burner Element 1500W
PartSelect #: PS11764909
Manufacturer #: W10823699
This surface element is made for under glass set-ups and supplies the heat to a cooking area on top of the range. It has an outside diameter of approximately 7 inches (1500 watts), and is a genuine OE...
$106.72
In Stock

Oven Light
PartSelect #: PS11744440
Manufacturer #: WP74011278
This oven light assembly is a little over four inches long and comes with the lens and 660-watt light bulb. Make sure your appliance is unplugged or circuit breaker is off before installing this new p...
$81.38
In Stock

Hinge Kit - Right Side
PartSelect #: PS2172201
Manufacturer #: R0706011
The hinge kit, or oven door hinge, is used in ranges and wall ovens. The hinge attaches to the right side of the door and controls how fast the door opens. At a specific angle, it allows the door to r...
No Longer Available


Main Power Terminal Block
PartSelect #: PS11745232
Manufacturer #: WP8203546
Sold individually.
$24.59
In Stock
Questions And Answers for ART6100WW
We're sorry, but our Q&A experts are temporarily unavailable.
Please check back later if you still haven't found the answer you need.
Common Symptoms of the ART6100WW
[Viewing 6 of 6]Element will not heat
Fixed by
these parts
these parts


Show All
Little to no heat when broiling
Fixed by
these parts
these parts

Show All
Door won’t close
Fixed by
these parts
these parts


Show All
Little to no heat when baking
Fixed by
these parts
these parts
Show All
Will Not Start
Fixed by
these parts
these parts

Show All
Oven not heating evenly
Fixed by
these parts
these parts
Show All


Keep searches simple. Use keywords, e.g. "leaking", "pump", "broken" or "fit".
hard to get old one out

-
robert from chatham, VA
-
Difficulty Level:Really Easy
-
Total Repair Time:15 - 30 mins
-
Tools:Nutdriver, Pliers, Screw drivers
31 of 70 people
found this instruction helpful.
Was this instruction helpful to you?
Thank you for voting!
Purchased home but stove had no broiler pan.

-
Raymond from BLOOMINGTON, MN
-
Difficulty Level:Very Easy
-
Total Repair Time:Less than 15 mins
14 of 20 people
found this instruction helpful.
Was this instruction helpful to you?
Thank you for voting!
The infinite switch controlling one of the range top burners failed.
1 - Turned off electricity to the cook top.
2 - Removed the range top from the cutout in the counter.
3 - Removed the smooth top by removing the screws around the perimiter of the smooth top.
4 - Removed the screws securing the corner closest to the dead switch.
5 - Removed the screws holding the channel, onto which th ... Read more e infinite switched were attached, to the frame of the cooktop base.
6 - Removed the dead switch by removing the screws that hold it to the channel.
7 - One by one move the wires from the old switch to the new one.
8 - Reversed the process, 6 - 5 - 4 - 3 - 2 - 1, to put the cook top back together.
All in all the part was an exact replacement and the repair went really well.
Read less
Parts Used:

-
erik from chester springs, PA
-
Difficulty Level:Easy
-
Total Repair Time:15 - 30 mins
-
Tools:Screw drivers
12 of 19 people
found this instruction helpful.
Was this instruction helpful to you?
Thank you for voting!