This is a bottom-mounted air filter manufactured for a microwave. The microwave air filter filters the air flowing in and out of the microwave, and traps grease from the exhaust. A dirty or clogged fi...
This high-voltage diode is designed for use within various makes and models of microwaves and is a genuine OEM part that converts alternating current (AC) into direct current (DC). If you notice your ...
This is a mounting bracket for a microwave. The part is fitted between your microwave and wall to allows you to secure your appliance safely to the wall studs and install it above your range. It is ma...
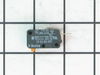
This is a micro switch, which is also known as a door switch for your microwave. The main reason for needing to replace this part is if you are not getting heat to your appliance. The door switch is l...
This is a high limit thermostat designed for use within various models of microwaves. The purpose of a high limit thermostat is to open the circuit of the appliance when the internal temperature reach...
The microwave light, or surface light lens, keeps the bulb in your microwave protected from getting cracked, scratched, and damaged. If your lens is defective or broken, or the bulb in your appliance ...
This is the main latch assembly for various models of Samsung microwaves. This assembly is a main component for the door of the microwave that features three switches that detect the door itself and h...
This vent damper is a genuine OEM replacement part that is compatible with various models of Samsung over-the-range microwaves with ventilation systems. It is responsible for regulating the airflow in...
I r/r the bulb cover, I then removed the burned out bulbs w/ a rag in case they broke they wouldn't have cut my fingers. You turn the bulbs lefty loosy. Installation is just the reverse. Install each bulb and turn righty titey, just snug the bulbs into place. Replace Glass cover and insert one phillips screw in plate and re-tighten
I ordered a new coupler and dropped it into the center hole, jiggled it until it fell into place, put the turntable back on the track, and voila, fixed! It was ridiculously easy.


.gif "SUPPLEMENTAL INFORMATION Diagram and Parts List for Amana Microwave")