Models > ADE4BRGS171TW01 > Symptoms > Not Heating

Parts That Fix Speed Queen Dryer ADE4BRGS171TW01 Not Heating

Not Heating is a commonly reported symptom for the ADE4BRGS171TW01 Speed Queen Dryer, and we have put together a full guide on how to fix this. This advice is based on feedback from people who own this exact appliance. We have listed the most common parts for your ADE4BRGS171TW01 Speed Queen Dryer that will fix Not Heating. We have included repair instructions, and helpful step-by-step video tutorials. If you are experiencing this issue, not to worry, DIYers just like you have fixed this, and shared their experience to help you!

Fixes Symptom 99% of time
★★★★★
★★★★★
148 Reviews

Rated by 135 customers 


Easy 

30 - 60 mins 

Ratings submitted by customers like you who bought this part.   

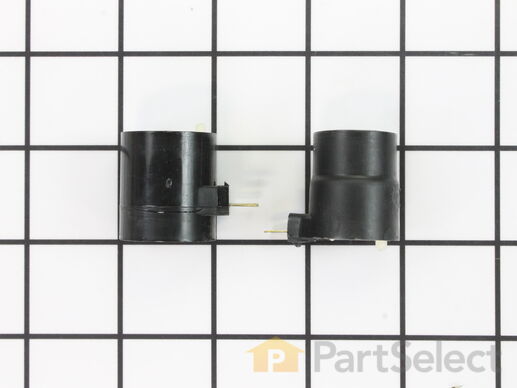
When the igniter reaches a high enough temperature, these coils (Coil Valve, Dryer Gas Valve Coil Kit, Dryer Valve Coil Kit, Gas Valve Solenoid) work together to open the gas valve and allow the gas to enter the burner. This is a safety mechanism to ensure that there are no unsafe buildups of gas inside your appliance. The coils are attached to the dryer gas valve. If the dryer does not heat or heats intermittently, the coil may not be opening the gas valve. Both coils must be operational for the valve to open. No continuity would indicate a defective coil, but they can be intermittent and fail when they get hot. Both coils should be replaced when one of them is broken. This part can break as a result of material fatigue from normal use. This part measures approximately 1 inch in diameter and 1 inch in height, and is constructed of plastic and metal. It comes in black/beige. This part features a 3-terminal boost/hold coil and a 2-terminal secondary coil

$ 30.89
  In Stock
PartSelect Number PS334310
Manufacturer Part Number 279834

Customer Repair Stories

Dryer would only heat cycle once

I removed the two screws holding the front panel to expose the lower works and verified the heating cycle failure. After a check of the vent system, checking the sensors for continuity and coils for resistance, I retired to the 'net for support. Accepting the general consensus that the most frequent, common and likely failure to be the coils, I rechecked them with the meter and found the two pronged coil to have significantly more resistance than the three prong coil. That was enough evidence to point to the coils. While I waited for the part to arrive, I replace the vent ducting. When the parts arrived I removed the two Phillips screws holding the coils, removed the old ones, installed the new ones, replaced the bracket, put the front cover back on and in less then ten minutes clothes where drying.
  • Robert from Seattle, WA
  • Difficulty Level:
    Really Easy
  • Total Repair Time:
    Less than 15 mins
  • Tools:
    Nutdriver, Screw drivers
81 of 90 people found this instruction helpful.
Was this instruction helpful to you?
Thank you for voting!

Dryer ran but would not heat

PartSelect showed seven different possibilities why the dryer wouldn't heat. I removed the two screws to remove the bottom panel and turned the dryer on and noticed that the heating element that ignites the gas was working fine. This meant that it was not getting gas so it could be the gas valve or one of the two gas valve coils which are located on top of the gas valve. I borrowed my neighbor"s ohm meter and touched the two probes on the coils terminals to check for continuity and found that one of the coils read zero. I then took both of the coils out by removing two screws and tested each coil again. One coil read 500-850 and the other read zero. This meant that it was no good so I called for the part and received it in three days. I reassembled the parts and turned the dryer on and it fired up after a few seconds. It works as good as new. The part plus shipping was less than $30. My repairman would have charged me $150-$200. While the dryer was apart I gave it a good cleaning with a vacuum and a toothbrush in delicate areas. I also removed and cleaned the lint trap housing by removing two nuts. I didn't know much about gas dryers, but thanks to PartSelect I easily fixed it myself.
  • Gary from Haverhill, NH
  • Difficulty Level:
    Easy
  • Total Repair Time:
    30 - 60 mins
  • Tools:
    Nutdriver, Screw drivers, Socket set
391 of 440 people found this instruction helpful.
Was this instruction helpful to you?
Thank you for voting!