


Models
>
ACM1460AB
ACM1460AB (PACM1460AB0) Amana Microwave - Overview
Sections of the ACM1460AB
[Viewing 6 of 6]


.gif "MISCELLAEOUS INFORMATION Diagram and Parts List for PACM1460AB0 Amana Microwave")

Keep searches simple, eg. "belt" or "pump".

Turntable Roller Guide
PartSelect #: PS972658
Manufacturer #: 8205178
This roller is located underneath the glass turntable. With the help of the motor, this roller helps to rotate the glass tray. This part takes the place of the coupling.
No Longer Available

Glass Carousel Tray
PartSelect #: PS11751441
Manufacturer #: WPW10267856
This tray rotates in your microwave ensuring more even temperatures.
$51.65
In Stock

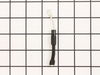
Black Sleeve Diode
PartSelect #: PS11747959
Manufacturer #: WPR9800486
In your microwave, the diode allows current to flow one-way only, converting alternating current to direct current. If you notice that your microwave does not heat properly, you may need to replace th...
$31.50
In Stock

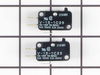
Door Interlock Switch Kit
PartSelect #: PS373050
Manufacturer #: 4392027
This part is a genuine manufacturer door interlock switch kit, also known as primary micro switch or microwave switch kit, for a microwave. The function of this part is to sense when the door of the m...
$85.78
In Stock

Turntable Motor
PartSelect #: PS11749221
Manufacturer #: WPW10159107
This motor rotates the glass turntable in the microwave.
$118.69
In Stock

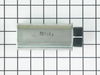
Capacitor
PartSelect #: PS11743000
Manufacturer #: WP59001168
The high-voltage capacitor is an electronic device that holds a charge of electricity in the high-voltage circuit of the microwave. The capacitor stores electricity similar to how a battery does, but ...
$122.64
In Stock

Wave Guide Cover
PartSelect #: PS392144
Manufacturer #: 8184278
This part guides the waves to the inside of the microwave to cook your food.
No Longer Available


Questions And Answers for ACM1460AB
We're sorry, but our Q&A experts are temporarily unavailable.
Please check back later if you still haven't found the answer you need.
Common Symptoms of the ACM1460AB
[Viewing 5 of 5]No heat
Fixed by
these parts
these parts
Show All
Tray won’t turn
Fixed by
these parts
these parts


Show All
Won’t turn on
Fixed by
these parts
these parts
Show All
Doesn’t shut off
Fixed by
these parts
these parts
Show All
Door stuck closed
Fixed by
these parts
these parts

Show All
Keep searches simple. Use keywords, e.g. "leaking", "pump", "broken" or "fit".
Sparks and loud hum from oven
1. I went to the internet to find the service manual for the Maytag microwave.
2. I opened up the oven and started measuring the resistance of the diode, capacitor, transformer, and magnetron between terminals and then to ground. The transformer and magnetron were well within the resistance limits. The diode was shorted in both direc ... Read more tions(+-). The capacitor was fully open in both directions -- high resistance.
3. I ordered the 2 parts, installed them, and ran the oven. Worked perfect first time.
4. Reinstalled oven and worked ever since (1 week so far).
5. The secret was that the transformer had a load hum. I figured the transformer was OK. The magnetron had no short between filaments and ground to filaments. The only two left were the diode and capacitor. The first two are about $200 -- almost the value of a new microwave. The $70 repair was well worth it. If the first two were still bad, then tempted to buy a new oven.
Read less
Parts Used:


-
Guy from Bellingham, MA
-
Difficulty Level:Really Easy
-
Total Repair Time:15 - 30 mins
-
Tools:Pliers, Screw drivers
113 of 170 people
found this instruction helpful.
Was this instruction helpful to you?
Thank you for voting!
Microwave worked intermittently depending on how door was closed
Remove top grille (2 screws), undo control panel (1 screw). Tilt down control panel, switches are on the left. There are actually three switches that are involved with the door, two horizontally mounted, one vertically mounted. This would be an EASY REPAIR, but it took me a while to figure out which of the three switches was bad, and a
... Read more
lso took a while to figure out that there is a plastic rod that inserts through the hole in the switch body. Once i figured this out went like a breeze. Lower horizontal switch was the bad one, but since the kit came with two switches i went ahead and replaced the upper horizontal one as well. IT appears that the horizontal switches are probably more likely to fail than the vertical switch based on the position of the switch and force angles. Works great now!
Read less
Parts Used:

-
Robert from Bainbridge Island, WA
-
Difficulty Level:A Bit Difficult
-
Total Repair Time:30 - 60 mins
-
Tools:Pliers, Screw drivers
67 of 82 people
found this instruction helpful.
Was this instruction helpful to you?
Thank you for voting!
no heat
I looked up the #1 reason for no heat for my microwave on the site , and using my model number found that 92% of the time it was the Black Sleeve Diode. Ordered the $15 part, and installed it within 30 minutes. Most of the time was used for removing the built in microwave and removing the cover. Replaced the diode by finding it on the
... Read more
diagram that I printed from this site (free). Very relieved that we don't need to have our custom cabinetry re-sized to accommodate a new microwave. Thank you!
Read less
Parts Used:
-
Lisa from PARADISE, PA
-
Difficulty Level:Easy
-
Total Repair Time:15 - 30 mins
-
Tools:Pliers, Screw drivers
28 of 28 people
found this instruction helpful.
Was this instruction helpful to you?
Thank you for voting!