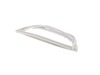
This is a center crisper rail for your refrigerator. This part acts as a support rail for the crisper drawer by holding the center of the crisper frame. You will need to replace this part is if your c...
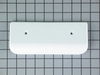
This crisper drawer cover support is for refrigerators.
Crisper drawer cover support supports the crisper drawer lid.
Wear work gloves to protect your hands when installing this part.
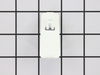
This light switch may also be known as a refrigerator door switch or a light switch kit, and is compatible with your refrigerator. The function of the refrigerator door switch is to turn on the light ...
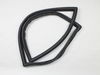
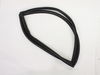
This is a door handle for your refrigerator or freezer, which allows you to easily open and close the door. Take note that the screws are not included when you order this part; you will need to keep t...
Sold individually. Crisper drawer is an original equipment manufacturer (OEM) part that fits some bottom-freezer Kenmore, Amana, Crosley, Jenn-Air, KitchenAid, Maytag and Whirlpool refrigerators.
T...
This refrigerator ice maker fill cup dispenses the water into the ice cube mold during the fill cycle. Replacing the water fill cup is a possible solution if you notice that the ice maker is leaking, ...
This is a dual water inlet valve for your refrigerator/freezer. The water inlet valve is a solenoid-operated switch that, when activated, releases water from the supply line into the water valve. The ...
This long harness thermistor kit is what helps monitor and regulate the temperature inside your refrigerator. It can be located in either the freezer compartment near the evaporator coils or in the fr...
$45.49
In Stock
Questions And Answers for AB2225PEKB12
Be the first to ask our experts a question about this model!
✖
Ask a Question
Ask our experts a question on this model and we'll respond as soon as we can.
This is the 2nd time I have used PartSelect, and this experience was as pleasant as the 1st. The exploded-view diagrams make parts identification very easy; and the photo of the actual part is such a great idea, it allows you to verify what you need. I also got my part (cross country, in 3 days)
Repair Procedure: Shut off water
... Read more supply. It may be easier to work if you disconnect the water supply tube, but it is not required. On the backside of the refrigerator, remove the bottom, black plastic protection panel. You will need a nut driver or battery-powered screw driver with a 3/8" socket tip on it. Next, remove the black metal panel that holds the water inlet valve in place. Remove screws with a nut driver. 1st remove the two flat-pin power connectors. (They are different sizes and color-coded, so there is no room for making a re-hookup mistake). Then proceed to remove the hoses. The hoses are pressure-lock tubing, so push the plastic disk in or down where the tube goes into the main body of the valve. Do this for all three hoses (tubes). Switch water valves and reverse the procedure. **Be certain that the tubes are pushed back in as far as they can go; if you do not re-seat the tubes, the pressure from the water going back in the valve, will blow the tubes right out the valve (ask me how I know this!). Once reassembled, turn the water back on slowly. Make sure you turn the water supply valve all the way open, it seats itself internally when you do and is less prone to drip leaks. That's it! (As a former kitchen remodeler, I find this a great DIY project).
I removed the ice maker from the refrigerator, by removing one screw on the underside bracket and loosening the two screws at the top side, then lifting the ice maker off the loosened screws. I then unplugged the electrical harness that supplies power from the refrigerator to the ice maker. I then disassembled the ice maker by removing
... Read morethe front cover which is snapped in place, then removing two recessed screws at the front. I removed the broken part, I then reassembled the ice maker with the new part. I replaced the two recessed screws at the front and snapped on the cover. Then I reinstalled the ice maker in the refrigator by plugging in the harness, slipping the ice maker over the loosened screws in the refrigerator and replacing the screw that was removed from the underside bracket. Tightening all the screws completed the project.