


Models
>
91195404000
91195404000 Kenmore Range - Overview
Sections of the 91195404000
[Viewing 6 of 6]
Manuals & Care Guides for 91195404000
Click to downloadKeep searches simple, eg. "belt" or "pump".


Broil Element
PartSelect #: PS249284
Manufacturer #: WB44T10009
This broil element is found on the upper part of the oven cavity.
$97.66
In Stock

Light Bulb - 40W
PartSelect #: PS217532
Manufacturer #: 40A15
This 40-Watt light bulb is sold individually and is a genuine OEM replacement option for your home appliances. It is specially designed to withstand extreme temperatures, so this bulb is compatible wi...
$11.02
In Stock

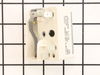
Range Surface Element Control Switch - 6 Inch - 1560 W
PartSelect #: PS236754
Manufacturer #: WB24T10029
This switch controls the small burner on a range/stove top.
$45.15
In Stock

Foot - Leveller
PartSelect #: PS223802
Manufacturer #: WB02X10521
Sold individually.
$23.43
In Stock

RECEPTACLE PUSH-IN
PartSelect #: PS752188
Manufacturer #: WB08T10026
This part is the replacement light socket for your oven. The oven light socket provides power to the light, and at the same time holds the light bulb in place.
$8.54
In Stock


Screw
PartSelect #: PS271689
Manufacturer #: WH2X930
This screw is sold individually.
$12.22
In Stock

Range Oven Door Gasket
PartSelect #: PS8753695
Manufacturer #: WB04T10086
The oven door gasket creates a seal between the oven door and the opening of the oven to prevent heat from escaping when the oven is closed.
$51.47
In Stock

WHITE BOTTOM TRIM CHANEL
PartSelect #: PS12725545
Manufacturer #: WB07X32929
This part is the replacement door trim for your oven. It is white in color and is approximately 30 inches long and 2 inches wide. The bottom door trim supports the outer glass from the bottom. The mai...
No Longer Available

Broiler Pan - Large
PartSelect #: PS1517612
Manufacturer #: WB48X10056
This large broiler pan is found in the bottom of your oven and is used to catch drippings from broiling foods. This part includes the grate and bottom pan and is made of porcelain. The grate measures ...
$30.07
In Stock

Large Haliant Burner with Limiter - 8"
PartSelect #: PS243903
Manufacturer #: WB30T10045
This haliant burner element is a gneuine OEM replacement part for your stove. This element is 8 inches in diameter. The element lies underneath the stovetop, and will need to be replaced if it stops h...
$148.32
In Stock
Questions And Answers for 91195404000
We're sorry, but our Q&A experts are temporarily unavailable.
Please check back later if you still haven't found the answer you need.
Common Symptoms of the 91195404000
[Viewing 7 of 7]Element will not heat
Fixed by
these parts
these parts


Show All
Little to no heat when broiling
Fixed by
these parts
these parts
Show All
Little to no heat when baking
Fixed by
these parts
these parts


Show All
Oven not heating evenly
Fixed by
these parts
these parts

Show All
Oven is too hot
Fixed by
these parts
these parts
Show All
Door won’t close
Fixed by
these parts
these parts


Show All
Will Not Start
Fixed by
these parts
these parts
Show All


Keep searches simple. Use keywords, e.g. "leaking", "pump", "broken" or "fit".
Broiler element failed
repair took about 30minutes total tiem..first turn off power to stove..then open oven removed racks..used nut drive to loosen top two screw hold element..then remove screw hold temp sensor element...then removed two screws holding broiler element...then removed the top screw ...then pulled element out about 7 inches to expose wire connect
... Read more
ion..held on with spade lugs.. pulled wires off...element now free to remove ...placed spade lug on new element...put element in pace with top two screws..loosely...then did rear screw that held temp element and broiler element...then tighten all screws ..turned on power..did 15 sec test to make sure wired properly..then 5 minutes to operating temperature... job done...hardest part was crazwling in and out the stove...old bones..
Read less
Parts Used:
-
paul from west grove, PA
-
Difficulty Level:Really Easy
-
Total Repair Time:15 - 30 mins
-
Tools:Nutdriver
65 of 75 people
found this instruction helpful.
Was this instruction helpful to you?
Thank you for voting!
Large burner would not get hot
Repair was very simple. Removed 2 screws under the cooktop, tilt the cooktop back, unplug 4 wires from 8" burner, remove two screws holding retaining clips, install new burner in reverse order. Very simple!
Parts Used:

-
Kevin from Leominster, MA
-
Difficulty Level:Easy
-
Total Repair Time:Less than 15 mins
-
Tools:Nutdriver, Screw drivers
70 of 92 people
found this instruction helpful.
Was this instruction helpful to you?
Thank you for voting!
Inner glass window of oven cracked
1. Removed the oven door -- this is a little tricky -- you need to lift to small metal covers on the hinges, then pull the door up and out from the broil (half open position). Replace the door the same way. It is important to insert the hinges with the door in the "broil" position, and after verifying that the door is aligned and closes
... Read more
normally -- then lift hinge covers to lock in place.
2. After door is removed the glass assembly can be removed and replaced by unscrewing two long (2-3 inch long) screws at the top. And three hex head screws at the bottom of the door. Note -- there is no need to removed the six screws (3 either side) on th ebottom of the door -- because these only hold the hinges to the door. The other 5 screws that you do need to remove actually hold the two halves of the door together.
3. Replace glass assembly and reassemble.
It is not so hard but you need "star" screwdrivers for the long screws... (not philips -- but 6-pointed stars), and a socket wrench is useful for the bottom 3 hex head screws...
If I were to do again it would only take me 15 minutes.... but I messed up by removing the hinges unnecessarily so it took me an hour.
Read less
Parts Used:

-
Charles from Sharon, MA
-
Difficulty Level:Easy
-
Total Repair Time:30 - 60 mins
-
Tools:Nutdriver, Screw drivers, Socket set
57 of 60 people
found this instruction helpful.
Was this instruction helpful to you?
Thank you for voting!