Models > 79573252300

79573252300 Kenmore Freezer - Overview

Sections of the 79573252300

[Viewing 6 of 6]

Manuals & Care Guides for 79573252300

Click to download
Keep searches simple, eg. "belt" or "pump".
Door Stopper – Part Number: 4620JJ2009A
Door Stopper
★★★★★
★★★★★
(5)
PartSelect #: PS3523083
Manufacturer #: 4620JJ2009A
The door stop, or door stopper, is used in refrigerators. This door stop helps keep the door in position and in balance. This part is attached to the bottom of the door and it keeps it from opening an...
$13.56
  In Stock
Valve Assembly,Water – Part Number: AJU55759303
Valve Assembly,Water
★★★★★
★★★★★
(6)
PartSelect #: PS3533114
Manufacturer #: AJU55759303
$87.51
  In Stock
Compressor Start Relay – Part Number: 6749C-0014E
Compressor Start Relay
★★★★★
★★★★★
(3)
PartSelect #: PS9865140
Manufacturer #: 6749C-0014E
$52.16
  In Stock
Ice Maker Assembly,Kit – Part Number: 5989JA0002N
Ice Maker Assembly,Kit
★★★★★
★★★★★
(7)
PartSelect #: PS3528723
Manufacturer #: 5989JA0002N
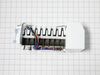
This ice maker assembly is a genuine OEM replacement unit for LG refrigerators. It is responsible for producing and dispensing ice cubes. You can find the ice maker assembly inside the freezer compart...
$229.84
  In Stock
Rail,Slide – Part Number: 5218JJ3001A
Rail,Slide
PartSelect #: PS3527360
Manufacturer #: 5218JJ3001A
$8.76
  In Stock
Tube,Inlet – Part Number: 5040JA2015A
Tube,Inlet
★★★★★
★★★★★
(1)
PartSelect #: PS3526241
Manufacturer #: 5040JA2015A
$20.48
  In Stock
Guide Rail Assembly - Right Side – Part Number: 4975JJ2002A
Guide Rail Assembly - Right Side
PartSelect #: PS3524811
Manufacturer #: 4975JJ2002A
$30.73
  On Order
Guide Rail Assembly - Left Side – Part Number: 4975JJ2002B
Guide Rail Assembly - Left Side
★★★★★
★★★★★
(2)
PartSelect #: PS3524812
Manufacturer #: 4975JJ2002B
$26.45
  In Stock
Defrost Thermostat – Part Number: 6615JB2005C
Defrost Thermostat
★★★★★
★★★★★
(3)
PartSelect #: PS3529338
Manufacturer #: 6615JB2005C
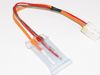
This part is a temperature sensing devise. It senses the rise in evaporator temperature during a defrost cycle and cycles the defrost heater off after all frost is melted. It is calibrated to permit...
$39.76
  In Stock
GASKET ASSEMBLY,DOOR – Part Number: ADX52752649
GASKET ASSEMBLY,DOOR
★★★★★
★★★★★
(1)
PartSelect #: PS8749101
Manufacturer #: ADX52752649
$107.04
  Special Order
Cover,Lower – Part Number: 3550JJ0006A
Cover,Lower
PartSelect #: PS3519982
Manufacturer #: 3550JJ0006A
  No Longer Available
Hinge Assembly,Upper – Part Number: 4775JJ2003B
Hinge Assembly,Upper
★★★★★
★★★★★
(1)
PartSelect #: PS3523518
Manufacturer #: 4775JJ2003B
  No Longer Available

Questions And Answers for 79573252300

Be the first to ask our experts a question about this model!

Common Symptoms of the 79573252300

[Viewing 6 of 6]
Door won’t open or close
Fixed by
these parts
Fixing
Show All
Ice maker not making ice
Fixed by
these parts
Fixing Fixing
Show All
Leaking
Fixed by
these parts
Fixing Fixing
Show All
Fridge too warm
Fixed by
these parts
Fixing Fixing
Show All
Will Not Start
Fixed by
these parts
Fixing
Show All
Clicking sound
Fixed by
these parts
Fixing
Show All
Keep searches simple. Use keywords, e.g. "leaking", "pump", "broken" or "fit".
icemaker stopped working
This is bottom drawer type frige. Icemaker is inside (not in the door) and hard to reach. I first tested the solenoids by disconnecting them and using a test cord, energized them independent of the frige wiring. They worked ok. Note: this frige has (2) solenoids going to the icemaker. And it has (3) solenoids serving the water dispenser. The icemaker solenoids are wired in parallel. I removed the icemaker by removing (1) screw from the bottom and loosening (2) on the top. Then removed icemaker as a complete unit disconnecting the wire connector at the same time. On the bench I tested the icemaker to verify it was defective. The wire harness has a 10 amp fuse in the black wire (hot wire). `The fuse was blown. This was sufficient to indicate the icemaker is shot. I did however, do some other tests. Cold resistance of the mold heater was 72 ohms. The timer motor was 4000 ohms. These measurements should be ok. I then activated the icemaker with a test cord, bypassing the blown fuse. The unit cycled one complete rotation then stopped. The mold heater worked. I tested the amp draw on the mold heater and it was only .1 amps. I should be a about .8 amps. I then cycled it again and then the timer motor began to sizzle and smell. Then it smoked and stopped mid-rotation. I then purchased a new icemaker. I believe the mold heater was going bad over time as this unit made ice but very slowly. This put extra strain on the motor as the mold was not releasing quickly. This damaged the motor causing it to fail.
Parts Used:
Ice Maker Assembly,Kit
  • Norris from Telford, PA
  • Difficulty Level:
    A Bit Difficult
  • Total Repair Time:
    30 - 60 mins
  • Tools:
    Screw drivers
3 of 3 people found this instruction helpful.
Was this instruction helpful to you?
Thank you for voting!
The ice maker fill valve died.
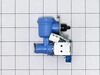
Went on line to see how difficult it would be to replace the valve. Through Google there was a video which showed in exact detail how to remove and replace the valve. Then went on line to find the replacement part which was readily available. The only problem was that the connection on the valve where the fill water enters the valve was larger than the old valve. To fix that I went to a local Ace hardware store and found a nut that would fit the valve connection. Also don't forget to use a compression ring to keep the fill line secured when replaced.
Over all it was very simple and was in my "pay grade"
Parts Used:
Valve Assembly,Water
  • William from NEWPORT NEWS, VA
  • Difficulty Level:
    Really Easy
  • Total Repair Time:
    1- 2 hours
  • Tools:
    Screw drivers, Wrench (Adjustable), Wrench set
2 of 3 people found this instruction helpful.
Was this instruction helpful to you?
Thank you for voting!
Refrigerator not cooling. Fan and lights not working also.
In plug refrigerator. Pry old switch out with flat blade screwdriver. Disconnect wiring from old switch and plug into new switch. Push back into refrigerator. Plug unit back in. Lights and fan should now work. Check for cold air coming out in freezer.
Parts Used:
SWITCH,PUSH BUTTON
  • Joe from SAVOY, IL
  • Difficulty Level:
    Really Easy
  • Total Repair Time:
    15 - 30 mins
  • Tools:
    Screw drivers
1 person found this instruction helpful.
Was this instruction helpful to you?
Thank you for voting!