This OEM 40 watt appliance light bulb is used for some ranges, refrigerators, freezers, and microwaves. Simply locate the existing bulb, unscrew it from its socket, and replace with new light bulb. If...
The Frigidaire light bulb lens covers the interior light bulb in an oven. No tools are necessary to replace this item. After unplugging the appliance, slide off the wire bracket to remove the existing...
The surface Meduim 9.5K burner cap is located on the top of the burner head and is used in ranges and ovens. The burner cap helps spread out the burner flame for even heating, and protects the burner...
This part is the igniter/orifice mounting screw for your cooktop or range. It is approximately ½ an inch in length and is made of metal. The mounting screw connects the orifice to the cooktop. If the ...
This OEM broiler pan and grate insert are cooking accessories used in your oven to broil food. The pan catches drippings and prevents them from falling into the appliance, while the grate insert ensur...
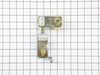
The oven light socket allows you to screw in a light bulb so that you can see the inside of your oven. The light socket is located in the back of your oven, so you will need to remove the back panel t...
This black burner cap is a genuine OEM part made of a durable material capable of reaching 14,000-BTU, with an approximately 3-inch diameter. It is compatible with various models of ranges and cooktop...
This flat glow bar igniter is designed for gas ovens. The function of the part is to ignite the gas to light the oven burner. If your gas igniter does not glow, or if it glows but will not light, you ...
$146.60
In Stock
Questions And Answers for 79036903905
Ask our experts a question about this model and we'll get back to you as soon as possible!
1 question answered by our experts.
Sort by:
< Prev
1
Next >
Search filter:
Clear Filter
Your search term must have 3 or more characters.
Keep searches simple. Use keywords, e.g. "leaking", "pump", "broken" or "fit".
Sorry, we couldn't find any existing answers that matched.Try using some different or simpler keywords, or submit your new question by using the "Ask a Question" button above!
Rodney
December 16, 2019
All burner igniters keep sparking without nothing being turn on.
For model number 79036903905
Hi Rodney,
Thank you for your question. A normally functioning igniter will typically click up to three times before it sparks. But, every now and then you may run into instances where the ignitor continues to click or tick even after the burner is lit, or the burner never lights at all. A clicking ignitor typically is not dangerous and may continue to click if the gas is shut off.
One of the most common sources of this issue is that the Burner Cap is out of place. Make sure the cooktop is completely cooled and remove the Burner Grate to access the cap. Try removing the cap and center it on the base. If the burner cap is askew, it can prevent the burner from lighting.
If that doesn’t work, check for moisture. If you recently had a pot boil over on burner, a food or grease spill, or cleaned the cooktop, there may still be moisture present even if it looks dry. Remove the burner cap and give the burner time to air dry. To speed up the process, make sure all the burners are off and towel off the top of the range. You can then either use a fan aimed at the range top or set your oven to 350° and leave it on for around 30 minutes to speed up dry time.
If you see that there is debris stuck in the holes in the burner, that could also potentially be the culprit.
You can use a metal pin or paper clip to clear the debris out of the grooves. Never use items such as toothpicks to do this, they may break off and get lodged inside.
If you get through all of these tips and still have the clicking problem, it may be the Spark Module, Spark Ignition Switch or the Ignitor itself. You can find replacements for your model stove for purchase on our website. If you feel comfortable, this is a repair you can do yourself. But, if you’re ever unsure don’t hesitate to contact a technician and consult your owner’s manual. We hope this helps. Thank you and have a great day!
Was this helpful?
Thank you for voting!
< Prev
1
Next >
✖
Ask a Question
Ask our experts a question on this model and we'll respond as soon as we can.
Turned power off at electrical panel. Pulled oven away from wall. Removed back cover (6 screws), then unplugged wires from old receptacle. I had to pull the squeeze clips backwards & break them to remove the old receptacle - couldn't squeeze them enough to remove them otherwise. The old receptacle came out through the inside of the oven,
... Read moreand the new one snapped in easily from inside the oven as well. Replaced wiring, installed new bulb, restored power & tested. Replaced back cover. Good time to vacuum under/behind where the oven usually lives before sliding it back to the wall.
This was the first time replacing the fan. It is a lot easier to work in the oven compartment with the oven door removed, only two screws on the door and the hinges were released. I found that a couple of the screws were either rusted or stripped so I used a pair of pliers to remove the screws that were holding the diffuser in place. O
... Read morence there was access to the fan I found that the fan was warped and that the blades were scraping against the back wall of the oven. The next challenge was to remove the retaining nut. I used a sheet metal screw to secure the warped fan to keep it from spinning. once I figured out that you have to turn the retaining nut to the right to loosen, it came off easily. 1/2" socket with extension. When I replace the fan I used two washers for spacers to make sure that the fan would not scrape the wall of the oven. Its been tested many times and the oven does not make that horrible sound anymore.