


Models
>
79036603601
79036603601 Kenmore Range - Overview
Sections of the 79036603601
[Viewing 6 of 6]
Manuals & Care Guides for 79036603601
Click to downloadKeep searches simple, eg. "belt" or "pump".

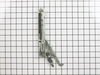
Temperature Sensor
PartSelect #: PS820208
Manufacturer #: 316217002
The oven temperature sensor for your range may also be called a probe. The quick connect on this part may differ than your original piece. If the temperature sensor does not fit you will have to cut o...
$50.31
In Stock

Door Hinge
PartSelect #: PS2345318
Manufacturer #: 318024747
This hinge is located on each side of the oven door.
No Longer Available

GLASS
PartSelect #: PS11728351
Manufacturer #: 5304503232
This tempered glass is supplied by the original manufacturer and measures 20 inches by 13 inches. It is an inner door glass, designed for use in ranges/ovens and has several purposes which include pro...
$152.88
In Stock


Medium Burner - 9.5K
PartSelect #: PS439737
Manufacturer #: 316212400
The surface burner head is used for ranges and ovens, and is located on the cooktop, where the flames go up. The surface burner spreads the gas through holes to create an even flame throughout the ent...
$27.05
In Stock

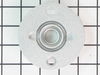
Steel Washer
PartSelect #: PS436497
Manufacturer #: 316008401
This steel washer is also known as the range washer and is used on your oven door. The measurements for the steel washer are a three quarter inch outer diameter, and a one quarter inch inner diameter....
$11.23
In Stock

Broiler Pan Grate Insert
PartSelect #: PS9864838
Manufacturer #: 5304494997
This OEM broiler pan and grate insert are cooking accessories used in your oven to broil food. The pan catches drippings and prevents them from falling into the appliance, while the grate insert ensur...
$68.24
In Stock


Spark Module
PartSelect #: PS2350722
Manufacturer #: 316135702
This spark module or range spark module, is used in ranges and ovens. The spark module monitors and controls the spark to ignite the surface burner in a range. It does this by sending a certain amount...
$94.31
In Stock

Flat Glow Bar Igniter
PartSelect #: PS444179
Manufacturer #: 318177710
This flat glow bar igniter is designed for gas ovens. The function of the part is to ignite the gas to light the oven burner. If your gas igniter does not glow, or if it glows but will not light, you ...
$146.60
In Stock


Questions And Answers for 79036603601
We're sorry, but our Q&A experts are temporarily unavailable.
Please check back later if you still haven't found the answer you need.
Common Symptoms of the 79036603601
[Viewing 7 of 7]Little to no heat when baking
Fixed by
these parts
these parts

Show All
Oven is too hot
Fixed by
these parts
these parts
Show All
Door won’t close
Fixed by
these parts
these parts

Show All
Will Not Start
Fixed by
these parts
these parts

Show All
Oven not heating evenly
Fixed by
these parts
these parts
Show All
Element will not heat
Fixed by
these parts
these parts
Show All
Gas igniter glows, but will not light
Fixed by
these parts
these parts

Show All


Keep searches simple. Use keywords, e.g. "leaking", "pump", "broken" or "fit".
Oven not heating to desired temperature
Replaced clock control by removing surface burner control knobs and plastic nuts, and then the cover over the oven control. Two screw hold the clock in place, after removal and disconnecting the plug-in you can reinstall the new clock control. The Heat Sensor inside the oven will also need to be replaced. It is located inside the oven
... Read more
and attached with two screws; the back of the oven will need to be removed to unplug. Reverse removal procedure and turn the power back on to the stove.
Read less
Parts Used:
-
Dan from Bellevue, ID
-
Difficulty Level:Easy
-
Total Repair Time:15 - 30 mins
-
Tools:Screw drivers
150 of 230 people
found this instruction helpful.
Was this instruction helpful to you?
Thank you for voting!
Cracked oven door inner glass
Repair was quite easy, as long as you have the instructions for removing the door. The screws that hold the bottom of the door to the fixed hinge are placed into the side of the hinge assembly after removal; this holds the door at a 45 degree angle for easy removal. After that, just place the door on a flat surface and dismantle the door
... Read more
from the inside. The inner glass is contained in a metal frame with another piece of glass; this frame comes apart easily using the clips in each side. The door assembles easily after the glass is replaced; just take your time and give yourself enough room to lay out the parts as you go. Good luck!
Read less
Parts Used:
-
Mitch from Fernandina Beach, FL
-
Difficulty Level:Easy
-
Total Repair Time:15 - 30 mins
-
Tools:Screw drivers
74 of 110 people
found this instruction helpful.
Was this instruction helpful to you?
Thank you for voting!
Oven door hinge broke causing the door to fail to close properly.
I ordered the part based on the parts list provided. The part arrived by mail 2 days after I submitted my order by email. True to the word in their website, they mailed the item the same day I placed the order.
It took approximately 20 minutes to remove the damaged hinge and replace the new one. No problems at all and I was ... Read more extremely pleased with the rapid arrival of my order. I had studied the door and the hinge placement in advance and knew exactly what was needed. The only tool I used was a screwdriver. I removed the plate on the side of the door...lifted out the damaged hinge...replaced it with the new hinge...replaced the plate covering the hinge parts and replaced the door on the oven. An easy fix....
It took approximately 20 minutes to remove the damaged hinge and replace the new one. No problems at all and I was ... Read more extremely pleased with the rapid arrival of my order. I had studied the door and the hinge placement in advance and knew exactly what was needed. The only tool I used was a screwdriver. I removed the plate on the side of the door...lifted out the damaged hinge...replaced it with the new hinge...replaced the plate covering the hinge parts and replaced the door on the oven. An easy fix....
Read less
Parts Used:
-
James from Chickamauga, GA
-
Difficulty Level:Really Easy
-
Total Repair Time:15 - 30 mins
-
Tools:Screw drivers
58 of 91 people
found this instruction helpful.
Was this instruction helpful to you?
Thank you for voting!