


Models
>
66517159K214
66517159K214 Kenmore Dishwasher - Overview
Sections of the 66517159K214
[Viewing 13 of 13]


 Diagram and Parts List for Kenmore Dishwasher")


Keep searches simple, eg. "belt" or "pump".

Rack Track Stop
PartSelect #: PS11746591
Manufacturer #: WP8565925
The rack track stop on your dishwasher is designed to stop the dish rack at the appropriate place when opening and closing the rack. If your dishwasher is not cleaning your dishes properly, the rack s...
$7.71
In Stock

Dishwasher Heating Element
PartSelect #: PS8260087
Manufacturer #: W10518394
This manufacturer-certified heating element is used to create heat during the dry cycle and increase water temperature during portions of the wash cycle when certain options are selected. If your dish...
$66.15
In Stock

Friction Sleeve
PartSelect #: PS11745488
Manufacturer #: WP8268961
This part helps to keep your door quiet when it opens and closes.
$7.50
In Stock

Dishwasher Drain Pump
PartSelect #: PS11753379
Manufacturer #: WPW10348269
This drain pump is used in dishwashers to remove water from the dishwasher tub. If the impeller in the dishwasher is damaged or the motor has been shorted out and will not drain, it is possible the bo...
$91.96
In Stock

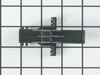
Retainer Clip - Black
PartSelect #: PS11755736
Manufacturer #: WPW10503548
This part is used to hold the access panel in place. Sold individually.
$26.74
In Stock

Faucet Adapter
PartSelect #: PS11751238
Manufacturer #: WPW10254672
The faucet adapter for your portable dishwasher or washing machine attaches to the faucet and allows you to connect the machine to the tap. Before you install the faucet adapter on your taps, be sure ...
$54.46
In Stock

Hose Clamp
PartSelect #: PS11743008
Manufacturer #: WP596669
This hose clamp is used in a wide variety of household appliances. Most often it is found in washers, dishwashers, refrigerators, freezers, dehumidifiers, garbage disposals, or air conditioners. This ...
$11.80
In Stock

Dishwasher INLET VALVE
PartSelect #: PS12578165
Manufacturer #: W11175771
This water inlet valve should be located behind the lower kick plate panel in either the right or left corner. The attaching solenoids on the valve open and close according to the desired amount of water needed.
$64.02
In Stock

Dishwasher Filter
PartSelect #: PS11759673
Manufacturer #: W10872845
This filter works with the water pump in your dishwasher. It prevents debris from entering the pump and causing damage. As a result, the filter can occasionally become clogged or damaged, and will nee...
$58.02
In Stock

High Limit Thermostat
PartSelect #: PS11743423
Manufacturer #: WP661566
This part acts as as safety mechanism that keeps the dryer from overheating. Once the dryer temperature reaches a certain point, this part will shut down power to the heating element.
$20.71
In Stock

GASKET
PartSelect #: PS16221222
Manufacturer #: W11498831
This door gasket is a genuine OEM replacement part that is specially designed for your dishwasher. The gasket is located around the frame of the dishwasher. It is a rubber seal that helps prevent wate...
$28.76
In Stock

Touch-Up Paint - White
PartSelect #: PS385132
Manufacturer #: 72017
This touch-up paint can be used on a wide variety of household appliances. It is most often used on washers, dryer, refrigerators, dishwashers, ranges, freezers, trash compactors, or microwaves. It is...
$8.00
In Stock
Questions And Answers for 66517159K214
We're sorry, but our Q&A experts are temporarily unavailable.
Please check back later if you still haven't found the answer you need.
Common Symptoms of the 66517159K214
[Viewing 10 of 10]Not drying dishes properly
Fixed by
these parts
these parts


Show All
Leaking
Fixed by
these parts
these parts


Show All
Not draining
Fixed by
these parts
these parts


Show All
Not cleaning dishes properly
Fixed by
these parts
these parts
Show All
Will not fill with water
Fixed by
these parts
these parts


Show All
Will Not Start
Fixed by
these parts
these parts
Show All
Door latch failure
Fixed by
these parts
these parts


Show All
Door won’t close
Fixed by
these parts
these parts
Show All
Noisy
Fixed by
these parts
these parts
Show All
Will not dispense detergent
Fixed by
these parts
these parts

Show All


Keep searches simple. Use keywords, e.g. "leaking", "pump", "broken" or "fit".
dishwasher not draining after wash cycle
Caviat: The actual repair is less than 15 minutes, but I spent a lot of time playing with it before I figured out it was that easy and fast. You don't need to remove the dishwasher from the counter to do this. And it will probably help to look at the new part closely so you can understand where the retainer clip is to press it and release
... Read more
the old pump.
First remove the water from the dishwasher pan that would not drain with a wet/dry vac. Otherwise the water will all drain on the floor when you remove the pump. Then remove the two screws on the kickplate on the front of the unit below the door. Remove the kickplate/maintainence access cover. The drain pump is on the right about 8 inches in. Using two hands you grasp the drain pump with your right hand and use the left hand to push the retaining clip down. Then the drain pump will rotate 1/4 turn counterclockwise and can be removed without pulling the dishwasher out. There is likely to be some water leak out that was traped in the pump housing that you can not reach with the vac. Disconnect the wire. Connect the wire to the new pump, put it in place and 1/4 turn clockwise to install it. Replace the kickplate and you're done.
First remove the water from the dishwasher pan that would not drain with a wet/dry vac. Otherwise the water will all drain on the floor when you remove the pump. Then remove the two screws on the kickplate on the front of the unit below the door. Remove the kickplate/maintainence access cover. The drain pump is on the right about 8 inches in. Using two hands you grasp the drain pump with your right hand and use the left hand to push the retaining clip down. Then the drain pump will rotate 1/4 turn counterclockwise and can be removed without pulling the dishwasher out. There is likely to be some water leak out that was traped in the pump housing that you can not reach with the vac. Disconnect the wire. Connect the wire to the new pump, put it in place and 1/4 turn clockwise to install it. Replace the kickplate and you're done.
Read less
Parts Used:
-
Andrew from Alexandria, VA
-
Difficulty Level:Easy
-
Total Repair Time:Less than 15 mins
-
Tools:Screw drivers
476 of 529 people
found this instruction helpful.
Was this instruction helpful to you?
Thank you for voting!
Heater element broken.
Step 1: Remove the screws in the bottom of the countertop.
Step 2: Remove the screws holding the bottom kickplate.
Step 3: Loosen leveling legs.
Step 4: Pull dishwasher out of hole.
Step 5: Unlplug dishwasher.
Step 6: Disconnect wires from bottom of element in back.
Step 7: ... Read more Remove plastic nuts holding element in place.
Step 8: Remove element.
Step 9: Reverse Steps 1-7.
Step 10: Drink beer.
Read less
Parts Used:
-
Dennis from Sedro Woolley, WA
-
Difficulty Level:Really Easy
-
Total Repair Time:Less than 15 mins
-
Tools:Screw drivers, Wrench set
217 of 242 people
found this instruction helpful.
Was this instruction helpful to you?
Thank you for voting!
Failed diagonistics test for OWI sensor
Pulled the dishwasher out from the counter, on the lower right hand side, about mid way back there is a bundle of all yellow wires, follow that to the sensor which mounts into the bottom of the wash tub. The sensor is easily removed by grasping it by hand and turn it about a half turn (can't remember which direction). It then just pulls
... Read more
out. Disconnect the wire bundle by pushing on the retaining clip and the install is the reverse.
Read less
Parts Used:

-
Mark from Lancaster, NY
-
Difficulty Level:Easy
-
Total Repair Time:15 - 30 mins
-
Tools:Screw drivers
58 of 83 people
found this instruction helpful.
Was this instruction helpful to you?
Thank you for voting!