


Models
>
6496-LWM-833
6496-LWM-833 Amana Washer - Overview
Sections of the 6496-LWM-833
[Viewing 23 of 23]


Keep searches simple, eg. "belt" or "pump".

Thrust Washer
PartSelect #: PS11740482
Manufacturer #: WP233520
This genuine OEM washer has a 3/4 inch outside diameter. This thrust washer can be used on most makes and models of dryers. A complete list of compatible dryers is available below. The washer is found...
$7.95
In Stock

Screw, 8/18 x 3/8
PartSelect #: PS11746840
Manufacturer #: WP90767
This screw is sold individually.
$5.42
In Stock

Hose Clamp
PartSelect #: PS11740613
Manufacturer #: WP285655
The hose clamp is used to hold the water hose in place which will prevent the hose from leaking water. Sometimes the clamp may lose its ability to latch on, causing a leaking washer. For the installat...
$11.10
In Stock

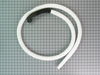
Drain Hose with Rubber Elbow
PartSelect #: PS11742254
Manufacturer #: WP40053901
This hose attaches to the pump to help remove the water out of the washer. 7 feet in length.
$55.00
In Stock

Complete Hub and Seal Kit
PartSelect #: PS2174602
Manufacturer #: R9900552
This kit comes with hub, seal head, gasket, seal shroud, seal seat, screw, spline insert, drive bell and seal.
No Longer Available


Screw, 8-18 x 1/2
PartSelect #: PS11741443
Manufacturer #: WP3390631
This screw is sold individually.
$7.84
In Stock

Main Tub Bearing Assembly
PartSelect #: PS11742242
Manufacturer #: WP40004201P
This triangular main tub bearing assembly is five inches long. It is made of metal.
$75.63
In Stock

Water Inlet Valve
PartSelect #: PS11741776
Manufacturer #: WP34963
This valve has two ports for water to enter. This water inlet valve attaches the water lines to the back of your appliance. The attaching solenoids on the valve open and close according to the desired...
$200.16
In Stock

Support Leg Spring
PartSelect #: PS2038822
Manufacturer #: 35948
These springs are sold individually and usually require a total of 7 per appliance.
No Longer Available

Drive Bell and Seal Kit
PartSelect #: PS2174335
Manufacturer #: R9900189
This washing machine drive bell and seal kit comes with a seal, a plug, a shoulder screw, a drive bell, and some grease.
No Longer Available

Nut
PartSelect #: PS11741865
Manufacturer #: WP358160
This serrated nut is used for many clothes dryers. It is less than an inch long, and is made entirely of metal.
$5.36
Special Order
Questions And Answers for 6496-LWM-833
We're sorry, but our Q&A experts are temporarily unavailable.
Please check back later if you still haven't found the answer you need.
Common Symptoms of the 6496-LWM-833
[Viewing 6 of 6]Leaking
Fixed by
these parts
these parts


Show All
Noisy
Fixed by
these parts
these parts

Show All
Will not agitate
Fixed by
these parts
these parts
Show All
No hot or cold water
Fixed by
these parts
these parts

Show All
Burning smell
Fixed by
these parts
these parts
Show All
Spins slowly
Fixed by
these parts
these parts
Show All


Keep searches simple. Use keywords, e.g. "leaking", "pump", "broken" or "fit".
Water leaking on floor from "mysterious place underneath washer"
Water was leaking on the floor during the wash cycle and especially during draining of the washer. I removed the front panel at ground level and watched while draining after a rinse.
I t was obvious that water was spraying from a hole in the rubber end of the hose (the hose is a fused assembly of a plastic section and a rubber ... Read more section).
So, I finished draining, removed the hose (required pliers to squeeze off a hose clamp).
Upon inspecting the hose, it was also apparent that the hole was caused by rubbing against a support bracket for the motor. This should not happen, but it did because the plastic standoff supposed to keep the hose away from the bracket was installed 180 degrees backwards.
So, I simply replaced the hose and turned the bracket around to the correct orientation.
Everything worked as planned and my repair cost was much less than if I had called someone out.
Read less
Parts Used:

-
Bryan from Chicago, IL
-
Difficulty Level:Easy
-
Total Repair Time:Less than 15 mins
-
Tools:Pliers, Socket set
50 of 55 people
found this instruction helpful.
Was this instruction helpful to you?
Thank you for voting!
The Seal On The Bottom Of The Tub Was Leaking
Removed the front of the washer, then lifted the top up and held it up with a prop. Pulled the agitator straight up and started the disasembly. Using the photos in the hub and seal kit was a big help. The large nut on the output shaft had to be cut off with my dremel tool and the hub removed with a wheeler puller. Assembly was pretty
... Read more
much straight forward. Primed the pump and started the machine for the stated time and was a sucess.
Read less
Parts Used:

-
HOWARD from CORTLAND, OH
-
Difficulty Level:Easy
-
Total Repair Time:1- 2 hours
-
Tools:Nutdriver, Screw drivers, Socket set, Wrench (Adjustable)
33 of 42 people
found this instruction helpful.
Was this instruction helpful to you?
Thank you for voting!
Bearing went out causing lots of noise.
This is not a bad repair, but give yourself some time. I did not have to take the tranny and motor out, but the inner and outer tub and all related parts had to come out, along with the outer tub base. If you are replacing the tub bearing, you HAVE to order the seal kit. Don't try to skimp like I did, since you will need the seal kit as t
... Read more
his is what causes that bearing to fail in the first place. We forgot how quiet the washer was after I fixed it, and it saved us from buying a new washer since we were ready to say the heck with it and buy a new pair. You might need an 1.5 inch socket to get the big nut off the spindle, but I was able to get with a visegrip and hammer. The nice thing about this repair is even if you screw it up, you won't have water all over the place because of the seal design. I just checked under the washer a few times for the first few weeks and all seems fine.
Read less
Parts Used:

-
mike from hull, IA
-
Difficulty Level:A Bit Difficult
-
Total Repair Time:More than 2 hours
-
Tools:Nutdriver, Pliers, Screw drivers, Socket set, Wrench (Adjustable), Wrench set
24 of 26 people
found this instruction helpful.
Was this instruction helpful to you?
Thank you for voting!