


Models
>
6289468892
6289468892 Kenmore Range - Overview
Sections of the 6289468892
[Viewing 4 of 4]
Keep searches simple, eg. "belt" or "pump".

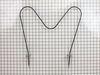
Bake Element - 240V
PartSelect #: PS453960
Manufacturer #: 5303051519
This heating element, used in any range/oven, is an open-style bake element. It is placed at the bottom of the oven and supplies heat. If your baking element does not supply consistent heat or is burn...
$37.02
In Stock

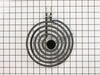
Surface Element - 8 Inch - 2600W
PartSelect #: PS2339242
Manufacturer #: 316442301
The range surface element provides heat to the cooking surface on top of the range. The element has a universal plug, is 8 inches in diameter, spans 5 coils in width and reaches 2600 watts. Before you...
$20.39
In Stock

6-Inch Coil Burner Element
PartSelect #: PS2368974
Manufacturer #: 318372211
This element is a genuine OEM replacement part, has looped terminal ends, comes with a black medallion center, and fits most electric ranges. All burners are made of a heating wire that produces heat ...
$39.32
In Stock

Oven Rack
PartSelect #: PS437923
Manufacturer #: 316067902
Oven racks can become rusted or damaged from constant use, and need to be properly maintained and cleaned to keep them working properly. If you notice that your oven rack has been damaged or rusted, t...
$81.35
In Stock

LENS
PartSelect #: PS16218465
Manufacturer #: 5304524341
The Frigidaire light bulb lens covers the interior light bulb in an oven. No tools are necessary to replace this item. After unplugging the appliance, slide off the wire bracket to remove the existing...
$10.90
In Stock

Burner Switch Kit
PartSelect #: PS470145
Manufacturer #: 5303935086
This is a burner switch kit, also known as the surface element control switch repair kit, for ranges. This burner switch kit sends voltage to the surface element coil and it controls the stove top sur...
$40.14
In Stock


Oven Thermostat
PartSelect #: PS470058
Manufacturer #: 5303934039
This part establishes and maintains the internal temperature of the oven cavity.
No Longer Available
Gasket
PartSelect #: PS453971
Manufacturer #: 5303051704
This oven door gasket prevents heat from escaping the oven cavity when in use.
$313.25
Special Order

Questions And Answers for 6289468892
We're sorry, but our Q&A experts are temporarily unavailable.
Please check back later if you still haven't found the answer you need.
Common Symptoms of the 6289468892
[Viewing 5 of 5]Element will not heat
Fixed by
these parts
these parts

Show All
Little to no heat when baking
Fixed by
these parts
these parts
Show All
Oven not heating evenly
Fixed by
these parts
these parts
Show All
Will Not Start
Fixed by
these parts
these parts
Show All
Oven is too hot
Fixed by
these parts
these parts
Show All


Keep searches simple. Use keywords, e.g. "leaking", "pump", "broken" or "fit".
Baking Heating Element Burned Up
Used a screw driver with a socket head to remove the two hex head screws holding the old element. Pulled the old element forward until the two wire attachements were visable. The wires were attached with a simple tab connector. Removed the wires from the element. Attached wires to new element slide the element and wires back into wall of
... Read more
oven and replaced screws. Done!
Read less
Parts Used:
-
Christopher from North Salt Lake, UT
-
Difficulty Level:Really Easy
-
Total Repair Time:Less than 15 mins
-
Tools:Socket set
192 of 201 people
found this instruction helpful.
Was this instruction helpful to you?
Thank you for voting!
blown bake element
Removed the two screws that hold the element in place at the rear of the oven.Unplug each prob,you may need pliers as they can be a little tight.Reconnected the new element.Keep the old screws.New element does not come with screws.Always unplug range when doing repairs.
Parts Used:
-
joseph from washington, PA
-
Difficulty Level:Really Easy
-
Total Repair Time:Less than 15 mins
-
Tools:Nutdriver, Pliers
59 of 62 people
found this instruction helpful.
Was this instruction helpful to you?
Thank you for voting!
High heat reluctant to turn down.
Most of the job is simple fastener mechanics.
Use a nut driver or Phillips screwdriver. Remove rear panel.
Pull out control knob. If it is stuck, wrap a small rag around the back of it and pull the rag steadily.
Carefully match marked terminals on the replacement switch with those on original. Switch terminals ... Read more may not be in the same location. Replace wires one for one, one at a time.
Carefully select the correct knob filler for the switch post. Several are supplied. Proceed with logic and measure the shaft length and the filler length and type to match.
Read less
Parts Used:
-
George from New Port Richey, FL
-
Difficulty Level:Easy
-
Total Repair Time:15 - 30 mins
-
Tools:Nutdriver, Pliers, Screw drivers
45 of 49 people
found this instruction helpful.
Was this instruction helpful to you?
Thank you for voting!