The tub dampening straps support the wash tub and reduce vibration by keeping the tub at the center of the cabinet. If your washer shakes and moves, or is making a loud banging noise during the wash c...
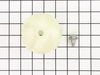
The selector knob is what you use to start the dryer. This replacement knob comes with a retaining clip. This is a very easy repair, the only tool you may need is a pair of needle nose pliers. Remove ...
The agitator coupler connects the agitator to the agitator shaft. Common symptoms of a damaged coupler include: a grinding sound during the wash cycle, the washer refusing to agitate or spin, or the w...
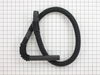
The drain hose is black in color and made of flexible material. This is a part for your top-load washer. The hose measures 57 inches long. This part moves the water out of the washer and into the drai...
The timer knob clip on your washing machine connects the timer knob to the control panel. If your timer knob is damaged or will not stay in place, you may need to replace the clip. If the timer does n...
This is a dual-action agitator for a washer. It is an OEM replacement part that is sourced from the manufacturer. The agitator tosses your clothes to clean them efficiently. This plastic dual-action a...
This pump helps expel water from the washing machine and is activated after the spin speed is maintained for a specific period of time. If you notice that your washing machine will not drain, there is...
The main tub seal is located between the transmission and the outer tub. Its the primary water seal in the outer tub for the transmission-shaft. If your washer is leaking during the fill cycle, or at ...
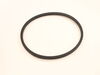
This V-shaped drive belt is 29 1/2 inches long x 1/2-inch-wide, and fits both front-load and top-load washing machines. When belts are worn or frayed, they are known to make noise. If you have a top-l...
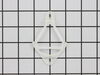
This drain hose support clip is a piece for your washer. The purpose of the drain hose support clip is to hold the drain hose in place by attaching to a cabinet. This piece is off-white and is roughly...
This water inlet valve attaches the water lines to the back of your appliance. The attaching solenoids on the valve open and close according to the desired temperature, or amount of water needed.
$91.55
In Stock
Questions And Answers for 59341T6WW
Be the first to ask our experts a question about this model!
✖
Ask a Question
Ask our experts a question on this model and we'll respond as soon as we can.
Slid off the old START knob, then pushed on the new START knob.
I created and printed a label on my computer for use with the time selector dial, which must be set at or beyond 10 minutes, before turning the START knob.
I made a label that says "Minimum" with a red arrow that points past the 10 minute setting on the
... Read moretime selector dial.
My teenage daughter was not setting the time selector dial, to a point past 10 minutes. When she turned the START knob, the dryer would not come on, because the time selector dial was not set past the 10 minute setting.
My daughter had continually twisted the START knob until it broke. I am hoping she will be able to see the large printed label I put on the dryer near the time selector, saying "Minimum" with a large red arrow pointing past 10 minutes.
I am very pleased that I was quickly able to find the exact matching START knob for my dryer and the exact same color, from PartSelect.Com
1. Drained the wash tub by taking the drain hose from the back of the washing machine and dropping it below the tub - water flowed out of hose a lot easier than trying to suck water out of tub using a pump (tried this on the first time I tried to fix washer). (Washing machine on 2nd floor of house and didn't want water running on floor)<
... Read morebr />2. Removed the 2 bolts holding the Pump/Motor assembly to the machine. 3. Removed both hose clamps on the Pump/Motor assembly and removed Pump. 4. Attached the new drain inlet hose to the pump and then to the tub with the original hose clamps. 5. Attached the drain hose to the pump and then plugged in the 2 wires for the pump. 6. Plugged in the washing machine and everything worked.
NOTES: 1. Hardest part was working with hose clamps (spring type clamps) in the tight space under the machine. 2. Easier to fix since I pulled machine apart a few days before - removing the clog in the pump/motor assembly only to get everything back together to find out that the motor was dead. Still well worth the time and effort due to not having to go out and buy a new Machine...