


Models
>
2721H
2721H Simplicity Lawn Mower - Overview
Sections of the 2721H
[Viewing 1 of 1]
Exact Part matches for your search term
[Viewing 1 of 1]
Engine Brace
This part number matches the current model number 2721H
PartSelect #: PS11950824
Manufacturer #: 2721H
No Longer Available
Keep searches simple, eg. "belt" or "pump".

Filter- A/C Cartridge
PartSelect #: PS8987387
Manufacturer #: 491588S
This is a replacement air filter/AC cartridge for your small engine. The air filter prevents dirt and debris from entering the engine. Over time, the air filter can become clogged or damaged, and this...
$7.06
In Stock
 – Part Number: 690981")
Rod-Push (Steel)
PartSelect #: PS9062983
Manufacturer #: 690981
This is a replacement steel push rod for your lawn tractor engine. The engine will have two push rods; one made of steel, and one made of aluminum. This part is made of steel and is approximately 6 in...
$6.89
On Order

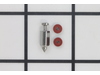
Starter Pawl-Ratchet
PartSelect #: PS8942598
Manufacturer #: 281505S
The manufacturer-approved Ratchet Pawl (Starter Pawl) comes in a set of two (2). This part attaches inside the recoil assembly, and is used to engage the flywheel. if broken due to wear/damage it will...
$3.99
In Stock

Kit-Needle/Seat
PartSelect #: PS8963322
Manufacturer #: 398188
This needle and seat kit, also known as a float valve, is found in many types of liquid-fueled lawn equipment, such as carburetors. The valve regulates the flow of fuel into the float bowl. The needle...
$6.91
In Stock
 – Part Number: 795387")
Seal--Oil (PTO Side)
PartSelect #: PS9151828
Manufacturer #: 795387
This OEM Seal-Oil (PTO Side), also called the Oil Seal, is a Black, Nitrile Rubber, 2/14 O.D., individually sold part which is installed using a Seal Puller. Customers rate the installation difficulty...
$7.88
On Order

Gasket-CylinderHead
PartSelect #: PS9067184
Manufacturer #: 693997
This is a replacement cylinder head gasket for your small engine. The gasket is approximately 5 inches in length and 5 inches in width at its longest and widest points. The gasket creates a seal, and ...
$26.91
In Stock


Seal,Oil
PartSelect #: PS9277860
Manufacturer #: 391086S
The Oil Seal is a manufacturer-approved rubber part which provides a seal between the crankcase and crankshaft by attaching around the axle shaft on the crankhouse housing. Installation is rated as "M...
$6.59
In Stock


Questions And Answers for 2721H
We're sorry, but our Q&A experts are temporarily unavailable.
Please check back later if you still haven't found the answer you need.
Common Symptoms of the 2721H
[Viewing 2 of 2]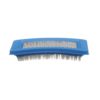

Keep searches simple. Use keywords, e.g. "leaking", "pump", "broken" or "fit".
Engine quit due to valve guide sliding out causing rocker arm to be immovable resulting in bent push rods.
Clean engine with a Gunk type product. Remove valve cover. Loosen bolts and remove old cylinder head. One bolt is located inside valve cover area. Remove old gasket and inspect and clean that surface. Attach new head with new gasket using existing bolts. Torque to 18'#s with a cross type pattern. Attach new rocker arms and push rods. Set
... Read more
valve clearance to .004 - .006. Attach valve cover with gasket. Check oil level. Start and let it warm up. Let cool remove cover then check valve clearance again. Replace cover.
Read less
Parts Used:

-
D from HUNTSVILLE, AL
-
Difficulty Level:Really Easy
-
Total Repair Time:30 - 60 mins
-
Tools:Nutdriver, Socket set
11 of 13 people
found this instruction helpful.
Was this instruction helpful to you?
Thank you for voting!
Lost my main jets while cleaning old gas from carb.
I removed the fan shroud, the carb/manifold as an assembly,turned the carb upside down and removed the fuel bowl. I replaced only one jet. Not until this moment did I discover their were two jets in this nikki carb. I now have a second jet ordered and will install it Friday,hopefully. These jets are two different part numbers as one is a
... Read more
left jet and the other is a right one. Be careful when opening the fuel bowl as these jets are held in their bores by small O-rings, and nothing else. The brigg's and Stratton part numbers are 791501 for the left jet and 791502 for the right.
Read less
Parts Used:
 – Part Number: 791501")
-
dan from EASTPORT, ME
-
Difficulty Level:Really Easy
-
Total Repair Time:15 - 30 mins
-
Tools:Pliers, Screw drivers, Socket set, Wrench set
8 of 12 people
found this instruction helpful.
Was this instruction helpful to you?
Thank you for voting!
Bad governor
Look on YouTube for video's on how to replace a Briggs governor. There are several there. My favorite, with best explanation, is, "Easily Replace Briggs Governor Gear (V-Twin Intek Engine) with Taryl". https://www.youtube.com/watch?v=wn3eanGxSEA&t=152s.
Taryl (probably not his real name) does a very good job of showing step-by- ... Read more step the whole procedure, along with some additional hints/tricks/techniques of value.
Not including oil and filter, I spent less than $50 for a new governor, gasket, and drive shaft seal. That's all that is really necessary to replace is those three parts. That is, unless pieces of the old governor tore up a gear, valve, or something else. Inspect everything! {I was lucky and only the governor was destroyed}
One word of note. Be sure to clean out all of the debris from the blown governor. Be sure to remove the spark plugs and carefully rotate the drive shaft while looking for nooks-and-crannies where debris can hide. I tried to use a magnet to help, but it didn't help much, even though the block is aluminum.
Good luck.
Read less
Parts Used:

-
John from BROOKVILLE, IN
-
Difficulty Level:Easy
-
Total Repair Time:1- 2 hours
-
Tools:Nutdriver, Pliers, Socket set, Wrench set
5 of 9 people
found this instruction helpful.
Was this instruction helpful to you?
Thank you for voting!