


Models
>
12A-562Q711
12A-562Q711 (2009) Troy-Bilt Lawn Mower - Overview
Sections of the 12A-562Q711
[Viewing 3 of 3]_WW_1.gif "Page A Diagram and Parts List for 2009 Troy-Bilt Lawn Mower")
_WW_2.gif "Page B Diagram and Parts List for 2009 Troy-Bilt Lawn Mower")
_WW_3.gif "Page C Diagram and Parts List for 2009 Troy-Bilt Lawn Mower")
Keep searches simple, eg. "belt" or "pump".

Front Lawn Mower Drive Wheel
PartSelect #: PS9455101
Manufacturer #: 734-04018C
This is a genuine OEM replacement part, it is sold individually.
This is the front wheel on the models shown below.
There are two of them on each mower.
The wheel has a ring gear on the inside whic...
No Longer Available

Mulching Blade
PartSelect #: PS9169783
Manufacturer #: 942-0741A
This is an authentic replacement part manufactured for use with Craftsman walk-behind lawnmowers. The blade is angled to allow the clippings to rotate through the cutting deck to produce fine clipping...
$32.37
In Stock

Control Handle
PartSelect #: PS9113457
Manufacturer #: 747-1161A-0637
The Control Handle is an OEM, metal, black handle used to control the engine. It attaches onto the handle assembly of the mower. If broken you will no longer be able to control the engine, and the par...
$12.90
In Stock


Bell Blade Support
PartSelect #: PS17016260
Manufacturer #: 736-0524B-1
The Blade Support (Bell Blade Support) fits between the bottom of the blade and the blade bolt to provide support for the blade. It is installed underneath the cutting deck on the blade. Installation ...
$5.84
In Stock


Nut, Flange Lock, 3/8-16, Grf
PartSelect #: PS9095080
Manufacturer #: 712-04065
Designed for use in various models of lawn and garden equipment, this part is not sold as part of a kit or assembly. It is made of metal, is gold in color, and is sold individually. This part may also...
$3.99
In Stock

Side Discharge Deflector
PartSelect #: PS10005504
Manufacturer #: 731-04177
The Side Discharge Deflector, also known as a discharge chute, is a black plastic part used to direct glass clippings out from under the deck of the mower. This manufacturer-certified part has been ra...
$18.44
In Stock


 – Part Number: 946-1132")

Questions And Answers for 12A-562Q711
We're sorry, but our Q&A experts are temporarily unavailable.
Please check back later if you still haven't found the answer you need.
Sort by:
- < Prev
- 1
- Next >
Search filter:
Clear Filter
Your search term must have 3 or more characters.
Keep searches simple. Use keywords, e.g. "leaking", "pump", "broken" or "fit".
Sorry, we couldn't find any existing answers that matched.Try using some different or simpler keywords, or submit your new question by using the "Ask a Question" button above!
Steven
May 13, 2022
The front drive wheels will not come off axle after removing the center nut on each wheel?
Hello Steven, Thank you for the question. The Wheel should come off once the nut is removed. We suggest trying a penetrating oil to loosen the the wheel. If you need help placing an order, customer service is open 7 days a week. Please feel free to give us a call. We look forward to hearing from you!
Was this helpful?
Thank you for voting!
- < Prev
- 1
- Next >
Common Symptoms of the 12A-562Q711
[Viewing 1 of 1]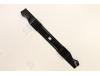
Keep searches simple. Use keywords, e.g. "leaking", "pump", "broken" or "fit".
Cable was frozen and bail was broken
I removed the bail and removed cable from motor! Then it was ready for new parts installation!
I attached the cable to the motor and I put the right side of bail in its hole and I then installed cable into the bail and then installed the left side of bail into its hole!! Once that was completed I used two zip ties to cinch down cab ... Read more le to the handle!! Job done!
I attached the cable to the motor and I put the right side of bail in its hole and I then installed cable into the bail and then installed the left side of bail into its hole!! Once that was completed I used two zip ties to cinch down cab ... Read more le to the handle!! Job done!
Read less
Parts Used:
 – Part Number: 946-1132")

-
Charles from MIDVALE, OH
-
Difficulty Level:Very Easy
-
Total Repair Time:Less than 15 mins
3 of 4 people
found this instruction helpful.
Was this instruction helpful to you?
Thank you for voting!
The treads on the front drive wheels were worn down to the point that they provided little traction.
Removed a single nut on each end of the drive shaft with the appropriate socket. Wheels then slipped off. Cleaned/polished the shaft with fine sandpaper, lubed with silicone spray, slid on the wheels and reinstalled the nuts with the same socket. Wheels were an exact fit and OEM quality. Done in 15 minutes start to finish.
Parts Used:
-
MICHAEL from Kennewick, WA
-
Difficulty Level:Really Easy
-
Total Repair Time:Less than 15 mins
-
Tools:Socket set
2 of 3 people
found this instruction helpful.
Was this instruction helpful to you?
Thank you for voting!
Front drive wheels were wore out
-
Ronald from WAYNE, MI
-
Difficulty Level:Very Easy
-
Total Repair Time:Less than 15 mins
-
Tools:Socket set
2 of 3 people
found this instruction helpful.
Was this instruction helpful to you?
Thank you for voting!