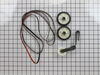
The drum support roller kit (Dryer Repair Kit) allows the dryer to tumble properly by supporting the drum cylinder. The idler pulley provides the tension required for a multi-ribbed belt. The belt att...
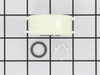
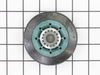
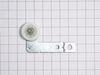
This Idler Pulley includes the tri-ring and gasket and everything included here is manufacturer-certified. This part maintains correct tension on the drive belt in order to spin the drum properly. If ...
This drum support roller is sold individually. Most dryers require two. The tri-rings are included. This is a drum support roller for a dryer. It is a genuine replacement part. The part includes the d...
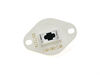
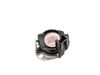
The internal-bias thermistor (Thermistor, Dryer Thermister, Dryer Thermistor) prevents the dryer from overheating by monitoring and controlling the temperature of the inside of the dryer drum. It is l...
If you notice that your dryer is noisy or will not tumble, you may need to replace the tri ring. This part is triangular, and is less than an inch in size. Tri rings can be found both on the idler pul...
If your washer shakes or vibrates loudly when it reaches its max speed, check that the leveling legs are even. To ensure that the washer is firmly on the ground using all four legs, adjust the legs so...
The idler pulley wheel is now sold with this arm. This idler pulley is for dryers.
Idler pulley maintains correct tension on the drive belt to spin the drum.
Also known as Thermal Cut-Off kit. The thermostat acts as a safety mechanism that keeps the dryer from overheating and the fuse is like a backup system - it's set to trip at a higher temperature than...
Grow a second set of hands. Always unplug any appliance. Remove lint screen. remove two screws (philips Head). I took a wooden shim lightly tapped w/hammer to pop front of dryer top free. Mine worked on hinges and just flipped back til it rested against the wall. Removed two 5/16 screws inside holding face on carefully raise face section
... Read moreoff the support clips at either side on the bottom. Pull drum out (I have the large style drum commercial size [approx.). Clean the inside free of all lint (known to be fire hazard). Sling new belt around drum. Get newly grown set of hands to hold drum in place. Pinch belt to fit between tensioner, lift tensioner and place belt around motor pulley. Spin drum couple times to make certain belt isn't twisted. Reverse dismantle proccess to put back together. Replace all parts that come with kit, you'll feel better knowing you got a new dryer, almost.
1st Unpluged power. 2nd removed two screws under lint screen cover. 3rd poped up lid with flathead screwdryer, then removed (2) 5/16 screws from door cover and unpluged lid switch, lifted up dryer door pannel 4th removed drum 5th took out plastic triangle wheel rings 6th removed old belt guild (to motor pully)
... Read more/>7th removed old wheels and plastic rings stops 8th cleaned excessive hair dust with shopvac 9th put new replaicment part in dryer. made sure to turn manually to make sure belt was lined up properly, then put all dryer peices back. 10th aditional work, took back cover off and removed the (4) 1/4 screws for lint screen case (left side in dryer) vacumed out any excessive dirt lint ect, also cleaned any excessive dust I found in back of dryer, dryer , exhaust ect, and put all back together. JUst like a new dryer aain after all PM was complete.
1) Disconnected power cord from wall. 2) Disconnected vent hose from back of dryer. 3)Removed dryer rear panel. 4)Disengaged tension spring on idle wheel arm. 5) Removed worn idle wheel. 6)Installed new Idler wheel assembly. 7) Vacuumed dust from rear of dryer (optional, recommended). 8) Reinstalled rear cover, vent hose and power cord. E
... Read moreasy repair 15-30


 Diagram and Parts List for Kenmore Dryer")