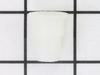
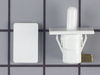
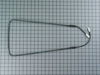
The lower door closing cam is used in refrigerator doors, it can be located on the fresh food side or the freezer side. It helps hold the door open. This cam is made out of plastic, so it might crack ...
This OEM, clear convertible meat drawer can be used to store meats or vegetables and is designed for the lower portion of your refrigerator, generally. It has its own cold air duct to allow cold air f...
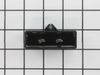
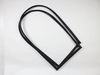
The Door Cam is a black plastic part which helps the door pivot shut while keeping the door and hinge in proper alignment. Lubricating this part upon installation may help it move easier. It attaches...
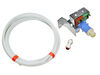
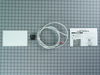
The water inlet valve (Refrigerator Water Inlet Valve Kit) provides water for the ice maker and water dispenser. This part is located at the back of the refrigerator, and connects to the water supply....
This Ice Maker (Icemaker Assembly, Complete Icemaker Assembly, Ice Maker Assembly, Refrigerator Ice Maker) can be used with 25-27 cubic feet refrigerators that have a vertical auger dispenser located ...
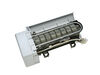
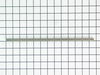
If you have ice building up in your freezer, or if your freezer is getting too warm during the defrost cycle you may need to replace the bi-metal defrost thermostat. The function of the defrost bi-met...
In this kit you will find the support, the ice door, spring, and delay. The heater ribbon is no longer needed and therefore will not be included with this part. This kit works in the dispenser chute t...
This set of two electronic control boards contains both the emitter and the receiver. These boards tells the icemaker when it's full and that it has to dump the ice, and it also tells the icemaker whe...
This part is also known as a shelf frame. This drawer cover is for refrigerators.
Drawer cover has rail brackets under the cover that hold the drawer and allow the drawer to slide in and out on th...
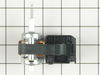
This part helps the compressor kick on and off while maintaining a constant temperature to keep things frozen in your freezer. If you are noticing temperature issues with your refrigerator or freezer,...
Remove the icemaker service door... gently pry the door pins from the hinge sockets. Remove the 3 screws from the under side of the icemaker with a nut driver (1/4"). Gently remove the icemaker . It's a tight fit between the top of the compartment and the icemaker lower support tray. Next, disconnect the electrical connector at the ri
... Read moreght side. You're done! Reverse procedure for installing. Good luck. Remember, your working with cold plastic...take your time and don't force too much.
Remove the top hinge cover. Removed the top hinge support. Lifted the door from the bottom support. Old door cams were worn completly flat. Replaced the lower door cam and closing cam use a little vasalene for lubricant on the cam surfaces. Placed the door back on the lower hinge support. Replaced the top hinge support. Door is cl
... Read moreosing great now. Thanks for the quick part deliver.
First I unplugged the fridge, then using the socket set I removed the cardboard shield from the lower rear of the refrigerator. I located the leaking water from a cracked solenoid water valve just inside the lower cavity directly behind the water intake line. Removing the valve was a snap - most of the valve plastic compression coupling
... Read mores unscrewed and came off. The metal compression fittings required an adjustable wrench and a pair of pliers to hold the solenoid unit steady. A couple of hex nuts kept the solenoid bolted to the refrigerator frame and came off easily with the socket. Two simple push-on electrical plugs came right off just by pulling on them. The new valve unit wasn't exactly like the original one. It had push-on instead of compression water fittings and the plugs were oriented differently. I recommend studying which water lines entered which port on the valve because I was a little unsure after I took the old one apart (whoops). After figuring out how to put it pack together, the push-on water fittings were even easier, and the unit was scewed back into place on the fridge frame. The electric plugs have different sized contacts so you can't mix them up. I put the cardboard shield back on. Viola!