The crisper drawer (Crisper Pan, Refrigerator Crisper Drawer) with humidity control is meant to keep your vegetables and fruit as fresh as possible by allowing you to regulate the humidity levels with...
This manufacturer-certified Refrigerator Door Shelf Bin, also known as the crisper bin and door shelf bin, is made of clear plastic, and is easy to install. It is used to hold items in the fridge door...
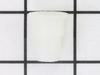
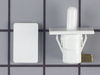
The lower door closing cam is used in refrigerator doors, it can be located on the fresh food side or the freezer side. It helps hold the door open. This cam is made out of plastic, so it might crack ...
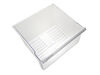
This OEM, clear convertible meat drawer can be used to store meats or vegetables and is designed for the lower portion of your refrigerator, generally. It has its own cold air duct to allow cold air f...
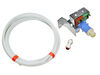
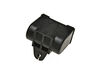
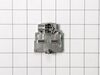
The water inlet valve (Refrigerator Water Inlet Valve Kit) provides water for the ice maker and water dispenser. This part is located at the back of the refrigerator, and connects to the water supply....
This Ice Maker (Icemaker Assembly, Complete Icemaker Assembly, Ice Maker Assembly, Refrigerator Ice Maker) can be used with 25-27 cubic feet refrigerators that have a vertical auger dispenser located ...
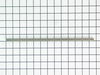
This capacitor (Refrigerator and Freezer Compressor Run Capacitor, Run Capacitor) provides the voltage or energy current required to start the compressor and keep it running. It allows the compressor ...
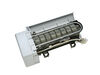
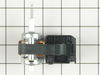
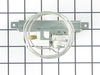
If you have ice building up in your freezer, or if your freezer is getting too warm during the defrost cycle you may need to replace the bi-metal defrost thermostat. The function of the defrost bi-met...
In this kit you will find the support, the ice door, spring, and delay. The heater ribbon is no longer needed and therefore will not be included with this part. This kit works in the dispenser chute t...
Remove the icemaker service door... gently pry the door pins from the hinge sockets. Remove the 3 screws from the under side of the icemaker with a nut driver (1/4"). Gently remove the icemaker . It's a tight fit between the top of the compartment and the icemaker lower support tray. Next, disconnect the electrical connector at the ri
... Read moreght side. You're done! Reverse procedure for installing. Good luck. Remember, your working with cold plastic...take your time and don't force too much.


 Diagram and Parts List for Kenmore Refrigerator")