Complete Heater and Housing Assembly - 240V Specifications
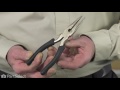
This heating element consists of two pieces: a metal tube and a coil. It carries 240 volts and is approximately 17 inches long with an approximate 7 inch diameter.
How Buying OEM Parts Can Save You Time and Money
Part Videos
Replacing your Maytag Dryer Complete Heater and Housing Assembly - 240V
Keep searches simple. Use keywords, e.g. "leaking", "pump", "broken" or "fit".
Sorry, we couldn't find any existing reviews that matched. Try using some different or simpler keywords.
★★★★★
★★★★★
Stan H - July 7, 2021
Verified Purchase
Good quality part.
Thank you!
Part was an exact replacement and repair video helped me replace it myself.
★★★★★
★★★★★
Matthew D - October 2, 2020
Verified Purchase
??
Works good. Just a tiny amount larger than the original part which made the install a little more involved.
★★★★★
★★★★★
Bruce F - August 22, 2020
Verified Purchase
Part came in a timely manner and worked as expected!
Part was in great condition and came fast. Appliance is now back in working order!
★★★★★
★★★★★
David B - June 4, 2020
Verified Purchase
Easy DIY repair!
The DIY video help a lot and made the replacement an easy fix. Our 20+ year old dryer is back working again.
★★★★★
★★★★★
Eric P - September 4, 2019
Verified Purchase
had to make it fit
the diameter was off I had to tweak the metal to get it to fit the blower housing
★★★★★
★★★★★
CARVEL S - October 16, 2018
Verified Purchase
Replacement part for Maytag dryer
The part was as stated on line. Installation was pretty easy even for this old man. Thanks for the good service.
★★★★★
★★★★★
Susan Z - August 25, 2018
Verified Purchase
Challenging install, but in the end- it works
Very challenging to reach some of the screws, need someone with small hands. Also, cylinder had to be modified to fit. After replacing four parts, THIS one solved the no heat problem.
★★★★★
★★★★★
Garry J - June 22, 2018
Verified Purchase
Perfect replacement
Part was shipped quickly being an exact copy installation was easy. Tutorial video was most helpful.
★★★★★
★★★★★
Mike S - June 15, 2018
Verified Purchase
good part fit pretty well
part came fast
★★★★★
★★★★★
Ed H - March 7, 2018
Verified Purchase
Right Part
Simple install // Brought more life back to the dryer
< Prev
1
2
Next >
Customer Repair Stories
Average Repair Rating: 3.0 / 5.0, 31 reviews.
What's this?
Sort by:
< Prev
1
2
3
Next >
Search filter:
Clear Filter
Your search term must have 3 or more characters.
Keep searches simple. Use keywords, e.g. "leaking", "pump", "broken" or "fit".
Sorry, we couldn't find any existing installation instruction that matched.
Dryer runs but no heat.
I went ahead and replaced all the thermostats, heater assembly and jump wire which was very easy after watching the installation videos. The new heater assembly was a little tough to get to fit in. but managed to get it to fit. Turned it on but to my surprise no heat. Someone earlier had told me that a friend had the same problem and it w
... Read moreas a faulty circuit breaker but I didn't think that could of been the problem. I then checked it and sure enough that is what was the problem, it was only get power on one leg of the breaker. Put in a new circuit breaker and every thing works great. I don't mind putting in the new parts at least I have a piece of mind that that it's in good shape and have back up spare parts if needed.
The replacement heater housing was not round and poorly fastened together..
We had to squeeze the replacement heater housing into a round configuration while pushing it into the inlet duct in the back of the dryer.
Stephen from WATKINSVILLE, GA
Difficulty Level:
Difficult
Total Repair Time:
30 - 60 mins
Tools:
Nutdriver
1 personfound this instruction helpful.
Was this instruction helpful to you?
Thank you for voting!
No heat
Before ordering the heater assembly, I went on the Internet. Read instructions on how to diagnose if the heater were bad and how to replace the heater, I checked the existing heating assembly with a VOM and found there was no resistance - it was an open circuit. This indicated is needed to be fully replaced.. I slowly took it all apart,
... Read more and then reassembled the new part. Installation was a little tricky but eventually worked out okay.
Read less
Barry from Statesville, NC
Difficulty Level:
A Bit Difficult
Total Repair Time:
1- 2 hours
Tools:
Screw drivers, Wrench set
1 personfound this instruction helpful.
Was this instruction helpful to you?
Thank you for voting!
Dryer stopped heating.
I had replaced other parts on this dryer before (drive belt, interlock switch), so knew how to remove the front. That is easy to do. Didn't even have to pull dryer away from the wall. Removed heater assembly. NOTE: take a picture, or note which wires go where! Took a chance that it was only the heating element after measuring the resistan
... Read morece of the element and noting that it was an open circuit (very high resistance). Could also have been something else in addition, but turned out, not. The hard part was getting the new housing assembly to fit in the circular hole at the back. It comes as a poor fit, not shaped right. I eventually just used pliers to bend in the edges, like crimping, and finally got it to fit in. Some pushing to get all screws back in place and now it runs and heats. A great dryer, over 30 years old, and still going. Well worth the effort to repair.
Went on your web site and saw some repair instructions and followed them.Repair was pretty easy.Thanks to your fast delivery service, I was only without my dryer for one day. This made my wife very happy! Thanks again for your help.
Craig from Napa, CA
Difficulty Level:
Easy
Total Repair Time:
30 - 60 mins
Tools:
Nutdriver, Screw drivers
0 of 1 peoplefound this instruction helpful.
Was this instruction helpful to you?
Thank you for voting!
Dryer would not heat..
I guessed it was the heating coil. I ordered one and it arrived in three (3) days, which was great. I pulled the dryer out away from the wall a bit and leaned the top of the dryer back against the wall and removed the front cover. it took about ten (10) minutes to remove the old heater assembly. I cleaned the inside of the dryer with a sh
... Read moreop vac. While installing the new heater assembly, the only trouble I ran into and took a little bit of time was that one lonely screw at the rear of the assembly, what a pain. I guess I spent a good twenty (20) minutes trying to put that screw in place, while trying to position the back of the new heater assembly correctly. The whole job took a little over and hour and a quarter, and the dryer is working great again. Thank you for all of the tips by previous installers, it really helped me out.
Read less
John C. from Edgewater, FL
Difficulty Level:
A Bit Difficult
Total Repair Time:
1- 2 hours
Tools:
Nutdriver, Screw drivers
1 of 3 peoplefound this instruction helpful.
Was this instruction helpful to you?
Thank you for voting!
no heat
Couldn't figure out how to dismantle the dryer to get to the heater and housing assembly. Found it on your website others commenting about where to locate the 2 front screws.....after that it was easy as a piece of cake. We took it apart and installation done in 15mins. Now I hope my Maytag dryer will last another 30years....LOL
I purchased the complete heater element and housing assembly as I do not have the wherewithall to troubleshoot the individual components. It was wise as was very easy to install. Installation instructions did not come with the part; however, knowing what I was dealing with from having replaced the belt earlier last year, I knew what the
... Read more part looked like without pulling my dryer apart. I initially removed the part from the box and then unplugged the dryer. From there, I removed the front of my dryer to confirm that everything matchedup. I then drew out a diagram (rough sketch) of the part on the dryer so that I knew what went where (screws, colored wires, etc). I then used a socket set to remove th screws and disconnect the wires, then was able to put the new part in. The only thing that I used the wrench for (a monkey wrench) was to provide leverage to fit the one end of the housing into the fitting at the back of the dryer - the part arrives more elipticly(sp) shaped than the perfect roundness so it took a little extra effort to get that in but only took a couple of minutes. I reconnected everything and plugged it back in and it has worked beautifully, drying items much faster now and my 'delicate' heat is now functional (never has worked since I received the dryer 4+ years ago). Aside from doing the sketch, it was a 20-30 minute install in total.
Read less
Annette from Everett, WA
Difficulty Level:
Easy
Total Repair Time:
30 - 60 mins
Tools:
Pliers, Socket set
0 of 2 peoplefound this instruction helpful.
Was this instruction helpful to you?
Thank you for voting!
Dryer would not dry clothes
I have had my dryer for 22 years and could not afford a repair person. It was not drying the clothes like it should so I decided it must be the heating element, yep that was the problem. My son came over and replaced the part, he said it was easy to install and had my dryer working within 30-1 hr. I am so thankful we have do it yours
... Read moreelf parts available to install on our own.
Read less
Beverly from Bethlehem, GA
Difficulty Level:
Really Easy
Total Repair Time:
30 - 60 mins
Tools:
Socket set
0 of 1 peoplefound this instruction helpful.
Was this instruction helpful to you?
Thank you for voting!
< Prev
1
2
3
Next >
Questions and Answers
Ask our experts a question about this part and we'll get back to you as soon as possible!
2 questions answered by our experts.
Sort by:
< Prev
1
Next >
Search filter:
Clear Filter
Your search term must have 3 or more characters.
Keep searches simple. Use keywords, e.g. "leaking", "pump", "broken" or "fit".
Sorry, we couldn't find any existing answers that matched.Try using some different or simpler keywords, or submit your new question by using the "Ask a Question" button above!
Ron
January 23, 2018
How do l test a thermostat or heater coil with ohm meter
For model number LDE412
Hello, thank you for your question! Here is a link that will take you to a section of our site that shows you how to test a heater element. https://www.partselect.com/Dryer+test-heating-element+repair.htm . This is the link that will take you to how to test the thermostat. https://www.partselect.com/Dryer+test-thermostat+repair.htm. Copy the links into a browser window and the information you need will be available. I hope this helps!
2 people found this helpful.
Was this helpful?
Thank you for voting!
Don
December 5, 2021
Dryer still is hot even when not in use for several days. Possible cause?
For model number DE712
Hello Don, Thank you for the question. The most common reason for a dryer that gets hot even when it's not in use is a grounded heating element. We suggest replacing the Element, PartSelect Number PS11757514. If you need help placing an order, customer service is open 7 days a week. Please feel free to give us a call. We look forward to hearing from you!
Was this helpful?
Thank you for voting!
< Prev
1
Next >
✖
Ask a Question
Ask our experts a question on this part and we'll respond as soon as we can.


 – Part Number: WPY304475")


 – Part Number: WP303396")

 – Part Number: WP303396")