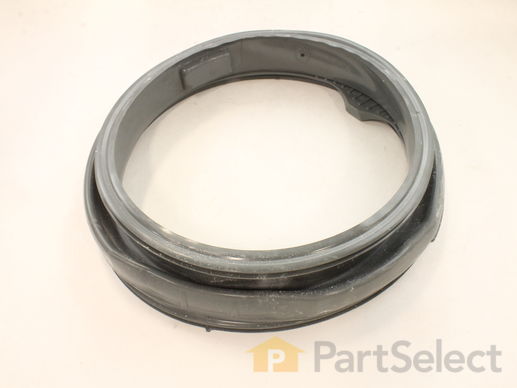
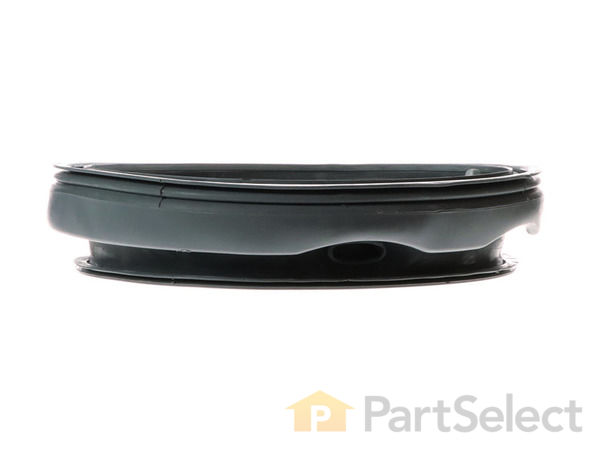
Part Location Diagram of WH08X10036 GE Door Boot Seal
See part 306 in the diagram
Replacing your General Electric Washer Door Boot Seal
( Grid squares measure 1x1 inch )
Customer Service Representative

Get in touch, we're here to help!

Daily 8am - 9pm EST

customerservice@partselect.com

Door Boot Seal WH08X10036

★★★★★
★★★★★
8 Reviews

Rated by 13 customers 

A Bit Difficult 

1- 2 hours 

Ratings submitted by customers like you who bought this part.

$ 240.70
  In Stock
Get FREE EconoShip on orders over $100! T&C apply

Get this part fast! Average delivery time for in-stock parts via standard shipping: 1.8 days.

PartSelect Number PS1766023
Manufacturer Part Number WH08X10036
Manufactured by GE
Product Description

Door Boot Seal Specifications

Also known as Bellow. The part may differ in appearance but functions same as original.
How Buying OEM Parts Can Save You Time and Money

How Buying OEM Parts Can Save You Time and Money

Part Videos

Replacing your General Electric Washer Door Boot Seal

Replacing your General Electric Washer Door Boot Seal
Troubleshooting
This part fixes the following symptoms:
Leaking | Burning smell
This part works with the following products:
Washer.
This part works with the following products:
General Electric.
Part# WH08X10036 replaces these:
AP4334050, 1394050, WH08X10022, WH08X10040
Back to Top
Customer Reviews
Average Rating:
★★★★★
★★★★★
8 Reviews
5.0
Filter By Rating:
  • 5 Stars
    8
  • 4 Stars
    0
  • 3 Stars
    0
  • 2 Stars
    0
  • 1 Star
    0
Sort by:
  • 1
Sorry, we couldn't find any existing reviews that matched. Try using some different or simpler keywords.
  • 1
Customer Repair Stories
 Average Repair Rating: 2.5 / 5.0, 13 reviews. What's this?
Sort by:
  • 1
  • 2
Sorry, we couldn't find any existing installation instruction that matched.
Front seal leaking water.
Took it apart per the video and reinstalled
  • Jodd from HANNIBAL, MO
  • Difficulty Level:
    Really Easy
  • Total Repair Time:
    30 - 60 mins
  • Tools:
    Nutdriver, Pliers, Screw drivers
1 person found this instruction helpful.
Was this instruction helpful to you?
Thank you for voting!
Door boot seal tore and washing machine was leaking water
Watch the video posted on PartSelect. It was excellent and walked step by step through the whole repair.

I only ran into one issue not included in the video. In order to remove the inner ring holding the boot seal, I had to remove the weight at the bottom of the tub. This is easy to remove with a wrench, but took two people to reinstall. You only need the second person for 1-2 minutes to hold the weight while you align the bolts.

The most difficult part is ensuring you replace the hex nuts and screws in the same location. I took pictures as i removed them to know where to reinstall.

Total repair time was probably 1.5 hours.
  • Paul from LAKEVILLE, MN
  • Difficulty Level:
    Easy
  • Total Repair Time:
    1- 2 hours
  • Tools:
    Nutdriver, Screw drivers
1 person found this instruction helpful.
Was this instruction helpful to you?
Thank you for voting!
Broken Spider Arm
We ultimately rebuilt this washer because I love it so and it was one-half cheaper to rebuild than to buy new! We watched videos and researched the repair and then dove in. Yes, we had to tear the machine down but really it was not that bad of an ordeal. It ended up being much easier than we initially thought but once all the parts arrived we fixed it!
Other Parts Used:
Door Boot Seal TUB_SEAL Drive Belt GASKET INSIDE CLAMP SCREW_ST4 10 GASKET OUTSIDE CLAMP
  • Janet from BRIDGEPORT, WV
  • Difficulty Level:
    Easy
  • Total Repair Time:
    30 - 60 mins
  • Tools:
    Nutdriver, Pliers, Screw drivers, Socket set, Wrench (Adjustable)
3 of 3 people found this instruction helpful.
Was this instruction helpful to you?
Thank you for voting!
Water leaking due to rip in door boot seal
I won't bother repeating other people's comments. My repair took a bit over 2 hours. I watched 2 different videos and thought the repair was doable. To remove the first wire band holding the boot seal to the front panel I found using an awl to grab the eyelet near the spring was easier than using a needle nose recommended in the video. To remove the second wire band I used an offset screwdriver. One video I watched recommended removing the lower counterweight to get at the band's screw - I did not do that. Putting the new boot seal into the first groove and installing the wire band was the most time consuming part of the job. I did not have extra hands to help. I recommend the second pair of hands for that part to save time. The rest of the install was easy.
  • Gary from WEBSTER, NY
  • Difficulty Level:
    A Bit Difficult
  • Total Repair Time:
    More than 2 hours
  • Tools:
    Screw drivers
2 of 2 people found this instruction helpful.
Was this instruction helpful to you?
Thank you for voting!
smoking in drum in rinse cycle
followed video on website
  • albert from CLIMAX, NC
  • Difficulty Level:
    A Bit Difficult
  • Total Repair Time:
    30 - 60 mins
  • Tools:
    Nutdriver, Pliers, Screw drivers
5 of 6 people found this instruction helpful.
Was this instruction helpful to you?
Thank you for voting!
leaky washer
we took the advice of you tube. my husband said "WONT READ DIRECTIONS BUT WILL WATCH A VIDEO" and he fixed it no problem. it took about 1 1/2 hours per unit.
  • nicole from round lake beach, IL
  • Difficulty Level:
    A Bit Difficult
  • Total Repair Time:
    1- 2 hours
  • Tools:
    Screw drivers
24 of 29 people found this instruction helpful.
Was this instruction helpful to you?
Thank you for voting!
The rubber gasket on my front loader had a rip in it and soap and water would leak out at the bottom making a nice puddle to walk in on.
I read and reread all of the installation repairs everyone had sent in. Everyone said on the average it would take 1-2 hours. I partly started the install myself and the ran into a problem. My wife was my helping second hands( second hands is a great help) and she suggested to either google or YouTube the repair. Within minutes I had found one on you tube and it help me tremendously. it had the exact model washer on the video and the install was a breeze. I would recommend looking up the repair cause they show step by step video and makes it a lot easier.
  • Gerard from Pompano Beach, FL
  • Difficulty Level:
    Easy
  • Total Repair Time:
    1- 2 hours
  • Tools:
    Screw drivers
101 of 118 people found this instruction helpful.
Was this instruction helpful to you?
Thank you for voting!
rip on gasket (maybe from a caught zipper)washer leaked
I was able to get the 1st metal ring After trying everything to get the 2nd ring off I ended up calling a repairman. It was just too hard for me get my hand into the area to loosen the ring. It took repairman over 1 hr to complete job of installing the boot. After spending o$300, I just just shook my head. Hats off to the other people able to do it.
  • Patrick from Linden, NJ
  • Difficulty Level:
    Very Difficult
  • Total Repair Time:
    More than 2 hours
27 of 37 people found this instruction helpful.
Was this instruction helpful to you?
Thank you for voting!
The door boot seal gasket ripped during a load.
I took the outer retainer clamp off and pulled the outer seal off the front of the washer. Then pushed the seal inward to see the rear seal and its wire clamp. Took a philips head screwdriver (short handel) and loosened the clamp. Pulled the clamp out and then the rubber boot. Put new boot on the tub (rear - this took a little while to make sure the seal was correctly in place.) Make sure the boot is lined up with the two hose connections. Intstall wire clamp, this took some time because there is not a whole lot of room to get your hands in there to tighten. Connect the two hoses to the boot and the boot to the front of the washer. Install outer wire clamp. Done.
  • ben from newaygo, MI
  • Difficulty Level:
    A Bit Difficult
  • Total Repair Time:
    15 - 30 mins
  • Tools:
    Screw drivers
48 of 62 people found this instruction helpful.
Was this instruction helpful to you?
Thank you for voting!
Water leaking from the door.
I had to replace the door gasket because there was a small piece that had torn away, which caused large amounts of water to leak when the load of laundry was too big. Smaller loads of laundry would just produce a little bit of water.
Unsure of how to replace the gasket, I used a phillips screwdriver to pull the door and front panel off. I thought that this would be pretty simple, but I soon discovered that it wasn't as simple as removing several screws and pulling the pieces off. The door was easy, the bottom panel was easy, but the front panel was held in place by screws, plastic tabs, the front of the gasket (I'll explain later), and gravity by means of plastic supports. Trying to find and release the tabs, lifting the panel up and out was not self-explanatory. I finally figured it out, and it made changing the gasket out, a breeze. The gasket is held in by two diferent wire spring clamps/bands. One band holds the gasket to the outside of the tub, and the other band holds the gasket to the front panel. Before removing the front panel you must remove the first band which is cleverly hidden by the face of the rubber gasket. Just peel it back...it's in there. I was able to pull/pry this off with a screwdriver because I was not worried about damaging the old gasket. The second band had to be removed with either a 6mm/7mm wrench(I can't remember which) or a stubby phillips screwdriver. The stubby screwdriver is handy because of the proximity of the tubs counterweights. Once the final band is removed just peel the gasket away from the tub, after taking note of how it came off. Put the fully loosened band on the new gasket and fit the new gasket into place. It helped to have two sets of hands to work it around the tub, but probably not necessary. The wrench is necessary to properly tighten the band, because you cannot get enough torque on the stubby screwdriver.Once the gasket is in place you can re-install the front panel, and secure the front of the gasket to the panel. Install the band and it will secure itself by the tension of the spring. Put the door back on and you are ready to wash clothes.
  • Brandon from Chugiak, AK
  • Difficulty Level:
    A Bit Difficult
  • Total Repair Time:
    More than 2 hours
  • Tools:
    Screw drivers, Wrench set
219 of 256 people found this instruction helpful.
Was this instruction helpful to you?
Thank you for voting!
  • 1
  • 2
Questions and Answers

Ask our experts a question about this part and we'll get back to you as soon as possible!

19 questions answered by our experts.
Sort by:
  • 1
  • 2
Sorry, we couldn't find any existing answers that matched.Try using some different or simpler keywords, or submit your new question by using the "Ask a Question" button above!
Tyrone
September 1, 2017
I ordered washer door boot wh08x10036 and it didn't come with a band clamp. Did I order the right one if not can you give me the right part number.
For model number WCVH6800JOMS
PartSelect logo
Hi Tyrone, Thank you for the question. You did order the correct boot for the model number but the clamp is sold separately. The part number for the clamp is 1019932. Hope this helps!

12 people found this helpful.

Was this helpful?
Thank you for voting!
Related Parts:
Joe
July 22, 2017
Washing machine made a loud noise the seal between the tub and front door spun and twisted took the front spring loaded ring off in the tub lower than the door opening. Thought i could just been the seal back in place but the tub is about 2 inches lower i had to prop it up from the bottom to get to line up with the door. I think i have more than a seal issue. I need suggestions what to do next
For model number WBVH5200J1WW
PartSelect logo
Hello Joe, Thank you for your question. I would actually suggest that you take the back panel off of your machine and take a look at your rear drum and bearing. It sounds like perhaps the Drive Pulley or Rear Drum assembly might have broken. I hope that helps!

3 people found this helpful.

Was this helpful?
Thank you for voting!
Val
October 22, 2019
Will this gasket fit the older model?
For model number WCVH6600H0BB
PartSelect logo
Hi Val, thank you for your question. Yes, this is the part that you are looking for according to your manufacturer and the model number provided. I hope that helps. Good luck with your repair.

2 people found this helpful.

Was this helpful?
Thank you for voting!
John
October 29, 2017
Is this an original oem GE part?
For model number WH08X10036
PartSelect logo
Hi John, Thank you for the question. Yes all of our parts are OEM. Good luck with the repair!

2 people found this helpful.

Was this helpful?
Thank you for voting!
Scott Uysal
March 24, 2018
I have seen so much smoke came out during spin cycle, plus when i open the front door i have seen little rubber pieces.
For model number WCVH6600H0BB
PartSelect logo
Hello Scott, Thank you for your inquiry. We would recommend checking the following parts to fix your issue: drive pulley kit, drive belt, motor kit, and door boot seal. Hope this helps!

2 people found this helpful.

Was this helpful?
Thank you for voting!
Hannah
January 10, 2018
Hello. The sheets in my washer did not ring out the necessary water after a cycle. It does this from time to time. I put it through an additional spin and drain cycle and when i came back the room smelled of burning rubber or possibly a strong gas smell. I had to open the garage door to air it out. I'm exploring what part would be the culprit and am wondering if it's the door boot seal. We also checked the belt in the back of the washer, but it seemed to look ok. How would i know if our door boot seal needs replacing? Is there a way to tell before taking it out? Thanks!
PartSelect logo
Hi Hannah, Thank you for the question. You would replace the Boot Seal if you had water leaking. It would not effect the appliance spinning out the water from the clothes or sheets.In order for us to locate the correct parts and repair information we will require the model number of the appliance. Once you have located the model number please feel free to resubmit the question and we will be happy to help you. Look forward to hearing from you!

1 person found this helpful.

Was this helpful?
Thank you for voting!
Tony
November 16, 2018
I have this same problem as included below. Occasionally the washer gets a rapid knocking when spin drying so i stop it and restart it, which allows the cycle to complete without the rapid knocking. The barrel seems rigid (no movement/slop to indicate a bad bearing). Can you provide detail information on how to determine if a part is defective for each of the items you recommended checking? If all these parts are required, they will cost upwards of $600 for parts alone. If it is just a damaged (rotting?) door seal, then that is manageable." i have seen so much smoke came out during spin cycle, plus when i open the front door i have seen little rubber pieces. scott uysal march 25, 2018 answer: hello scott, thank you for your inquiry. we would recommend checking the following parts to fix your issue: drive pulley kit, drive belt, motor kit, and door boot seal. hope this helps!"
For model number WHDVH660HW
PartSelect logo
Hi Tony, Thank you for your question. A washer making a loud noise during spin cycle can also be caused by a faulty drive pulley. The pulley is what the belt (if applicable to your washer) rides on to spin your washers tub. The pulley can be made of plastic or metal. It could be simply worn out or just loose. The only way to know if the parts are defective is to inspect them and if they are electronic parts, you will need a multimeter to test them. I hope this helps. Thank you and have a great day!

1 person found this helpful.

Was this helpful?
Thank you for voting!
Wilbert
June 20, 2019
Are there any seal between the tub and the door gasket
For model number WBVH5200J1WW
PartSelect logo
Hi Wilbert, thank you for your question. No the seal would be the door bellow/tub boot seal. I hope that helps. Good luck with your repair.

1 person found this helpful.

Was this helpful?
Thank you for voting!
David
May 5, 2018
Door boot bellows became twisted. Replaced it but tub doesn't line up with the opening in door and filler spout distorts the boot. Tub appears too low and off to one side. Thoughts?
For model number WCVH6800J0MS
PartSelect logo
Hello David, I would recommend watching the video that shows how to install this part on our site, under part number WH08X10036. It may be that the spring clamps are not holding the gasket onto the tub which allows the gasket to move with the Tub. I would suggest looking at the inner and outer bellow clamps. I hope this helps!

Was this helpful?
Thank you for voting!
David
May 7, 2018
Installed a new door bellows. The old one became very twisted while was still installed. When attaching the full tube at the upper left the bellows is almost too low. Attaching it causes the bellows to be pulled upward out of shape. When putting the door panel on the edges of the bellows where it should meet the opening in the door is off by about 3 inches. Is there a suspension part i should look for that failed that would cause the drum to drop twisting the original bellows and new bellows to not line up with door opening ? New bellows is in the tub grove and clamps seated properly. Door and tub do not align even without the bellows. Thanks.
For model number WCVH6800J0MS
PartSelect logo
Hi David, Thank you for your question. For information on how to install the door boot seal, there is a video listed with the part on our website, that you may reference for help. I hope this helps. Thank you and have a great day!

Was this helpful?
Thank you for voting!
  • 1
  • 2
Model Cross Reference
This part works with the following models:
PartSelect Number: PS1766023
Manufacturer Part Number: WH08X10036
Brand
Model Number
Description
General Electric
GBVH5140H0WW
Washer
General Electric
GBVH5140H1WW
Washer
General Electric
GBVH5200J0WW
Washer
General Electric
GBVH5200J1WW
Washer
General Electric
GBVH5200J3WW
Washer
General Electric
GBVH5200J4WW
Washer
General Electric
GBVH5200K0WW
Washer
General Electric
GBVH5300K0WW
Washer
General Electric
GBVH5300K2WW
Washer
General Electric
GBVH6260F0GG
Washer
General Electric
GBVH6260F0WW
Washer
General Electric
GCVH6260F0GG
Washer
General Electric
GCVH6260F0WW
Washer
General Electric
GCVH6260H0WW
Washer
General Electric
GCVH6260H1WW
Washer
General Electric
GCVH6400J0WW
Washer
General Electric
GCVH6400J1WW
Washer
General Electric
GCVH6400J2WW
Washer
General Electric
GCVH6500K0WW
Washer
General Electric
GCVH6500K1WW
Washer
General Electric
GCVH6600H0BB
Washer
General Electric
GCVH6600H0GG
Washer
General Electric
GCVH6600H0MB
Washer
General Electric
GCVH6600H0MS
Washer
General Electric
GCVH6600H0WW
Washer
General Electric
GCVH6600H1BB
Washer
General Electric
GCVH6600H1GG
Washer
General Electric
GCVH6600H1MB
Washer
General Electric
GCVH6600H1MS
Washer
General Electric
GCVH6600H1WW
Washer
Customer Service Representative

Get in touch, we're here to help!

Daily 8am - 9pm EST

Contact Customer Service