The temperature sensor on your oven detects the temperature within the oven cavity. If you notice your oven is too hot, not hot enough, or does not heat evenly, the short oven sensor kit may need replacing. This oven sensor is referred to as the short sensor and is 3 inches long. It should not be confused with the 6-inch-long sensor. The oven sensor is located on the back wall of the interior of the oven. Before starting this repair, be sure to disconnect the power source from the oven. If you are repairing a gas range, make sure to disconnect the gas source as well.
How Buying OEM Parts Can Save You Time and Money
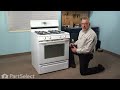
Part Videos
Replacing your Maytag Range Short Oven Sensor Kit
Troubleshooting
This part fixes the following symptoms:
Little to no heat when baking | Oven not heating evenly | Will Not Start | Oven is too hot
This part works with the following products:
Range, Wall Oven, Microwave Oven Combo.
This part works with the following products:
Maytag, Magic Chef, Jenn-Air, Amana.
Part# 12001655 replaces these:
AP4009456, 1365, 12001655, 04000051, 12001356, 12001555, 12001655, 12001655VP, 74002625, 74003094, 74003413, 74004470, 74004944, 74005192, 7430P001-60, 7430P002-60, 7430P004-60, 7430P007-60, 7430P007-60K, 7430P009-60
...
Show more, 7430P041-60, W10127322, Y04000051 Show less
Customer Reviews
Average Rating:
★★★★★
★★★★★
26 Reviews
4.7
Filter By Rating:
5 Stars
23
4 Stars
1
3 Stars
1
2 Stars
0
1 Star
1
Sort by:
< Prev
1
2
3
Next >
Search filter:
Clear Filter
Your search term must have 3 or more characters.
Keep searches simple. Use keywords, e.g. "leaking", "pump", "broken" or "fit".
Sorry, we couldn't find any existing reviews that matched. Try using some different or simpler keywords.
★★★★★
★★★★★
Rupert G - March 19, 2023
Verified Purchase
Easy repair, worked are expected.
Appliance in working order.
★★★★★
★★★★★
Randy B - January 6, 2023
Verified Purchase
Great!
Quick delivery part fit perfect excellent instructions
★★★★★
★★★★★
Edward G - August 17, 2022
Verified Purchase
Simple installation
The part was as described and installation was easy.
My oven still takes a long time to get to temperature.
It still is not working correctly.
Not sure what is going on.
★★★★★
★★★★★
Cathy S - April 18, 2022
Verified Purchase
Great Part
Easy ordering and quickly shipped. Received this OEM part quickly and easy job. Great!!!!!
★★★★★
★★★★★
Michael F - December 19, 2021
Verified Purchase
Right part, right price, prompt delivery
Right part, right price, prompt delivery
★★★★★
★★★★★
Dayton W - March 14, 2021
Verified Purchase
Worked as expected
Great service , part was in excellent condition and worked flawlessly.
Stove is back in operation. Thank you so much.
Dayton.
★★★★★
★★★★★
Jill K - March 13, 2021
Verified Purchase
Easy repair
I’m famous for being all thumbs when it comes to anything technical but I was able to do this repair in minutes, using one of the included adapters and my oven is now heating perfectly. The part arrived in just a few days.
★★★★★
★★★★★
Robert H - September 26, 2020
Verified Purchase
OVEN
no i think i had a short in the line but other than that all's fine just brought a new oven this was 13yrs old and used a awful lot in those but thank you for giving me a review on the part and thank you for PART SELECT r howard
★★★★★
★★★★★
Patrick M - August 27, 2020
Verified Purchase
Easy RepaiR
Easy
★★★★★
★★★★★
James R - August 7, 2020
Verified Purchase
Easy repair. The part was the exact one needed.
The video on the website was excellent as a guide. It made doing the repair very easy. My oven works well now.
< Prev
1
2
3
Next >
Customer Repair Stories
Average Repair Rating: 3.9 / 5.0, 36 reviews.
What's this?
Sort by:
< Prev
1
2
3
Next >
Search filter:
Clear Filter
Your search term must have 3 or more characters.
Keep searches simple. Use keywords, e.g. "leaking", "pump", "broken" or "fit".
Sorry, we couldn't find any existing installation instruction that matched.
Lower oven would not ignite, upper oven heat was inconsistent
To replace the igniter, I removed the oven door, all racks, the cover for the burner element and the shield over the burner element. I also removed the back panel to access the wiring. Removal of these elements was easy and took only a couple of minutes. When I tried to remove the old igniter from the bracket supporting it, one of the
... Read morescrews was stripped. Unfortunately I had to drill this screw out and replace it. If I didn't have to do this, both jobs would have taken about 20 minutes combined. After removing the igniter from the bracket, I replaced it, ran the electrical to the back where the wiring harness was and reassembled the components.
As for the upper oven temperature sensor, it took 5 minutes. I removed the two screws holding the sensor in place and pulled it out which exposed the electrical connection. I simply unplugged it, and screwed the new one in its place. I then connected the wiring harness.
Oven wouldn't reach temp, gas smell and loud pop when gas would re-ignite,took 45 mins or more to reach 350' from starting temp of 100'
Considered calling a repair facility, after reading your tips and what parts should fix what problem I decided to fix myself. Moved oven out,slide in gas range. Took off probe and tested with volt ohm meter, read 1090 ohms, should have been good. I could see oven igniter glow red, but I decided to replace both units, glad I did. Oven go'
... Read mores from 100' to 350' in 8 minutes now, for less than $85.00 have a fully functioning oven now. I'm sure the repair would have exceeded $300.00 or more being we live in a rural area. Thanks for the tips from your experts as well as you customers.
Crazy codes and not heating the oven properly at desired temp settings
1. Turn power off and loosen and remove screws. Pull out sensor from mounting hole and expose wire connector. Remove old sensor. Select appropriate wire adaptor and reconnect the sensor. Carefully push connector through hole and secure with screws removed previously. Turn power back on and cycle oven to make sure oven operates properly. I
... Read moref you have an oven thermometer it can be used to compare set point of oven to thermometer to make sure readings are the same. All done! Happy wife can now bake cookies again and now I can go back to man cave for other projects!
Read less
Stan from CHICAGO RIDGE, IL
Difficulty Level:
Really Easy
Total Repair Time:
Less than 15 mins
Tools:
Screw drivers
2 of 2 peoplefound this instruction helpful.
Was this instruction helpful to you?
Thank you for voting!
oven igniter although lit up it failed to permit gas valve to open
ordered new replacement oven igniter kit and also felt it was a good opportunity to change the oven temperature sensor so also ordered short oven sensor kit. both parts fit as described as original replacements with very little work involved. oven worked properly good well done and a big saving on a service call repair or new range.
f1&f3 error> continuous beeping,oven stopped working after using the self cleaning mode
I located the temp sensor (top left). Removed the 2x Phillips screws and slide the wire out until the plug is thru the opening taking care not to pull to hard as to damage the end that you not going to replace. To install plug it in and push the wire thru and secure with 2x Phillip screws.
Robert from FITCHBURG, MA
Difficulty Level:
Easy
Total Repair Time:
30 - 60 mins
Tools:
Nutdriver
1 personfound this instruction helpful.
Was this instruction helpful to you?
Thank you for voting!
The oven did not heat, but the top burners worked fine.
1. Slowly pull the stove from wall. 2. Unplug 120 volts plug from outlet. 3.Turned off the gas outlet. 4. Open the stove door, remove the racks, then unscrew (2) screws that hold the short oven sensor in place. 5. Slowly pull sensor out of it's housing. Remove the clip that holds the sensor. Install new sensor using the clip. Push sensor
... Read moreback through the hole opening. Screw the (2) screws into the mount to secure the sensor. 6. Plug the 120 volt plug into the wall outlet. Turn on the gas outlet. Test stove by turning on oven. It works like a new stove. Wife is happy, and Thanks Giving Dinner is on! Reverse your steps to secure your stove. A total of 25 minutes after cleaning the dust under stove. Thanks for everything. By the way, Thanks Giving Dinner was delicious.
Read less
Marvin from DECATUR, GA
Difficulty Level:
Really Easy
Total Repair Time:
15 - 30 mins
Tools:
Screw drivers
1 personfound this instruction helpful.
Was this instruction helpful to you?
Thank you for voting!
Had an F2 message go off then F3 when I tried to turn the stove on
Unplugged the old temp sensor at the back of the stove. From the inside I removed the 2 retaining screws. I taped a string to the old wire and pulled it through so I could pull the new harness through on the new sensor. When the new sensor arrived I installed it in reverse order. Easy peasy. Works great!!!!
Daniel from MOUNT HEALTHY, OH
Difficulty Level:
Very Easy
Total Repair Time:
Less than 15 mins
Tools:
Screw drivers
1 of 2 peoplefound this instruction helpful.
Was this instruction helpful to you?
Thank you for voting!
Oven would not maintain temperature
So simple! I really had no idea what the problem was. I found the PartsSelect site, read the comments from fellow Maytag double oven owners, diagnosed the problem as the sensor and ordered the part. It arrived in only two days! We removed the back of the stove, pulled the old sensor through, plugged the new one in and YAY the oven is l
... Read moreike new. I have to admit most of the repair time involved sweeping up the dog hair that had accumulated under the stove.
Read less
KATHY from PLEASANT GAP, PA
Difficulty Level:
Really Easy
Total Repair Time:
Less than 15 mins
Tools:
Screw drivers
4 of 6 peoplefound this instruction helpful.
Was this instruction helpful to you?
Thank you for voting!
F 3 signal on display pad every time oven warmed up
Removed all the racks from inside the oven, unscrewed the 6 screws that held it into the cabinet, pulled it out and sat it on the floor in front of the cabinet. Removed the oven sensor from the inside of the oven after disconnecting the wire harness from the rear right exterior of the oven. Installed new sensor from inside (2screws), plug
... Read moreged it into the harness in the back and reinstalled oven in the cabinet.
Read less
jeff from haskell, NJ
Difficulty Level:
Easy
Total Repair Time:
15 - 30 mins
Tools:
Screw drivers
1 of 2 peoplefound this instruction helpful.
Was this instruction helpful to you?
Thank you for voting!
< Prev
1
2
3
Next >
Questions and Answers
Ask our experts a question about this part and we'll get back to you as soon as possible!
53 questions answered by our experts.
Sort by:
< Prev
1
2
3
Next >
Search filter:
Clear Filter
Your search term must have 3 or more characters.
Keep searches simple. Use keywords, e.g. "leaking", "pump", "broken" or "fit".
Sorry, we couldn't find any existing answers that matched.Try using some different or simpler keywords, or submit your new question by using the "Ask a Question" button above!
JOE
December 31, 2017
I replaced the heat sensor. It lasted one week. I got f3 , i replace the sensor again, a week later i am again getting f3 and sometimes f5 . What is wrong.
For model number CWG3600AAB
Hello Joe, Thank you for your inquiry. You may have an issue with your control board, you can test it with a multimeter to see if it has continuity. If you are unfamiliar with how a multimeter functions, there are YouTube videos available to assist you. The other issue could be with the wiring between the sensor and the main control board as that is what the F5 error usually indicates. Hope this helps!
12 people found this helpful.
Was this helpful?
Thank you for voting!
Anthony
March 8, 2018
The problem i have is that the oven burner will not ignite at temperatures below 425 degrees and will only stay lit for about 10 seconds. At that point, both the igniter also shuts down. What part do i need?
For model number CRG9700AAW
Hi Anthony,
Thank you for your question. If the oven is not heating correctly, then the issue is likely with the oven sensor and you will need to check it with a multimeter. When testing the sensor with a multimeter, the sensor should be tested at room temperature. You will need to measure the resistance between the two prongs at the end of the sensor connector. Replace the oven sensor if the reading is less than 900 Ohms or more than 1200 Ohms. I hope this helps. Thank you and have a great day!
6 people found this helpful.
Was this helpful?
Thank you for voting!
Louis
August 27, 2017
What is the resistance of the sensor supposed to be?
For model number GY399LXUB02
Hi Louis,
Thank you for your inquiry. The resistance should be around 1080 ohms. I hope this helps. Good luck with your repair.
5 people found this helpful.
Was this helpful?
Thank you for voting!
Charles
November 28, 2017
I had suspected the temp sensor, untill after i replace the pressures regulater. Than i notice the f3 error was coming on immediately and the igniter wasn't glowing
For model number CWG3600AAB
Hi Charles,
Thank you for your inquiry. The F3 error code is letting you know that the oven temperature sensor has either failed or shorted out. You will need to test the sensor with a multimeter to check the continuity of the part and you will also need to check sensor to see if the wiring is frayed or pinched. You will also need to check for connector damage. I hope this helps. Thank you and have a great day!
4 people found this helpful.
Was this helpful?
Thank you for voting!
Mike
December 2, 2017
Received an F3 message, replaced the temperature sensor but still getting F3. The wire coming through back of oven is old and the fitting is cracked - can i replace just the fitting or do i need to pull the entire oven out and replace the wire from the sensor to the control panel? Also - not sure if it matters but i replaced the igniter two weeks ago, working fine now. Also replaced the vertical door seal's but missing horizontal door seal.
For model number CWG3600AAB
Hi Mike,
Thank you for you question. Yes, it is likely that you will have to replace the whole wiring harness if it is damaged. You should be able to test your harness to see if that is the part giving you trouble with a multi meter. If this part does not fix the issue however, it may be your electronic control board that is the issue. I hope that helps. Good luck with your repair.
4 people found this helpful.
Was this helpful?
Thank you for voting!
Ron
May 6, 2018
I received f-3 after unit was preheating after 10 minutes. Called in for service was told it was the control board which was not available. I was able to obtain one. I installed it but did not secure the ribbon from the control panel; also I think I connected the yellow and black wires incorrectly, nonetheless same symptoms. Oven came on but after preheating f-3-1 came on. Called for service again was told it was the sensor. I replaced the sensor. I installed the yellow and black wire correctly and secured the ribbon. Now as soon as I put on the power f-3-1 comes on immediately. The oven does not start up, I only get error f-3-1. Is it a defective sensor, defective board or do I need to replace the igniter?
For model number JGS8850ADB
Hello Ron,
Thanks for your question. The F3-1 code implies a shorted sensor. The wiring to the sensor may be incorrect or faulty, or the sensor itself may be defective. Consider testing the sensor with a multimeter for electrical continuity, and replace it if it shows no continuity. Otherwise, check the wiring and see if it is connected correctly to the sensor.
I hope this helps.
4 people found this helpful.
Was this helpful?
Thank you for voting!
Eileen
March 5, 2018
Tried to reset clock on stove got this error message 5ab6ath. Can not clear the error message and none of the other components will work. Help
For model number MGR5775QDS
Hello Eileen, thank you for your question. The "SABBATH" code is an indication that your range has been placed in "Sabbath Mode". This is set to disable the range for up to 72 hours for those religions that honor the sabbath. It can't be defeated by unplugging the range or turning off the breaker. You will either have to wait the 72 hour period, or locate the section in your owner's manual that explains how to turn that mode off. It should be listed in the "Operating Instructions" section of your manual. I hope this helps!
3 people found this helpful.
Was this helpful?
Thank you for voting!
Dennis
September 23, 2019
This issue has been happening for a couple of months. I set the oven temp to 400 or whatever and it stops heating at 100. I cancel it and try again and after several tries it eventually starts heating correctly. What part would you recommend replacing?Thanks
dennis
For model number GW397LXUQ06
Hello Dennis, Thank you for the question. I suggest testing the Oven Sensor. Testing the temperature sensor probe on your oven is easy. With the sensor at room temperature, measure the resistance between the two prongs at the end of the sensor connector. The resistance of the sensor should read approximately 1000 – 1090 ohms at room temperature. Hope this helps!
2 people found this helpful.
Was this helpful?
Thank you for voting!
Kathleen
February 19, 2019
Oven takes a long time to heat up. One time only it would not shut off.
For model number WFE366LVT 0
Hello Kathleen, Thank you for contacting us. I suggest checking the following parts: PS11749737 Oven Sensor, PS11750972 Terminal Block, PS11747168 Bake Element, and PS11751553 Control, Electric. You can test the parts with a multimeter. If you are unfamiliar with how a multimeter functions, we have videos available to assist you.
2 people found this helpful.
Was this helpful?
Thank you for voting!
William
April 4, 2018
Range lost power when power came back stove would beep keep beeping. Turned power off for 10 minutes when power was turned back on stove sometime beeps but oven will not work.
For model number JGS8850BDS
Hello William, thank you for your question. It sounds like the electronic control board has failed. The electronic board controls the oven functions, so if neither of the oven elements work, that is usually a good indicator that the board has failed. I would suggest replacing part number Electronic Control
WP8507P228-60. Good luck with your repair!
1 person found this helpful.
Was this helpful?
Thank you for voting!
< Prev
1
2
3
Next >
✖
Ask a Question
Ask our experts a question on this part and we'll respond as soon as we can.