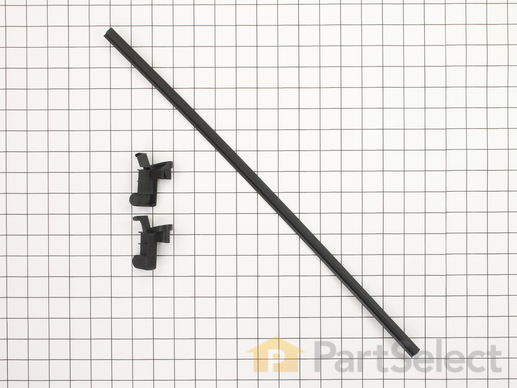
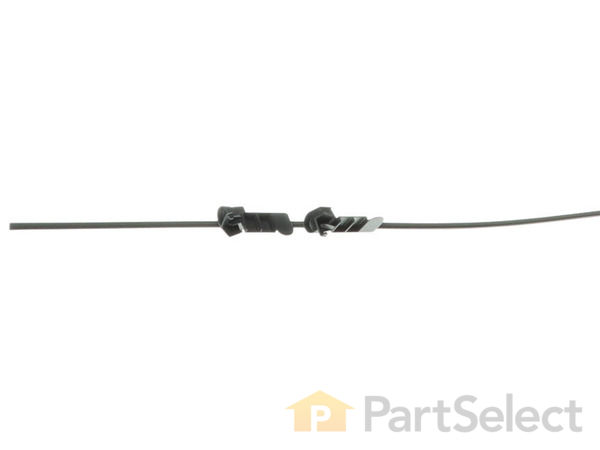
Part Location Diagram of 4172127 Whirlpool Lower Door Seal Kit
See part 7 in the diagram
Replacing your KitchenAid Dishwasher Lower Door Seal Kit
( Grid squares measure 1x1 inch )
Customer Service Representative

Get in touch, we're here to help!

Daily 8am - 9pm EST

customerservice@partselect.com

Lower Door Seal Kit 4172127

★★★★★
★★★★★
11 Reviews

Rated by 25 customers 

Easy 

30 - 60 mins 

Ratings submitted by customers like you who bought this part.

$ 67.17
  In Stock
Get FREE EconoShip on orders over $100! T&C apply

Get this part fast! Average delivery time for in-stock parts via standard shipping: 1.8 days.

PartSelect Number PS356593
Manufacturer Part Number 4172127
Manufactured by Whirlpool
Product Description

Lower Door Seal Kit Specifications

NOTE: This part requires a silicon sealant for installation.
How Buying OEM Parts Can Save You Time and Money

How Buying OEM Parts Can Save You Time and Money

Part Videos

Replacing your KitchenAid Dishwasher Lower Door Seal Kit

Replacing your KitchenAid Dishwasher Lower Door Seal Kit
Troubleshooting
This part fixes the following symptoms:
Leaking
This part works with the following products:
Dishwasher.
This part works with the following products:
KitchenAid, Kenmore.
Part# 4172127 replaces these:
AP3102987, 3123, 4172127, 4172127, 9742631, 9743488, 9743489, 9743542
Back to Top
Customer Reviews
Average Rating:
★★★★★
★★★★★
11 Reviews
2.9
Filter By Rating:
  • 5 Stars
    3
  • 4 Stars
    2
  • 3 Stars
    1
  • 2 Stars
    1
  • 1 Star
    4
Sort by:
  • 1
  • 2
Sorry, we couldn't find any existing reviews that matched. Try using some different or simpler keywords.
  • 1
  • 2
Customer Repair Stories
 Average Repair Rating: 3.2 / 5.0, 25 reviews. What's this?
Sort by:
  • 1
  • 2
  • 3
Sorry, we couldn't find any existing installation instruction that matched.
Dishwasher leaked when running, noticed worn gaskets
I consulted the videos and they did a good job of showing what needed to be done. Both the gasket band seal fit. The seal at the bottom of the door was not designed to be a very tight fit, so I used the adhesive. There were some plastic drain cups that were also included with the lower door seal kit that would have required more time and would require getting deeper into the dishwasher to replace them. They were not worn or broken, so I left them in place.
Other Parts Used:
Door Gasket Heat Resistant Adhesive Lower Door Seal Kit
  • Kyle from MIDLOTHIAN, VA
  • Difficulty Level:
    Really Easy
  • Total Repair Time:
    30 - 60 mins
1 person found this instruction helpful.
Was this instruction helpful to you?
Thank you for voting!
Leaking
R&R the seal then, then R&R The two little hard plastic pieces at bottom of the tub. The hardest thing was R&R the door springs.
  • Terry from MUSKOGEE, OK
  • Difficulty Level:
    Really Easy
  • Total Repair Time:
    30 - 60 mins
  • Tools:
    Nutdriver, Screw drivers
1 person found this instruction helpful.
Was this instruction helpful to you?
Thank you for voting!
Lower door seal went missing and water splashing on to floor
First off if PartSelect sends your door kit folded over in a mailer envelope you will never get it to stay on door. Took five days with weight sitting on it to flatten door seal.

Ridiculous way to ship a straight seal.

Buy the seal from someone who understands the application.
  • Susan from STOW, OH
  • Difficulty Level:
    Really Easy
  • Total Repair Time:
    30 - 60 mins
1 person found this instruction helpful.
Was this instruction helpful to you?
Thank you for voting!
Rotted seal
Took the old one off put the new one on
  • Teresa from SAINT MARYS, OH
  • Difficulty Level:
    Easy
  • Total Repair Time:
    30 - 60 mins
2 of 2 people found this instruction helpful.
Was this instruction helpful to you?
Thank you for voting!
Water leak from lower right corner.
Parts received for the repair were for the KDI21 model and could not be used for my KDI20 model.
Other Parts Used:
Heat Resistant Adhesive Lower Door Seal Kit
  • Angelos from FAIRFAX, VA
  • Difficulty Level:
    Very Difficult
  • Total Repair Time:
    More than 2 hours
2 of 3 people found this instruction helpful.
Was this instruction helpful to you?
Thank you for voting!
Water leaking at 2 areas, worn gaskets
After reviewing schematics and videos was helpful in part selection in replacement.
Other Parts Used:
Drain and Wash Impeller Kit Lower Door Seal Kit
  • Timm from GRANGER, IN
  • Difficulty Level:
    A Bit Difficult
  • Total Repair Time:
    1- 2 hours
  • Tools:
    Nutdriver, Pliers, Screw drivers, Socket set
2 of 2 people found this instruction helpful.
Was this instruction helpful to you?
Thank you for voting!
water leaking out of front of dishwasher
Read you insructions . Lowered the door. Pull up the door meatlhinge tabs. Snap out the door (circuit and springs still holding onto the door. Laid the door on the floor. Popped out the 2 hinge plastic covers. Popped the new ones in. Snapped the door back on the hinges. Put the metal tabs back over the hinge peg. After the door was shown to work. Put the new front seal on the door. Caution: You can put the door seal in the wrong configuration thus the seals sticks out and when you pull the lower dish tray out the seal will come off. Look at you old one to ensure the proper technique installing the splastic strip. Done. Pretty simple if you look at the old stuff before replacing the new.
  • Steven from High Ridge, MO
  • Difficulty Level:
    Easy
  • Total Repair Time:
    15 - 30 mins
  • Tools:
    Screw drivers
1 of 6 people found this instruction helpful.
Was this instruction helpful to you?
Thank you for voting!
leaking at bottom of door.
We were told by a repair guy to buy a new dishwasher-about a $900+ cost to replace. Then a local parts place and Sears each quoted us $85 for the part plus $129 to come out. Found your website and bought the part for $17. Also bought a hard rubber gasket that fits on the bottom of the door for $8. The brackets that came with that last part were the hardest to install, but the gaskets took 15 minutes. We did glue another strip of the long door gasket along the area under the door lip. Works great! Saved over $800. You rock!
Other Parts Used:
Middle Spray Arm Kit Lower Door Seal Kit
  • Robert from Monument, CO
  • Difficulty Level:
    A Bit Difficult
  • Total Repair Time:
    More than 2 hours
  • Tools:
    Pliers, Socket set, Wrench (Adjustable)
10 of 13 people found this instruction helpful.
Was this instruction helpful to you?
Thank you for voting!
Dishwasher was leaking water at the door
The lower door seal had fallen out as it was worn out so I wasn't sure of the proper orientation of the new seal or even where it went as the instructions had nothing about the seal. A little bit of logical thinking and the seal just just snapped in place. The door drains that came with the kit were both a right or left hand and so I didn't install them. Turns out that I didn't need the new ones anyway. The old door seal just pulled out and the new one just pushed into place. I was careful to center the top of the strip so that it would come out even at both sides of the bottom. There were no instructions for the door seal but none were needed. As long as I was working on the washer I did some cleaning to make it look new and bright...that took the most time. Easy repair and a happy wife besides.
Other Parts Used:
Door Gasket Lower Door Seal Kit
  • Kenneth from Golden Valley, MN
  • Difficulty Level:
    Really Easy
  • Total Repair Time:
    Less than 15 mins
  • Tools:
    Nutdriver
10 of 11 people found this instruction helpful.
Was this instruction helpful to you?
Thank you for voting!
Suds and water leaking from bottom of door
Bent back metal ears over door hinge pins, released door springs from door hinges. Lifted door off of hinges and replaced corner drain back seals and lower door seal.Still leaks so obviously I have another issue or the door seal is lousy quality. I've completed this project before and never had another issue for 6 years.
  • Mario from Fowlerville, MI
  • Difficulty Level:
    A Bit Difficult
  • Total Repair Time:
    15 - 30 mins
  • Tools:
    Screw drivers
2 of 2 people found this instruction helpful.
Was this instruction helpful to you?
Thank you for voting!
  • 1
  • 2
  • 3
Questions and Answers

Ask our experts a question about this part and we'll get back to you as soon as possible!

7 questions answered by our experts.
Sort by:
  • 1
Sorry, we couldn't find any existing answers that matched.Try using some different or simpler keywords, or submit your new question by using the "Ask a Question" button above!
Carol
August 23, 2017
Could you please let me know what kind of silicone sealant to use with part # 4172127?
PartSelect logo
Hello Carol, thank you for contacting us. You will need white silicone adhesive caulk, we have this on our site, part number PS11728058 Good luck with the repair!

11 people found this helpful.

Was this helpful?
Thank you for voting!
Related Parts:
Jack
February 28, 2018
Received part 4172127 and special adhesive, but no instructions. Do I need the 2 plastic parts, can't figure where they go. Ms Shaw ordered parts from you, just trying to be a good ex.
For model number kud124sewh1
PartSelect logo
Hi Jack, Thank you for the question. the two plastic parts go at the corners of the door. You will need to remove the door in order to remove the old parts and have them replaced. Hope this helps!

5 people found this helpful.

Was this helpful?
Thank you for voting!
Marjorie
March 3, 2018
How do you install lower door seal with adhesive to prevent leaking seal can be put on two different ways so which way is correct?
For model number KUD124SE
PartSelect logo
Hello, Thank you for your inquiry. Open up the dishwasher door and pull out the old seal. Then close the door and use a 1/4 inch nut driver to remove the lower access panels. Next you need to remove the two door springs, make note of which notch they are in, then push the spring down to push it off the rail. Bend the tap that holds the hinge onto the pin with a flat head screw driver right behind the tab and bend it up and out of the way so you can lift the pin out of the hinge to release them. Close the dishwasher door, you may want to put a towel down, then lift it off the hinges and set it on the floor. Remove the left and right tub spacers by lifting them out. Put in the new tub spacers by pushing them down into place. Then replace the door on the hinges. Lower it down, then bend the hinge tab back down so it closes the hinge pin in place enough so that it holds the hinge but doesn't restrict the movement of the hinge. When you put the lower seal on, you want to make sure that the little slot is where the bottom of the door goes into. Apply the adhesive carefully along the edge, then insert the seal into the bottom of the door. Close the door and then reach underneath to hook the door springs onto the rails back onto the notch you took them off of. Before you put the kick panels back on, you may want to run a load to make sure there is no leaks. Then re-attach the panels, starting with the lower one first, then the upper one and re-attach the screws. Hope this helps!

5 people found this helpful.

Was this helpful?
Thank you for voting!
Marg
August 5, 2019
Where do you apply the sealant?
For model number KUD124SEWH1
PartSelect logo
Hello Marg, thank you for your question. The Heat Resistant Adhesive part number PS11728058 can be applied to the Seal along the area that snaps into place on the door. Good luck with your repair!

1 person found this helpful.

Was this helpful?
Thank you for voting!
Darcy Banerd
November 7, 2019
Do you happen to have a new video to replace the inner door seal. Al the videos are for the old style door. I have a one piece door with the operating buttons on the top edge of the door, so when it closes the buttons are not visible. There is only on plate that covers the very bottom. So this is long door version. Any videos i find on line are again for only the old style dishwasher. If you need to see what i mean just look at my model which is not new by any manner. It is 10 yrs old. I have just replaced the door gasket and that did not solve the problem of the leak on the right side of the door, so i have just ordered the bottom inner door seal and that is where all the videos are for 20 + yr old dishwashers. Please let me know if you can even provide written instructions i would appreciate it. Thanks darcy
For model number GU3200XTXY3
PartSelect logo
Hi Darcy, sadly the only video we have is the one on this page here: https://www.youtube.com/watch?v=_OnV5tanjVU&feature=emb_title . Thank you for your question and good luck with your repair!

1 person found this helpful.

Was this helpful?
Thank you for voting!
Lynette
September 6, 2021
Will this seal work in my dishwasher ?
For model number 66513429k701
PartSelect logo
Hello Lynette, Thank you for the question. This Lower Doro Seal kit is not listed for the model number provided. We have researched the model you have provided and have found the Lower Door Seal is only sold as part of the Air Inlet, PartSelect Number PS11748136. If you need help placing an order, customer service is open 7 days a week. Please feel free to give us a call. We look forward to hearing from you!

1 person found this helpful.

Was this helpful?
Thank you for voting!
Related Parts:
Dave
December 31, 2021
Kenmore 665.15982 dishwasher. When in a number of wash program modes - as the program switches from washing to drain mode water pours out the bottom of the door - sounds washing and draining at the same time. I cancel the program and manually select drain option - the water pouring out the bottom of the door stops and the water drains as normal. This issue started all at once - not gradually. Does the pump do both spraying and draining and potentially not switching between the two properly when in a program mode.
PartSelect logo
Hello Dave, Thank you for your inquiry. Part# PS3500989 controls both the water circulation and draining. You can test this part with a multimeter to see if it is causing the problem. We also recommend checking the water inlet valve, the door switch, the float switch, and the float stem kit. If you are unfamiliar with how a multimeter functions, we have videos available to assist you. Good luck with your repair.

Was this helpful?
Thank you for voting!
Related Parts:
  • 1
You May Also Need ?
Model Cross Reference
This part works with the following models:
PartSelect Number: PS356593
Manufacturer Part Number: 4172127
Brand
Model Number
Description
Kenmore
6651597299
Dishwasher - Kenmore Dishwasher Model 665.1597299 (6651597299, 665 1597299) Parts
Kenmore
66515972990
Dishwasher
Kenmore
66515972991
Dishwasher
Kenmore
66515972992
Dishwasher
Kenmore
6651597399
Dishwasher - Kenmore Dishwasher Model 665.1597399 (6651597399, 665 1597399) Parts
Kenmore
66515973990
Dishwasher
Kenmore
66515973991
Dishwasher
Kenmore
66515973992
Dishwasher
Kenmore
66515974990
Dishwasher
Kenmore
66515974991
Dishwasher
Kenmore
66515974992
Dishwasher
Kenmore
6651597999
Dishwasher - Kenmore Dishwasher Model 665.1597999 (6651597999, 665 1597999) Parts
Kenmore
66515979990
Dishwasher
Kenmore
66515979991
Dishwasher
Kenmore
66515979992
Dishwasher
Kenmore
66515982990
Dishwasher
Kenmore
66515983990
Dishwasher
Kenmore
66515984990
Dishwasher
Kenmore
66515987990
Dishwasher
Kenmore
6651598999
Dishwasher - Kenmore Dishwasher Model 665.1598999 (6651598999, 665 1598999) Parts
Kenmore
66515989990
Dishwasher
Kenmore
66515997499
Dishwasher - Kenmore Dishwasher Model 665.15997499 (66515997499, 665 15997499) Parts
KitchenAid
KUDC24SESS24
Dishwasher - UNDERCOUNTER DISHWASHER
KitchenAid
KUDC24SESS4
Dishwasher
KitchenAid
KUDC24SESS5
Dishwasher
KitchenAid
KUDC25CHBL0
Dishwasher
KitchenAid
KUDC25CHBL1
Dishwasher
KitchenAid
KUDC25CHBT0
Dishwasher
KitchenAid
KUDC25CHBT1
Dishwasher
KitchenAid
KUDC25CHSS0
Dishwasher
Customer Service Representative

Get in touch, we're here to help!

Daily 8am - 9pm EST

Contact Customer Service