Part Location Diagram of WR55X10025 GE Temperature Sensor
See part 242 in the diagram
Replacing your General Electric Refrigerator Temperature Sensor
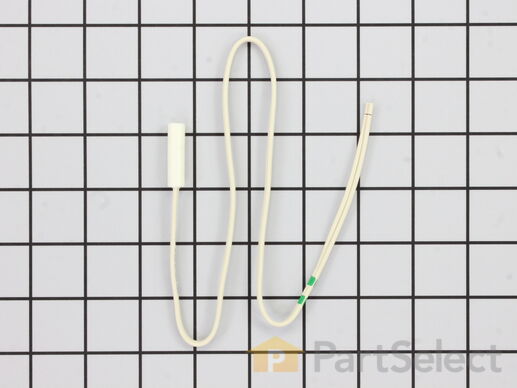
( Grid squares measure 1x1 inch )
Customer Service Representative

Get in touch, we're here to help!

Daily 8am - 9pm EST

customerservice@partselect.com

Temperature Sensor WR55X10025

★★★★★
★★★★★
66 Reviews

Rated by 44 customers 

Easy 

30 - 60 mins 

Ratings submitted by customers like you who bought this part.

$ 27.00
  In Stock
Get FREE EconoShip on orders over $100! T&C apply

Get this part fast! Average delivery time for in-stock parts via standard shipping: 1.8 days.

PartSelect Number PS304103
Manufacturer Part Number WR55X10025
Manufactured by GE
Product Description

Temperature Sensor Specifications

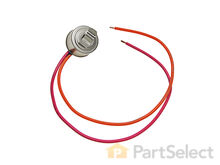
This sensor (Temperature Sensor, Thermistor, Refrigerator Temperature Sensor) sends the temperature reading of the compartment to the control board. If you notice your refrigerator is too warm, too cold, or not defrosting properly, then there may be a problem with your sensor. The temperature sensor can break from material fatigue or through normal use, and should be replaced. It is attached to the evaporator and control housing in your appliance. It measures approximately 1.25 inches long with 18 inch wire leads, and is constructed out of plastic. This part comes in white, beige. It includes the sensor, with wire leads.
How Buying OEM Parts Can Save You Time and Money

How Buying OEM Parts Can Save You Time and Money

Part Videos
Difficulty: Easy | Tools Required: Screw drivers,Nutdriver

Replacing your General Electric Refrigerator Temperature Sensor

Replacing your General Electric Refrigerator Temperature Sensor

Replacing your General Electric Refrigerator Temperature Sensor

Replacing your General Electric Refrigerator Temperature Sensor

How to Troubleshoot Temperature Problems in Your Refrigerator

How to Troubleshoot Temperature Problems in Your Refrigerator

How Does an Ice Maker Work?

How Does an Ice Maker Work?

How to Troubleshoot an Ice Maker That is Not Working

How to Troubleshoot an Ice Maker That is Not Working

Test If Your Electrical Part is Failing - Multimeter Tool

Test If Your Electrical Part is Failing - Multimeter Tool
Troubleshooting
This part fixes the following symptoms:
Fridge too warm | Freezer section too warm | Fridge too cold | Freezer not defrosting
This part works with the following products:
Refrigerator, Freezer, Range.
This part works with the following products:
General Electric, Hotpoint.
Part# WR55X10025 replaces these:
AP3185407, 914093, WR55X10025, WR50X10027, WR50X10034, WR50X10055, WR50X10067, WR55X10025B, WR55X10026, WR55X10027, WR55X10028, WR55X10030, WR55X10087, WR55X10088, WR55X10089, WR55X10367, WR55X10380, WR55X10661, WR55X10711, WR55X10735 , WR55X10736, WR55X10737, WR55X10937, WR55X10938, WR55X10939, WR55X11121, WR55X11141, WR55X11150, WR55X11152 Show less
Back to Top
Customer Reviews
Average Rating:
★★★★★
★★★★★
66 Reviews
4.6
Filter By Rating:
  • 5 Stars
    51
  • 4 Stars
    8
  • 3 Stars
    3
  • 2 Stars
    2
  • 1 Star
    2
Sort by:
  • 1
  • 2
  • 3
Sorry, we couldn't find any existing reviews that matched. Try using some different or simpler keywords.
  • 1
  • 2
  • 3
Customer Repair Stories
 Average Repair Rating: 3.4 / 5.0, 44 reviews. What's this?
Sort by:
  • 1
  • 2
  • 3
Sorry, we couldn't find any existing installation instruction that matched.
The tempeture for both the freezer and the fridge would be all over the place
Troubleshot the tempeture sensors and the resistance was alot lower than the specs called for had to replace the evap fan being 1 of the sensors is connected to the evap fan . Start by removing all the food from the.freezer and bottom section of the fridge . Remove all the shelves and bins in freezer and shelf and drawers.on the lower section of the fridge .remove the ice bin , and the ice.machine remove the light shroud, and.bulbs, push tabs on the light sockets and pull the sockets from the housing.. and then push the sockets through the holes of housing remove all the screws from the rear wall from top to bottom upon removal of the section just under the ice.machine and behind the light socket you.will find the evap fan and it's bracket remove the 2 screws and pull straight up on the fan blade be carefully to not break its best to pull from the center of fan blade .remove the clip and thermistor that's connected to top of the evap coil. While your there remove the defrost thermostat to do this the clamp that holds it to the coil is a split clamp and you gently push on the clamp upper section and pull the lower section and it will seperate enough for you to remove the thermostat the other thermistors are in the fridge section 2 are on the divider wall behind the plastic oval plastic.housings one just above the the middle.of fridge the other is.lower section. And finally 1 more is at the very bottom of fridge last drawer on right hand side to.remove this you need to remove the light cover. Remove the plastic half round plastic deflector and the foam behind it remove the water reservoir screws and open the freezer at the bottom center wall at the back is a round plastic damper cover with a Phillip screw remove that ,on fridge side remove the 4 screws that hold the lower damper housing to the bottom of fridge gently and slowly work your way around the center seam and aeperate the upper cover of damper housing and expose the thermistor and replace. Note on all the thermistors just cut off enough to splice in replacement I personally used water tight heat shrink soldered type butts work great
Other Parts Used:
Evaporator Fan Motor Dispenser Door Solenoid Assembly Defrost Thermostat Temperature Sensor
  • Joseph from CANOGA PARK, CA
  • Difficulty Level:
    Easy
  • Total Repair Time:
    30 - 60 mins
  • Tools:
    Nutdriver, Screw drivers
4 of 4 people found this instruction helpful.
Was this instruction helpful to you?
Thank you for voting!
Freezer coils icing over, not defrosting
diagram from part select matched my fridge perfect. i ordered all parts that involve defrosting coils. ( defrost heater 618, defrost thermostat 620, defrost thermostat 627 ). two wires involved with thermostat, just removed all old parts and replaced with new. Part Select videos helped demonstrate the projects well.
Other Parts Used:
Defrost Thermostat Defrost Thermostat Temperature Sensor Defrost Heater
  • John from BELLEVILLE, IL
  • Difficulty Level:
    Easy
  • Total Repair Time:
    30 - 60 mins
  • Tools:
    Pliers, Screw drivers, Socket set
2 of 2 people found this instruction helpful.
Was this instruction helpful to you?
Thank you for voting!
THE REFRIGERATOR SECTION WAS WARM
I removed the freezer main draw, top draw, plastic guide rail and the metal right side rail. I also removed the ice maker and ice draw. Then remove back panel that holds the evaporator fan. Once panel is removed you can access wires for thermostat and temperature sensor. Then followed video instructions on replacing each part.
Other Parts Used:
Run Capacitor Defrost Thermostat Temperature Sensor
  • texton from flushing, NY
  • Difficulty Level:
    A Bit Difficult
  • Total Repair Time:
    1- 2 hours
  • Tools:
    Nutdriver, Screw drivers, Socket set
3 of 4 people found this instruction helpful.
Was this instruction helpful to you?
Thank you for voting!
Cold food evaporator freezing over
Removed three screws holding the evaporator cover. Removed screws holding the evaporator to the back wall of the compartment. Removed the drip pan which was rusted through. Inserted new drip pan. Cut and spliced new tempature sensor and inserted it onto the aluminum block which is attached to the back side of the evaporator. Installed new cover which includes a new fan. GE wanted almost six hundred dollars to do this repair. I paid $180.00 for all the parts, installed them in about an hour and the unit works like new.
Other Parts Used:
Evaporator Cover Evaporator Drip Pan Temperature Sensor
  • Michael from NORTH PORT, FL
  • Difficulty Level:
    Easy
  • Total Repair Time:
    1- 2 hours
  • Tools:
    Screw drivers
4 of 4 people found this instruction helpful.
Was this instruction helpful to you?
Thank you for voting!
freezer frosting in back, refrigerator compartment warm
I followed the partselect videos for the temp sensor and defrost thermostat and the refrigerator has been working well for a about a week now. The refrigerator is old enough that I was just going to replace it. When I called the repair company I use, they said it would cost $200 to $300 for the repair, but I didn't want to put that money into an old refrigerator. I did a little research, found this site and figured it would be worth buying about $20 in parts and giving it a try. I have absolutely no experience working on refrigerators, but the videos were so easy to follow, everything went smoothly. The old thermostat was definitely broken when I checked it with a meter, so I'm pretty confident that the problem is fixed.
Other Parts Used:
Defrost Thermostat Temperature Sensor
  • Scott from EL DORADO HLS, CA
  • Difficulty Level:
    Easy
  • Total Repair Time:
    1- 2 hours
  • Tools:
    Screw drivers, Socket set
1 person found this instruction helpful.
Was this instruction helpful to you?
Thank you for voting!
Our side by side refridgerator the freezer side was freezing up.
After turning off power and unthawing back cover so I could remove it. Then I had remove all of the ice from the coils with a hair dryer. After everything was unthawed I removed the temperature sensor from the coil tubing and cut the wires. I skinned the wires on the new sensor and crimped a butt splice on each wire. I skinned each wire in the freezer then crimped butt splices to each wire. After taping the connections with black tape I reinstalled the back cover and turned on the power. So far it has been two weeks and there Is no frost and the refridgerator is working fine.
Other Parts Used:
Defrost Thermostat Temperature Sensor
  • David from UPPER SANDSKY, OH
  • Difficulty Level:
    Really Easy
  • Total Repair Time:
    30 - 60 mins
  • Tools:
    Nutdriver, Screw drivers
1 person found this instruction helpful.
Was this instruction helpful to you?
Thank you for voting!
refrigerator and freezer stopped working
I replaced the three sensors, 2 in the freezer 1 in the refrigerator. This was rated as the most common problem. Did not fix the problem. I then checked the ohms on the new sensors then the old sensors they were all within .5 of each other. So I got smart and went down the list of causes on their list. I emailed partselect and asked what the parts should read. They replied with that information and it turned out to be the voltage converter on the compressor. I ordered the part on friday payed for overnight delivery and it arrived tuesday. This as you can imagine makes me angry. But the part was easy to install and my refrigerator started working right away. I would advise anyone with this problem to start at the top of the problem list use a multi meter check everything on the list and only replace part or parts that don't come up to standards. This will save time and money and hopefully fix the problem the first time as you are not switching out parts and hoping that it solves the problem.
  • mike from Aguilar, CO
  • Difficulty Level:
    Really Easy
  • Total Repair Time:
    30 - 60 mins
  • Tools:
    Nutdriver
2 of 2 people found this instruction helpful.
Was this instruction helpful to you?
Thank you for voting!
Refrigerator not defrosting, ice tray clogging up in ice tray, refrigerator making loud humming noise, and compressed running all the time.
First, turn off power - since I did not want to pull the refrigerator out on my wood floor I tripped the circuit breaker to that circuit and opened door to make sure interior light was off (ensuring power was off). This unit has a bottom freezer, I took out all shelves, ice maker and all parts in the way of accessing back of interior of freezer section. Removed back plastic section by removing one screw in middle top of back panel and prying it out. This was a bit difficult as it was in there a bit tight but once the plastic warmed up it pulled out ok. This revealed the compressor section and temp sensor that was attached to the copper coils with of all things - a zip tie! In pictures of this that I looked at on various web sites the sensor was on a metal bracket attached to the coil so it made me wonder if tf the factory took a shortcut? I cut the old sensor wire, stripped the two wires 1/2", and connected them to the new sensor wire with butt connectors, I put some silicone into the ends of the butt connectors to prevent moisture from entering into connectors and wrapped the connection in black electrical tape. I then "attached" the sensor to the coil using a zip tie, put the plastic back piece back on, inserted everything I took out and put power back to refrigerator. It's been 3 days and temp of refrigerator is stable, ice maker not clogging up, and compressor not running all the time! So far so good.
  • Mark from ROSEMOUNT, MN
  • Difficulty Level:
    A Bit Difficult
  • Total Repair Time:
    30 - 60 mins
  • Tools:
    Screw drivers
2 of 3 people found this instruction helpful.
Was this instruction helpful to you?
Thank you for voting!
condenser icing refrigerator warm freezer ok
follow the easy instructions replace 3 temperature sensors cut the wires and crimp them with new sensor and it works like new
  • Rene from HEBER, CA
  • Difficulty Level:
    Really Easy
  • Total Repair Time:
    30 - 60 mins
  • Tools:
    Pliers
2 of 3 people found this instruction helpful.
Was this instruction helpful to you?
Thank you for voting!
Refrigerator side freezing food
Replaced both temp sensors worked good for 2 days then began freezing food. Looked into it further on line. Found small motorized door broken that controls the cold air from the freezer
Other Parts Used:
Temperature Sensor Shunt Sensor Refrigerator Temperature Sensor Cover
  • M &M Aviation from ESCANABA, MI
  • Difficulty Level:
    Easy
  • Total Repair Time:
    15 - 30 mins
  • Tools:
    Screw drivers
4 of 5 people found this instruction helpful.
Was this instruction helpful to you?
Thank you for voting!
  • 1
  • 2
  • 3
Questions and Answers

Ask our experts a question about this part and we'll get back to you as soon as possible!

255 questions answered by our experts.
Sort by:
  • 1
  • 2
  • 3
Sorry, we couldn't find any existing answers that matched.Try using some different or simpler keywords, or submit your new question by using the "Ask a Question" button above!
Rene Ramirez
August 25, 2017
How do I test the temperature sensor.
For model number GSS25WGTAWW
PartSelect logo
Hi Rene, Thank you for the question. The best way to do this is to remove the thermistor from the refrigerator so you can control the temperature of the sensor. You can let the sensor warm up to room temperature or grab a glass of ice water to test the thermistor. With the sensor warmed up to room temperature the sensor should read approximately 6.2K Ohms at 68°F. With the thermistor submerged is a glass full of ice water, the sensor should be very close to 32°F which should read approximately 16.3K Ohms. If the values that you are getting are far off from these readings, then the sensor is bad and should be replaced. Hope this helps!

94 people found this helpful.

Was this helpful?
Thank you for voting!
Amanda
July 20, 2017
Heres my problem. My refrigerator AND freezer keep going into defrost mode, stay there for too long which causes everything to completely defrost but then it will turn back on with both the fridge and the freezer working. I was told the thermistor is causing this to happen. Is that the case here?
PartSelect logo
Hello Amanda, a faulty thermistor can cause this reaction. You can find the thermistor on the freezer evaporator coils. To replace this part, you will need to order it here WR55X10025. Best of luck with this repair!

87 people found this helpful.

Was this helpful?
Thank you for voting!
Christina
July 20, 2017
I need to replace the temperature sensors in my fridge but I don’t know where to start. Is there more than one temperature sensor in most units? Do you know how many are in mine? And can I purchase the same part that many times or is there a different one for each sensor location?
PartSelect logo
Hello Christina, your model has 3 sensors. To replace all 3, you will need to order 1 WR09X10050, and 2 WR55X10025. Please let us know if you have any further questions!

46 people found this helpful.

Was this helpful?
Thank you for voting!
DIANE
November 11, 2017
Came home from being out of town for 3 days and everything defrosted and temps in freezer and refrigerator were 72 degrees. Contacted our appliance repair guy. It took him quite a while to figure out and believed it was the condensor inverter and the motherboard (that he said was "fried"). He replaced both items (...it took a good part of 2 days...). it appeared that all was working and both sides of frig were starting to get cold; we had to leave town again. when we got home 2 days later, both sides were at 72 degrees again. we called repair guy who was coming the next morning. when he arrived, all was operating fine, and temps were "very close" to their good settings (i.e. freezer @ 0 and other side @ 35 degrees). hard to fix something that's working. we've continued to "check the temps" every few hours the past 7 days and all has been ok. tonight we went to the freezer and everything liquid again (...we haven't put any meat in freezer until we know all ok....). temps at 45 47 degrees (both sides). compressor is "cool to the touch" (i.e. not running) but fan is running. i'm thinking that maybe its the temperature sensor(s) causing the problem. any ideas? we've already spent $650 on repairs + cost of all food in frig & freezer being lost. the 36" GE monogram (counter depth), side by side is 9 years old.
For model number ZISS360DRJSS
PartSelect logo
Hi Diane, Thank you for your question. I'm sorry to hear about this. If the refrigerator and the freezer are too warm than the part that fixes majority of the time is the temperature sensor. You may want to also check the evaporator fan motor and the condenser fan motor as well to make certain they are working correctly. I hope this helps. Thank you and have a great day!

35 people found this helpful.

Was this helpful?
Thank you for voting!
Mitch
February 13, 2018
My freezer works fine but my fridge does not go below 54 deg. And then the lower food tray freezes around the manual control but still does not lower the temp in the entire fridge.
For model number GFE27GGDABB
PartSelect logo
Hello Mitch, thank you for your question. I would recommend checking to make sure the evaporator motor is working properly, buy turning the fan blade and pushes the air into the fridge and circulates the around around all the items in the fridge. If this motor is working, the next part I would recommend replacing would be the temperature sensor. I hope this helps!

31 people found this helpful.

Was this helpful?
Thank you for voting!
Wayne
August 3, 2017
The refridge side is freezing food and liquids. Will replacing the temp sensor in the fridge side solve the problem or do i need to replace all three. The other 2 are in the freezer side.
For model number gss25lgma
PartSelect logo
Hi Wayne, Thank you for your great question. You should be alright just replacing the refrigerator side sensor, but it would not hurt to test the other sensors to see if they are malfunctioning as well. I hope this helps!

26 people found this helpful.

Was this helpful?
Thank you for voting!
Robert
February 12, 2018
The unit stopped freezing- on a saturday all was melting, the frig portion was working fine. We took all the food out. Now suddenly the unit started working again like magic. Making ice and functions well. What is the problem.
For model number GSH22JFXJBB
PartSelect logo
Hello Robert, thank you for your question. Your unit may be frosting up on the back coils which can cause the freezer get too warm. I would check the heater and thermostat, as well as the temperature sensor and electronic control board-which has the defrost controls built into it. You can test the parts with a multimeter. If you are unfamiliar with how a multimeter functions, there are YouTube videos available to assist you. Hope this helps!

24 people found this helpful.

Was this helpful?
Thank you for voting!
JACK
October 29, 2017
Makes ice ok then the ice cubes all freeze together have the temp set to 0 for the freezer
For model number PSS25NGNA
PartSelect logo
Hi Jack, Thank you for your inquiry. It is normal for the ice in the bucket to stick or fuse together. This will occur if the ice is not used right away. This can also occur if the water is splashing or leaking during the fill cycle. Adjusting the water to a lower level may also help. If the load in the freezer is less then half full, it can also cause the temperature during the defrost cycle, to get warmer and may cause the ice to fuse together at a faster rate. I hope this helps. Thank you and have a great day!

21 people found this helpful.

Was this helpful?
Thank you for voting!
Sidney
January 7, 2018
Ice maker chute above the cup, keep freezing up. I replaced dual inlet water valve, grommet/tube assembly and ice/water filter, all did not fix the problem. Same with the water dispenser, keep freezing up, every time i defrosted. I don't have a freezer thermometer (plan to get one), but freezer and fridge seem ok. Any suggestions and fix will be helpful.
For model number GSH25JFXLWW
PartSelect logo
Hello Sidney, Thank you for your inquiry. We would recommend checking the following parts to fix your issue: temperature sensor, defrost heater, defrost thermostat, damper control, and the evaporator fan motor. You can test the parts with a multimeter. If you are unfamiliar with how a multimeter functions, there are YouTube videos available to assist you. Hope this helps!

20 people found this helpful.

Was this helpful?
Thank you for voting!
Jude
July 20, 2017
fridge was actin up so replaced the air inlet damper but didnt change things. now im told it’s the temp sensor i should check next. where is the sensor located nd how do i get to it?
PartSelect logo
Hi Jude, the fresh food thermistor WR55X10025 is found on the left wall of the fresh food compartment. The freezer thermistor is found on the right wall of the same compartment. I hope this helps.

19 people found this helpful.

Was this helpful?
Thank you for voting!
  • 1
  • 2
  • 3
You May Also Need ?
Model Cross Reference
This part works with the following models:
PartSelect Number: PS304103
Manufacturer Part Number: WR55X10025
Brand
Model Number
Description
General Electric
39631UGTAWW
Refrigerator
General Electric
A4425GDTABB
Refrigerator
General Electric
A4425GDTAWW
Refrigerator
General Electric
A4425GDTBBB
Refrigerator
General Electric
A4425GDTBWW
Refrigerator
General Electric
A4425GDTW
Refrigerator - GE Refrigerator Model A4425GDTW Parts
General Electric
BSS25GFPACC
Refrigerator
General Electric
BSS25GFPAWW
Refrigerator
General Electric
BSS25GFPCCC
Refrigerator
General Electric
BSS25GFPCWW
Refrigerator
General Electric
BSS25GFPDCC
Refrigerator
General Electric
BSS25GFPDWW
Refrigerator
General Electric
BSS25GFPECC
Refrigerator
General Electric
BSS25GFPEWW
Refrigerator
General Electric
BSS25GFPHCC
Refrigerator
General Electric
BSS25GFPHWW
Refrigerator
General Electric
BSS25JFRFWW
Refrigerator
General Electric
BSS25JFRJWW
Refrigerator
General Electric
BSS25JFTAWW
Refrigerator
General Electric
BSS25JFTBWW
Refrigerator - T Series
General Electric
BSS25JFTCWW
Refrigerator - T Series
General Electric
BSS25JFTDWW
Refrigerator
General Electric
BSS25JFTEWW
Refrigerator - T Series
General Electric
BSS25JFTGWW
Refrigerator
General Electric
BSS25JFTHWW
Refrigerator
General Electric
BSS25JFTIWW
Refrigerator
General Electric
BSS25JFTJWW
Refrigerator
General Electric
BSS25JFTNWW
Refrigerator
General Electric
BSS25JFTPWW
Refrigerator
General Electric
BSS25JSRFSS
Refrigerator
Customer Service Representative

Get in touch, we're here to help!

Daily 8am - 9pm EST

Contact Customer Service