This drive coupling for your blender has reverse threads, and is used to spin the blender blades. The coupling connects the blender jar to the base. To replace this part, use a flat blade screwdriver to pry the coupling off, wipe the threads off with a dry cloth, and screw the new coupling on counter-clockwise. Make sure the blender is unplugged before beginning this repair.
How Buying OEM Parts Can Save You Time and Money
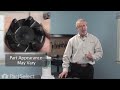
Part Videos
Replacing your KitchenAid Blender Drive Coupling
Troubleshooting
This part fixes the following symptoms:
Touchpad does not respond | Door won’t open or close
This part works with the following products:
Blender.
This part works with the following products:
KitchenAid.
Part# WP9704230 replaces these:
AP6013694, 9704230, WP9704230VP
Customer Reviews
Average Rating:
★★★★★
★★★★★
139 Reviews
4.8
Filter By Rating:
5 Stars
125
4 Stars
9
3 Stars
1
2 Stars
3
1 Star
1
Sort by:
< Prev
1
2
3
Next >
Search filter:
Clear Filter
Your search term must have 3 or more characters.
Keep searches simple. Use keywords, e.g. "leaking", "pump", "broken" or "fit".
Sorry, we couldn't find any existing reviews that matched. Try using some different or simpler keywords.
★★★★★
★★★★★
George G - September 24, 2023
Verified Purchase
Blender coupling
Was exact replacement, great price, much better then buying new blender
★★★★★
★★★★★
Maxine B - May 26, 2023
Verified Purchase
Recycle with PartSelect
My beloved blenders drive coupling wore down to the nub. Thanks to YouTube I learned it could be replaced and PartSelect had exactly what I needed. The website was easy to use and by plugging in the serial number I was able identify the correct part.
★★★★★
★★★★★
Norman P - February 6, 2023
Verified Purchase
Easy
No problems
★★★★★
★★★★★
Nicole S - November 23, 2022
Verified Purchase
Exactly the right part. Easy to install
Exactly the right part. Easy to install
★★★★★
★★★★★
Stephen S - June 9, 2022
Verified Purchase
Easy to install
The part ordered was correct + I enjoy being a long term customer of parts select !
★★★★★
★★★★★
Stephen R - May 26, 2022
Verified Purchase
A+++ transaction
Easy fix!!
★★★★★
★★★★★
Yvonne T - April 3, 2022
Verified Purchase
Yes
Yes, fast delivery.
★★★★★
★★★★★
James P - April 1, 2022
Verified Purchase
Works as expected
Other than A little bit of work prying the old one off works great
★★★★★
★★★★★
Karen D - February 11, 2022
Verified Purchase
Only needed a large flathead screwdriver
The coupling I needed to replace had melted! I am very pleased that a replacement part is available, is made in America, and is easy to change. My Kitchen Aid blender is back in action.
★★★★★
★★★★★
Charles Hammel J - January 26, 2022
Verified Purchase
Drive coupling a perfect match
I needed to replace the drive coupling for our blender and this was a perfect match. Installation was very easy and excellent instructions were provided. My part also arrived early.
< Prev
1
2
3
Next >
Customer Repair Stories
Average Repair Rating: 4.5 / 5.0, 276 reviews.
What's this?
Sort by:
< Prev
1
2
3
Next >
Search filter:
Clear Filter
Your search term must have 3 or more characters.
Keep searches simple. Use keywords, e.g. "leaking", "pump", "broken" or "fit".
Sorry, we couldn't find any existing installation instruction that matched.
drive coupler damage
used 2oz. gasket hammer tapped drive coupler clockwise and , R&R coupler.
I should have watched the video, and/or splurged and bought the little wrench to hold the motor shaft. To be clear, the video has you use a flat-head screw driver to PRY the old coupler off the threaded motor shaft - not to unscrew it. You might be able to unscrew it (particularly if you have the wrench), but my coupler would not unscrew
... Read moreeven after I used penetrating oil. Eventually, I used a pair of vice grips to pry it off - somewhat similar to the method employed in the video. I thought I would strip the threads on the shaft, but I did not. Then I simply screwed on (counter-clockwise) the new coupler and the blender is as good as ever.
Read less
James from GREENSBORO, NC
Difficulty Level:
Difficult
Total Repair Time:
30 - 60 mins
Tools:
Pliers, Screw drivers
2 of 2 peoplefound this instruction helpful.
Was this instruction helpful to you?
Thank you for voting!
drive coupling broke apart
followed on line instructions. Real easy to do. Now I have my blender back.
Alice from CANASTOTA, NY
Difficulty Level:
Really Easy
Total Repair Time:
30 - 60 mins
Tools:
Screw drivers
1 personfound this instruction helpful.
Was this instruction helpful to you?
Thank you for voting!
Some of the driver coupler teeth broke
Use the purpose made wrench to hold the drive shaft while unscrewing the broken coupler from the drive shaft. The shaft has a left hand thread, so turn the coupler clockwise to remove it from the drive shaft. Then screw the new coupler onto the drive shaft, turning it counter-clockwise. That's it!
Patrick from BLUFFTON, SC
Difficulty Level:
Really Easy
Total Repair Time:
Less than 15 mins
2 of 2 peoplefound this instruction helpful.
Was this instruction helpful to you?
Thank you for voting!
Plastic blender coupling ears broken off
Because the old coupling was so tightly screwed onto the shaft it was necessary to use very flat wire crimpers to slide between the old coupling and the blender housing to grip the shaft and immobilize it while pliers were used to grasp the old coupling and loosen it---rotate clockwise.
Philip from SEQUIM, WA
Difficulty Level:
Really Easy
Total Repair Time:
Less than 15 mins
Tools:
Pliers
1 personfound this instruction helpful.
Was this instruction helpful to you?
Thank you for voting!
Rubber drive coupling disintegrated
A 5/16" thin wrench fits the shaft beneath the coupling. The shaft has a flat side on it. The coupling comes of easily turning clock-wise for the reverse threads..
wewer from Carbondale, CO
Difficulty Level:
Really Easy
Total Repair Time:
Less than 15 mins
Tools:
Wrench set
1 personfound this instruction helpful.
Was this instruction helpful to you?
Thank you for voting!
The original drive coupling disintegrated
I repaired it as per instructions provided by using a flat head screwdriver to pry the original off.
Thomasine from WAYNE, NJ
Difficulty Level:
Easy
Total Repair Time:
Less than 15 mins
Tools:
Screw drivers
1 personfound this instruction helpful.
Was this instruction helpful to you?
Thank you for voting!
My blender I bought at an estate sale needed a new drive coupling.
I used a straight edge screwdriver. At first my husband and I were afraid to much too much force behind the old coupling, but I figured it's no good the way it was so used more force and "pop" it came off. Then installed the new one and I love my blender!!
Irene from LAGRANGE, IN
Difficulty Level:
Easy
Total Repair Time:
30 - 60 mins
Tools:
Screw drivers
1 personfound this instruction helpful.
Was this instruction helpful to you?
Thank you for voting!
Coupler between base and container was stripped
I tried turning defective coupler off after inserting a narrow screw driver into the motor fan bladed. That did not work. I then used a wide bladed flat-head screw driver to pry the defective coupler disc off the motor shaft. After prying each side over and over, the old coupler base broke free. I cleaned the remnants of the base from the
... Read more threaded shaft and then screwed the new coupler on only finger tight. It went on easily. For less than $15.00 (including shipping) we now have a working blender that hopefully will last another 10 years.
Read less
Larry from SAN FRANCISCO, CA
Difficulty Level:
Easy
Total Repair Time:
15 - 30 mins
Tools:
Screw drivers
1 personfound this instruction helpful.
Was this instruction helpful to you?
Thank you for voting!
Coupling worn out
Simply followed the online video instructions. Screwdriver to remove the worn out part. Rag to clean threads. Hand tighten replacement part (reverse threads). Blender fully functional. Couldn't have been easier.
Elliott from Surprise, AZ
Difficulty Level:
Very Easy
Total Repair Time:
Less than 15 mins
Tools:
Screw drivers
1 personfound this instruction helpful.
Was this instruction helpful to you?
Thank you for voting!
< Prev
1
2
3
Next >
Questions and Answers
Ask our experts a question about this part and we'll get back to you as soon as possible!
22 questions answered by our experts.
Sort by:
< Prev
1
2
3
Next >
Search filter:
Clear Filter
Your search term must have 3 or more characters.
Keep searches simple. Use keywords, e.g. "leaking", "pump", "broken" or "fit".
Sorry, we couldn't find any existing answers that matched.Try using some different or simpler keywords, or submit your new question by using the "Ask a Question" button above!
Yvonne
July 20, 2017
I bought a new drive rubber coupler but before installing it I noticed a really tacky substance left over from the old coupler stuck to my blender. Should I clean this off, and if so … how?! I tried using normal dish soap and no luck so far.
Hi Yvonne, I’m sorry to hear that. We recommend trying a mild-medium cleaner. Make sure to get the area nice and damp and then try scrapping it off. If this does not work you should try a sticky substance remover such as Goo Gone. I hope this helps!
28 people found this helpful.
Was this helpful?
Thank you for voting!
Adam
July 20, 2017
Looking down at my blender I see only a metal wheel, I know I have to remove it to replace my coupler but how do I get it off without making my blender worse. Does it just pop off?
Hello Adam, to remove your coupler, try to pull it up as you are turning the bottom to pop it off and remove the old part. Please let us know if you have any further questions.
11 people found this helpful.
Was this helpful?
Thank you for voting!
Nick
July 20, 2017
Replacing my black coupler and the video shoes that the part is a right turn part but mine turns both ways. Is my blender more broken than I thought or is mine just different than the example?
Hi Nick, do not worry the part is meant to turn both ways! Good luck with this repair!
9 people found this helpful.
Was this helpful?
Thank you for voting!
Joe
November 18, 2017
How do I replace the drive coupling on the blender
For model number ksb5bu4
Hi Joe, Thank you for the question. Here is a link to the video on installing the Coupling. Hope this helps!
https://www.youtube.com/watch?v=AwAkY4s70kE
6 people found this helpful.
Was this helpful?
Thank you for voting!
Shirley
February 5, 2018
While using blender on liquid setting a grounding occurred and chewed the coupling. I need a new one but the screw under the coupling isn't very tall to put coupling back on? Do i need another part?
For model number KSB5MC4
Hi Shirley,
Thank you for your question. If it is just your coupling that got damaged that should be the only part that you need to replace. To get the screw that your coupler goes on you would have to replace your entire motor. I hope that helps. Good luck with your repair.
6 people found this helpful.
Was this helpful?
Thank you for voting!
Louise
February 28, 2020
Please and kindly rsvp if your recommended replacement piece is comparable for my kitchen aid model before i place the order on line. Thank you so much!
For model number KSB5NK4
Hello, Thank you for your question. Drive Coupling - Manufacturer Part Number WP9704230 This part is in stock. You are welcome to order it from our site if you would like. We hope this helps.
3 people found this helpful.
Was this helpful?
Thank you for voting!
Claude
August 12, 2019
I have an old blender that needs a drive coupling. My model no is ksb3wh3. You do not show that model. The nearest thing is ksb5wh3. Will this coupling work on my ksb3wh3
For model number ksb5wh3
Hello Claude, thank you for inquiring. I was able to locate the information needed for your model and this Drive Coupling part number PS11746921 is the correct replacement for it. Good luck with your repair!
3 people found this helpful.
Was this helpful?
Thank you for voting!
Sarah
August 29, 2019
Is this the correct drive part for my KitchenAid blender?
For model number 4KSB5WH3
Hi Sarah,
Thank you for your question. Yes, this would be the correct drive coupler for your blender. I hope this helps. Thank you and have a great day!
3 people found this helpful.
Was this helpful?
Thank you for voting!
Albert
December 29, 2017
How do i get the old meatal coupling off ? Is it threaded clockwise or counter clockwise to unscrew ?
For model number KSB5ER4
Hi Albert,
Thank you for your question. There is a video listed with the part on our website that you may reference on how to install the coupler. I hope this helps. Thank you and have a great day!
3 people found this helpful.
Was this helpful?
Thank you for voting!
Kay
September 18, 2019
I need a new drive coupling for my KitchenAid blender. The full model number is ksb5wh. It has no number following. I don’t find this number listed on your site. Is it replaceable? Thanks
For model number KSB5WH
Hello Kay, thank you for writing. It is not shown as compatible to your model. Unfortunately the replacement for your model is discontinued. We have no replacement information for it. You will need to reach out to KitchenAid directly for a substitution part number. Please feel free to get back in touch with us if they provide you with one. Thank you!
2 people found this helpful.
Was this helpful?
Thank you for voting!
< Prev
1
2
3
Next >
✖
Ask a Question
Ask our experts a question on this part and we'll respond as soon as we can.